Tag Archive for: production

On Going DAWless

Dawlessness (a word I have just coined) seems to be something that people are quite passionate about at the moment, both for and against. There are popular synth YouTube channels devoted to it (see Dawless Jammin’ with Jade Wii) and some people wear their DAWlessness as a badge of pride (see Look Mum No Computer). In case anyone is not familiar with the whole DAWless thing, it’s just what it sounds like—making electronic music without the use of a DAW (Digital Audio Workstation). This usually means a number of sequencers playing synths and drum machines, all synced over MIDI, perhaps supplemented with some live keys and/or vocals. The real puritans then record the whole thing to cassette. Don’t ask how they upload it to YouTube…

Advocates of this way of working offer a number of reasons for rejecting what is the most powerful music tool available today. They say the computer is a distraction – that you shouldn’t make music on a machine that also gives you access to Facebook, Instagram, streaming news, cat videos, etc. They talk about the sense of immediacy and feeling like you are playing an instrument rather than doing your tax returns. Some people cite the benefits of imposed creative limitations.

On the other side there has been a certain amount of mockery and meme-ing that asserts that DAWless jams are tuneless, formless, one-groove affairs with no journey. Why on earth would anyone willingly give up the boundless possibilities that a modern, fully-fledged DAW offers, they ask? Investing a lot of money to set creative limitations seems a little perverse, does it not?

I’m not here to argue one way or the other. Both approaches are perfectly valid. The explosion of external, mostly analog hardware over the last 10-15 years has made a DAWless approach accessible—and not just for the preserve of synth collectors with vast studios of vintage gear. Thanks to Roland, Korg, Akai, Arturia and others, you can now buy a mixer, drum machine, synth, and standalone external sequencer—a complete DAWless jamming setup in other words—for well under $1,000. Meanwhile, computing power has continued to grow and DAWs have become even more sophisticated, with ever-more powerful and creative VST instruments available. In reality, the vast majority of electronic music producers use some hardware alongside a DAW, and there is absolutely no need to choose.

Still, I think it is interesting how in some ways we have come full circle with electronic music production. After all, most of the greatest early electronic dance music tunes were made in a similar “dawless” way. Before PCs had the muscle to host virtual instruments and record multiple audio streams, their role—if they were used at all—was as a sequencer. A series of machines, synced over MIDI or DIN-sync, effects on the mixer send/return, a multi-track tape recorder or ADAT. Whole tracks would be built up by playing the mixer faders and mutes. Of course, the DAW itself is merely a digital simulacrum of this whole setup—instruments, a powerful sequencer, a mixer and a multitrack recorder, all in a single software package.

And if you think about what a DAW really is—a Digital Audio Workstation—you can see that in fact, many so-called DAWless jams are not really DAWless at all. Because what is an MPC Live, or a Elektron Octatrak, or a Synthstrom Deluge if not a Digital Audio Workstation? These modern devices are MIDI sequencers, samplers, synths, mixers and, in the case of the Deluge, even recording devices. With such a richness of features it is not surprising that people are finding that they can make full tracks without using a computer. In a future post I will look at these devices and compare their potential for making full songs without using a DAW.

Finally, I would argue that one of the key drivers of the popularity of going DAWless is the perceived need to deliver visually engaging live performances. The often voiced suspicion that the laptop artist is probably just on Facebook seems to have been taken to heart by a whole generation of electronic musicians. As a result some people seem to feel a table full of devices is required for a fully authentic “live” experience.

The history of music is full of arguments over authenticity and musical integrity. There was a time when people expected a recorded song to be a faithful rendition of a band playing live. Nobody expects that now…we have become totally accustomed to the notion of the creative, artist producer—from Brian Eno onwards. In a way the DAWless movement is taking electronic music out of the producer world—where things are iterated, planned, adjusted, and finally released—into the musician world, where you just play. From asynchronous to synchronous music making. There is nothing wrong with this at all; most people are attracted to one approach than the other.

Do you always use keyboards and hate programming sequencers, or vice versa?

Do you think of yourself as a musician or a producer?

Is a DAWless setup appealing to you or would you rather watch a succulent grow?

SEE ALSO : “How do I get started with modular?”

Taking breaks from music-making

It’s strange how some topics seem to pop up in the music world again and again, both online and in person—taking breaks from music being one of them. During the summer in Canada most people—including musicians—don’t want stay indoors as much. Many musicians seem to get FOMO this time of year because they’re not making music. Other people I know are hit by writer’s block (including myself), and some people have asked me if I think music-making should be a daily routine or not. While I love this topic, there are multiple ways to approach music production routines and taking breaks from music; I’m sharing some of my own views here, which are based on my experience.

Taking breaks as you work

This usually surprises a lot of people, but when I work on production or mixing, I take a lot of breaks. I often notice that even after just 10 minutes of working hard, you can lose track of the tone of your song. You get used to what “works”, but the low end or the highs might be too much and you can’t tell because you’ve lost perspective. Even volume can be difficult to assess when your ears are fatigued; you might be playing too loud and not realize it.

Taking a 10-second or so break every 10-15 minutes can prevent fatigue and will help restore your understanding of your song.

If you’re in a creative mood and want to do more, I would strongly recommend taking a break after 1-hour to test the true potential of your music. If you’re familiar with this blog, you probably aren’t surprised to read that I recommend to actually stop working on a particular song after an hour and work on another one instead, or even do something completely different.

Taking breaks and making new songs

Sometimes you’ve made a bunch of songs and you feel like you’re repeating yourself, or worse, everything feels annoying (red flag: writer’s block ahead). Some people feel they need to take a break and not open their DAW at all for a while. Is that a good idea?

Yes and no.

My studio is in a building in Montreal that also houses other studios as well, with all kind of musicians. The ones that impress me the most are the jazz and classical musicians. They have a very, very intense schedule for practicing. In talking with them, they say that skipping just one day of practice has an impact on how they master their instrument(s). I can relate; when I take time off over a 3-day weekend, on the Monday I am a bit slower to figure out which tool works best for a specific situation. If I work on music, it takes me a bit more time to problem solve. In a way, I have to agree with the jazz and classical musicians here even though our music worlds are quite different.

The difference between me—as an audio engineer and electronic musician—and classical and jazz musicians, is that I’m constantly working in a space in which I need to invent new ideas, as opposed to practicing something over and over to master it. For my live sets and productions, I do rehearse and play my music—my workflow isn’t just mastering mouse-clicking around a screen. I humanly intervene by using MIDI controllers, mixing by hand, and when working on sound design I’ll also play with knobs too to create new ideas. I see creativity as a muscle that needs to stay fit to be powerful, but if you’re going to gym regularly, you know muscles also need rest in order to grow.

My conclusion on taking breaks from music is this: I think it’s important to work on audio-related tasks daily in order to stay focused, but when it comes to creating new ideas, creativity is not something that can be forced—it needs to come by itself, naturally. Whenever I push myself too hard to force an idea to come to life, it sounds wrong. The best ideas are spontaneous, often invented quickly, and done without much shaping.

So what does this mean for the musician?

Consider taking long breaks if you have really negative feelings towards what you do, or if you don’t feel good about making music. When taking time off from pursuing your own music creatively, what are some of the other alternatives and things you can do when you need downtime from working on your own songs?

Sound design. Try to see if you can spend time creating one sound you like from scratch, i.e. a pad.

Learn production techniques. You can register with online classes to learn something new; ADSR is full of examples with low prices.

Explore presets. Each effect or instrument you have has presets. You now have time to explore everything. The strength of knowing how many presets sound helps to be able to quickly access a specific aesthetic when needed.

Create templates. Have you considered creating a template for Ableton? I have multiple templates for sound design, mixing, jamming as well as song structure templates to play with.

Build macros. Use multiple effects and assign them to some knobs to see how you can alter sounds quickly.

Sample hunting. So many sites exists for finding samples, but finding time to shop is rare. You can do that now.

Build new references. If you don’t have a folder with reference tracks in it, it’s time to start, and if you do, add new ones. A good way is to make reference playlists on Soundcloud or YouTube.

Try demos and sample them. I love getting a bunch of VST/AU demos to try out and then sampling them. Eventually I get to know which new virtual synth or effect I really like.

Re-open projects that have been pending or recycle them. You might have unfinished songs and sometimes they are a good place to scavenge for samples or ideas to use in other songs.

Revisit past projects you’ve worked on and liked to remind yourself of methods you used that worked. Whenever I feel I need a break but still want to spend some time on music, I go through past projects to see how I worked and what could have been done better—I always learn something from revisiting old work.

All that said, most importantly, when you take a break from music, do not sell any gear or buy anything new. Just wait. If you like music and making it, chances are high that you’ll be doing it for years to come. Sometimes we need a break, but breaks don’t mean you have to give up completely. The feeling of needing a break is temporary—even if it’s a long break—but your love of music is permanently with you.

SEE ALSO : Are Music Schools Worth The Investment?

Why should you make music?

Why make music?

This simple question might seem like it has an easy answer, but when I was asked recently why I make music, I realized that the more I started thinking about it, the more complex the answer became. Today it can feel like everything in the modern world works against musicians, but the more I think about it, the more I think that this isn’t exactly true. Let me explain:

You might not be aware of this, but between the 1930s and 1970s in the US Baseball was a very important part of national culture and identity. During this time, the inclusion of immigrants in the sport was quite important—Jackie Robinson was the first African-American to play American baseball professionally, which helped to promote the inclusion of the African-American community in professional sports in the US at that time. Baseball wasn’t the only thing promoting the inclusion of immigrants and minorities in the national culture, but it definitely played a role (I recommend Ken Burns’ baseball series if you’re interested in this topic).

We can see the same sort of trend in the history of music. The countless occurrences of music becoming a part of politics are too numerous to describe in detail here, but electronic music specifically had its popularity grow due in part to its early adoption by gay communities—same with disco. Even nowadays, Montreal’s MUTEK festival is playing a similar role—forcing gender equity in the artist lineup and giving artists a platform to express themselves safely, no matter what their gender or orientation. Music is a platform for self-expression and provides artists with a chance to share their own personal views. MUTEK’s early vision was to create a space for artists to share the fruit of technological research in music and present it as an art form beyond trends, movements, etc., but over time it became clear that personal touches were also quite essential to the festival.

So, when I was asked “why do you make music?”, some of the points I have just explained came to mind, but I also paused and thought about my own inner motivation(s) and how they have evolved over the years.

I think that for me, every 5 years the purpose of making music has changed directions; my motivations were originally very goal-driven. This is something I see a lot with people I work with—their inner motive for making music is directly linked to where they want to go next. For young artists examining the careers of older ones, the point of making music and how it changes over time is a worthy discussion to have.

Based on my understanding and experience, there are common goals that unite many artists and might help to answer the question “why should you make music?” (the answers to this question I’ve compiled below are not in any specific order).

To learn a skill or to have a hobby

My earliest interest in music was in the early 80s, but back then it was nearly impossible to make electronic music. Music lessons felt boring and pointless, but DJing music for break-dancing was pretty dope. However, learning to be a DJ while living outside of Montreal at that time was pretty much impossible. Presently, I often have people ask me if I could teach them to DJ because they’d love to do it for fun for friends, but I refer them to YouTube as it is quicker and cheaper. Many people with this motivation are simply into the idea of assembling music and playing it. DJing music is quite fun and a great hobby that you can do with friends. After you start doing it for a while, the point of DJing might shift from just doing it to entertain some friends towards connecting with other DJs, or sharing demos on Soundcloud and aspiring to play in front of a crowd. The “why DJ?” becomes purely related to the attraction of doing it. It’s rare to see people really asking themselves “why”, but I remember when I was starting to DJ that I had close friends and family asking why they should take my hobby seriously. I was really into theatre back then, and to people close to me the idea of being a DJ seemed silly.

Regardless of your original motivations to start messing around with music-making, making music as a hobby is really fun—it’s a wonderful creative outlet and can even be useful with friends when you have evenings together and everyone wants to be entertained.

To establish yourself as a part of a community

A sense of community comes for most after they’ve started DJing, but many people also start here. What’s interesting about music is it can be a side-project throughout your entire life. Going from one community to another is also not uncommon. I was really into raves in the early 90s and wanted to contribute to that scene by playing music I thought was suitable for that community, but over time my music tastes changed. My circle of friends changed a few times as my passion for what I loved (music) created some distance around people, but music has always been there in the background.

Having music as the centre of your life gives life purpose in-itself, as well as creates a lifestyle around it—there’s no good or bad way to approach this. I know some jazz and classical musicians that have so much devotion to their craft that it would make anyone I know from the electronic scene blush. Is making music the centre of your life to that degree better? These devoted musicians aren’t necessarily happier in the end, but what music gives them personally is the most important reason why they make and/or perform it and a very valuable and satisfying part of their lives.

The tricky part of motivation is that sometimes you might never really feel like you’ve reached your end goal. Being part of a community, for example, is hard to quantify and depends on the feedback you’re getting. This type of internal/external motivation loop is where a lot of people struggle and get lost. It’s common to see people who are under the impression that it would be better to abandon everything and sell all their music related toys than to keep trying to reach their goal. Is there a way to avoid this thought? Why do people slip into negativity all of a sudden and react drastically?

Say you’ve tried to sustain a music “career” or project for years and it never really went as far as you wanted it to—it’s easy to pin the problem on a lack of recognition from others. Same goes for an artist who has been around a long time and has “done everything” and then gets lost when thinking about what to do next. Sometimes your music community might change directions drastically if they reach that point—a lot of my peers switched to making house music at one point—which can also make you feel lost yourself. When you feel lost or tired of trying with music, it really has nothing to do with other people, but more with your personal approach to music. This might sound cliché, but it’s true.

Personally, I have been experimenting with my approach to music quite a lot; I find a lot of relief by focusing on people who care and appreciate what I do. Building your own community or small circle of music friends has been for me the only thing that can get me back on track when I feel lost. I lost my patience after chasing others for years and decided to shift my energy towards those who cared instead—and I didn’t have to search very far.

To make a career out of music

Once people feel included in a music community, the next logical goal is to try to “make it” on a professional level. This can mean many things:

A career for self-expression and self-realization

One of the most important needs of humans is to feel they’re able grow and to have others (and themselves) witness it. If you’re pushing yourself making music, you’ll see and hear the growth of your music yourself, and with time and patience the quality will get better which provides great feelings of satisfaction, especially when it’s turned into a career.

A community-driven career

As I’ve covered in multiple past posts, one can be attracted by a community of artists or genres and want to join their movement. The beauty of this approach is connecting socially over electronic music, which can create opportunities for many conversations and projects, technical, philosophical, or otherwise.

You can also do music for multiple reasons and those reasons can morph through time, through life changing events or simply because your interests are shifting. I come to question myself every now and then. Asking yourself this question also helps you understand where to go next. One of the reason why the base of this question is more relevant than what we think of.

SEE ALSO : Workflow Suggestions for Music Collaborations

Honing your production skills before releasing music

For music producers, specifically those interested in releasing music, gratification is one of the most complex topics to address. From the moment you complete your first track, it becomes all about showing it to people to see how they react and to get feedback. As you progress with producing, more of your tracks will start to feel like they are release- worthy. But the real question we have to ask is not if they are release-worthy, but are they timeless?

When you start making music and don’t have the concepts or skills honed enough to do it in a streamlined manner, it’s inevitable that you’ll find yourself “hating” the tracks you make; spending so much time on them means you will dislike them by the time they are “done”. I’m of the opinion that most tracks are never 100% complete—every time you work on a project you’ll notice more details that you feel you can fix and this can turn into a never-ending spiral.

For me personally, my road has been an interesting one—the first tracks I ever made were sent to labels and eventually released, but every time I visit Beatport (or other platforms) are and listen to those tracks, I ask myself if they are what I want people to think about when they hear my artistic name. Each release comes with a technical improvement, and the process is noticeable, but…what if those tracks were never released? 

On the upside, I guarantee 100% that if it were not for those tracks and releases, I wouldn’t have been able to connect with so many people around the genre and network into making contacts—this proved very useful and worthy in the long-run. On the downside, every musician wishes to have his/her very best out there, as it’s our business card, it’s what people will remember the most when they talk about you.

I read the other day about an artist who practiced and honed his skills for seven years straight without even considering releasing a track before that, as he felt his music was not up to the standards that he wanted to put out in the world. So, what then, is the correct road? If I could do it all over again, I would most definitely not have released the first and most technically lacking tracks I ever made. It’s all very personal, but if you can, I would follow that artist’s advice—it removes the stress of wanting to sound in a specific manner for a specific label, and you’ll find your own sound in a more creative way. Make music for the sake of it, not because you have a deadline. Deadlines will come in the future, I can guarantee it.

My honest conclusion is that with production—same as any skill—you have to put in the hours of work and have the patience to accept that it will be slow. As one of my teachers once told me, there is no shortcut to training your ears. Having some perspective now and a short career of 5 years in music production, I believe our best tools are groups like the coaching corner we all know and love; in groups like these you can show your music to the world, get focused feedback, and continue to improve and grow as an artist around like-minded people without it being too permanent.

The key is knowing and accepting that you will always be able to do better. There’s no rush and you will eventually be thankful for having waited to have your very best out there. On the other hand if you don’t want to wait, make sure you have some feedback from artists you know have a deep technical background as they will give you the best tips to improve your tracks.

SEE ALSO : Taking breaks from music-making

Creating tension in music

Electronic music—oriented for dance-floors—mainly relies on the use of tension to create excitement. I was recently asked how I personally approach tension-building in my work. In this post I’d like to share my point of view on the subject, but before writing this I also spent some time reading articles about tension in music to see how it’s approached by others. To my surprise, I didn’t find anything I could really relate to. Many approaches to creating tension use common, established techniques, and it seems like most of the advice about this topic was for rock-type music. While the techniques I read about are interesting, I firmly believe that you need to understand the reasons behind creating tension in music first, and once you understand them, you might find that things I discuss in this post are still relevant 10 years from now. Personally, I’ve been approaching tension-building in my music the same way for the last 20 years, from a philosophical point of view.

There’s a moment that stands out to me most with regards to my first true understanding of tension in electronic music. I spent the first few years of my DJ career as the opening act. I’d be the minimal dude that plays mellow, heady, trippy stuff, which—at the time in Montreal’s scene—meant opening slots. No complaints here though; this part of my career is when I learned the most about playing live. Opening a show is one of the most misunderstood roles in live music; it’s far more important than most people think.

When people start arriving at a show, the club is empty and there’s already a bit of awkwardness and natural tension mixed in with the audience’s excitement and anticipation. People arrive with expectations, and the opening artist is usually there to set the mood and to build a foundation for what the night will become (which includes not playing too uptempo if the floor is empty). Creating sonic comfort as the opening act is essential.

It’s difficult to create tension if you haven’t yet created a trusting relationship with the people at the event while performing. You’ve probably read many times that the best DJs are the ones that know how to read a crowd—and there’s a reason for this; you have to be aware of the audience’s needs and how to fulfill them, but also of how to create anticipation before addressing those needs: this is tension-building.

Now, it’s important to understand that there are three main tension-building scenarios in music:

  1. Circumstantial. In a given context, some natural tension/excitement might already exist, such as playing your last song before the headliner plays. Those 5 minutes will be naturally more tense as people’s eyes and ears are getting ready for the main act, and the music is supporting this anticipation.
  2. DJ-related. When a DJ knows how to play a track at the right moment and combine it with something else to create an experience, then the music becomes part of a puzzle.
  3. Music-made. This type of tension is created within a song itself, sonically via producing.

When you understand that your music might be heard in these three different contexts, it can give you a better idea of what sort of tension might be best for you personally to create. For instance, perhaps you only want to create music that will rely on the skilled hands of a DJ to really be effective—this doesn’t mean your song is made to be less interesting; skilled DJs search for these kinds of tracks as “tools” for their sets! When someone thinks a song is boring or too “simple”, I’d reply that usually it’s because it’s being listened to out of context, and someone like Villalobos or Hawtin could easily turn a simple track into a bomb by dropping it at the right time. I made an album on my label Climat that was quite experimental, and it was reported that Ricardo played some of the weirdest cuts in the middle of his sets and people would cheer…I doubt many acts can do that with a purely experimental track. That said, music that’s made for DJs to use as a tool has to be very clean from a technical point of view, which means that you need to have your sections very spaced out and have elements that come in repetitively at regular intervals. For example, your 4-bar sections could always end with a snare roll to indicate you’re finishing a section. This organization in your arrangement becomes a track that can be easily layered without confusion, for both the crowd and the artist.

If you think that most of your tracks are for DJs and are meant to be played in clubs, it’s important to test your tracks yourself in a DJ set to see how they go. You’ll want to determine if the tracks are easy to layer or not and to see what you can do with them.

When it comes to creating elements in a track through producing that can create tension, it’s essential to understand that tension rises as an expectation of something to happen (or not). If you write a song so that there’s a specific sound at a specific point every bar, if you have have a bar or two where you leave it out, this can create anticipation and tension. So from a technical point of view, there are some specific tension-producing techniques that can work well when implemented properly:

  • Breakdowns. I’d say that techno between end the of 90s until about 2009 usually had at least one breakdown with “stuff” happening. Breakdowns can include things like cutting the kick out or removing lower frequencies—applied for about 4 bars or so—then a drop would follow. A few years after, people started to get really fed up with this approach, and many producers realized that it was actually more effective not to include a breakdown, and to let the DJs create their own breakdowns by cutting the lows at a moment better suited to their own personal set(s). That said, cutting the lows often still works well.
  • Volume changes. When you introduce a new element into a song, you can either fade it in or simply drop in the sound at 100% volume. A fade will create tension as it the sound becomes louder and louder, while a drop-in is useful to create surprises, which is also a good way to resolve tension. One of the most misused techniques when it comes to volume changes is to have a variation in the volume of an entire section, then having the following section louder. When this is done properly, the contrast is a good way to create an explosion.
  • Decay. Sounds that have their decay increase over time seem bigger and more powerful, especially if you approach changes progressively. Reverb use is also a way of adding decay, and if you add a very large one to short sounds, they’ll become longer, creating tension.
  • From maximal to minimal. Having a lot of sounds happening at the same time and then trimming them down to the essentials will create an “emptiness” that people become familiar; they will anticipate resolution to a “fuller” mix. The density change is something that can be physically felt in a club setting. This is why everyone was using the white noise technique to create excitement for a while; it was a good way to resolve a moment of emptiness.
  • Pitch. Playing with the pitch of a melody or sound is a good head trip, and if you play with it subtly, it can really create uneasiness and tension. Some genres use pitch manipulation in an extreme way by slowly modulating pitch to its highest point, but to me, this technique becomes irritating and predictable after a while.
  • Pattern changes. If you’ve established your groove with a certain pattern and then introduce a hole or change, it will create tension.

Now, is there a particular duration for a tension-building section that might make it work better?

Yes and no. I’m lucky and have had the chance to hear and see many of my songs in a club setting. I’ve had many attempts at tension-building fail, and some succeed. Shorter tension-builders work better than longer ones. Also, keep in mind that some songs will play better if you don’t try to add tension to them at all. I think that 2-bar moments are great for tension-building because it also gives the DJs some time to play within them. If you make your tension-builder too long, you’re making the DJ work hard and potentially fail. Think about tension-building like a sauce—if it’s all premade, you have less room to add your own stuff. Don’t overdo it in your own productions; developing a sense of trust with the DJs who will be playing your work is essential. When people listen to minimal music and say it’s boring, it’s something I take with a grain of salt—perhaps at home in your living room it might be, but in the right context (such as a club), it might be more than enough.

SEE ALSO : Building a great groove

Workflow Suggestions for Music Collaborations

One of the most underestimated approaches to electronic music is collaboration. It seems to me that because of electronic music’s DIY approach people believe they need to do absolutely everything themselves. However, almost every time I’ve collaborated with others I hear them say “wow, I can’t believe I haven’t done that before!” Many of us want to collaborate, but actually organizing a in-person session can be a challenge. In thinking about collaboration and after some powerful collaboration sessions of my own, I noted what aspects of our workflow helped to create a better outcome. I find that there are some do’s and don’ts in collaborating, so I’ve decided to share them with you in this post.

Have a plan

I know this sounds obvious, but the majority of people who collaborate don’t really have a plan and will just sit and make music. While this works to some degree, you’re really missing out on upping the level of fun that comes out of planning ahead. I’m not talking about big, rigid plans, but more so just to have an idea of what you want to accomplish in a session. Deciding you’ll jam can be plan in-itself, deciding to work on an existing track could be another, or working on an idea you’ve already discussed could be a more precise plan.

Personally, I like to have roles decided for each person before the session. For example, I might work on sound design while my partner might be thinking about arrangements. When I work with a musician, I usually already have in mind that this person does something I don’t do, or does it better that I can. The most logical way to work is to have each participant take a role in which they do what they do best.

If you expect yourself to get the most of sound design, mixing, beat sequencing, editing, etc., all at once, you’re probably going to end up a “Jack of all trades, master of nothing”. Working with someone else is a way to learn new things and to improve.

A good collaborative session creates a total sense of flow; things unfold naturally and almost effortlessly. With that in mind, having a plan gives the brain a framework that determines the task(s) you need to complete. One of the rules of working in a state of flow is to do something you know you do well, but to create a tiny bit of challenge within it.

Say “yes” to any suggestions

This is a rule that I really insist on, though it might sound odd at first. Even though sometimes an idea seems silly, you should say yes to it because you’ll never know where it will lead you unless you try it. I’ve been in a session where I’ve constantly had the impression that I was doing something wrong because we weren’t following the “direction” of the track I had in my head. But what if veering off my mental path leads us to something new and refreshing? What if my partner – based on a suggestion that made have seemed wrong at first – accidentally discovered a sound we had no idea would fit in there?

This is why I find that the “yes” approach is an absolute win.

Saying yes to everything often just flows more naturally than saying no. However, if the “yes” approach doesn’t work easily, don’t force it; it’s much better to put an idea aside and return to it another day if it’s not working.

Trust your intuition; listen to your inner dialogue

When you work with someone else, you have another person who’s also hearing what you’re hearing, and will interact with the same sounds and try new things. This new perspective disconnects you from your work slightly and gives you a bit of distance. If you pay attention, you’ll notice that your inner dialogue may go something like “oh I want a horn over that! Oh, lets bring in claps!” That inner voice is your intuition, your culture, and your mood, throwing out ideas; sharing these ideas with one another can help create new experiments and layers in your work.

Combining this collaborative intuition with a “yes” attitude will greatly speed up the process of completing a track. Two people coming up with ideas for the same project often work faster and better than one.

Take a lot of breaks

It’s easy to get excited when you’re working on music with another person, and when you do, some ideas might feel like they’re the “best new thing”, but these same ideas could actually be pretty bad. You need time away from them to give yourself perspective; take breaks. I recommend pausing every 10 minutes. Even pausing for a minute or two to talk or to stand up and stretch will make a difference in your perceptions of your new ideas.

Centralize your resources

In collaborating, when you reach the point of putting together your arrangements, I would say that it’s important to have only one computer as the main control station for your work. Ideally you’d want an external hard-drive that you can share between computers easily; this way you can use everyone’s plugins to work on your sounds. One of the most useful things about teaming up with someone else is that you get access to their resources, skills, materials, and experience. Make sure to get the most out of collaborating by knowing what resources you can all drawn upon, and then select a few things you want to focus your attention on. It’s easy to get distracted or to think you need something more, but I can tell you that you can do a lot with whatever tools you have at that moment. Working with someone else can also open your eyes to tools you perhaps didn’t fully understand, were not using properly, or not using to their full potential.

Online collaboration is different

Working with someone through the internet is a completely different business that working together in-person. It means that you won’t work at the same time and some people also work more slowly or more quickly than yourself. I’ve tried collaborating with many people online and it doesn’t always work. It takes more than just the will of both participants to make it work, it demands some cohesion and flexibility. All my previous points about collaborating in-person also apply to collaborating online. Assigning roles and having a plan really helps. I also find that sharing projects that aren’t working for me with another person will sometimes give them a new life.

If you’re a follower of this blog, you’ll often read that one of the most important things about production that I stress is to let go of your tracks; this is something very essential in collaborating. I usually try to shut-off the inner voice that tells me that my song is the “next hit” because thinking this way usually never works. No one controls “hits”, and being aware of that is a good start. That said, when you work with someone online, since this person is not in the room with you and he/she might work on the track while you’re busy with something else, I find works best to be relaxed about the outcome. This means that if I have a bad first impression with what I’m hearing from the person I’m working with, I usually wait a good 24h before providing any feedback.

What if you really don’t like what your partner is making?

Not liking your partner’s work is probably the biggest risk in collaborating. If things are turning out this way in your collaboration, perhaps you didn’t use a reference track inside the project, or didn’t set up a proper mood board. A good way to avoid problems in collaboration is to make sure that you and your partner are on the same page mentally and musically before doing anything. If you both use the same reference track, for example, it will greatly help to avoid disasters. If you don’t like a reference track someone has suggested, I recommend proposing one you love until everyone agrees. If you and your partner(s) never agree, don’t push it; maybe work with someone else.

The key to successful collaborations is to keep it simple, work with good vibes only, and to have fun.

SEE ALSO : Synth Basics

Choosing a genre for your music

Every now and then I encounter people I work with who have trouble choosing a genre to produce in because they like a wide variety of different genres and have too many ideas. I’ve also experienced this myself in my early years of DJing, and it was a bit of an issue for my sets. Given my early experiences, I’m well situated to understand how it can feel to have too many ideas and to have trouble settling on a specific genre or style. I’d like to discuss how you can deal with this problem in your own music-making.

As a DJ in the late ’80s and early ’90s, I was very much interested in emotional music and techno. There was some commercial dance music that I would dig and mix with techno in my sets, but the reactions I’d get when I’d do this were often not very good. There are legendary DJs like Laurent Garnier who are masters of surfing different genres in a single set, going from one to another seamlessly and having people love it, but this is an art in itself. To understand how to do this, you have to understand how the music you’re playing is made and how it works, in terms of rhythms and harmonies. But once you do, anything is possible. Now, software like Traktor or Mixed In Key can help with this type of mixing; the flexibility we have now with modern technology provides us with many options to constantly reinvent ourselves.

But what about music-making and producing as opposed to DJing? How can you choose a genre to make if you are interested in many?

I like to have a very open mind about producing in terms of taking influences from multiple genres and styles; I’d say that it can actually be something positive once you understand how your brain works. Many people feel that cross-breeding genres will end up a mess, but just like DJing, it can work. Let me discuss how:

One genre, one alias

A very simple way to approach producing in multiple genres is to use the Uwe Schmidt (Atom) approach where you make and explore making music in one genre, under one alias. Schmidt has a ridiculous amount of aliases he’s been using to make all the music he’s inspired to. He doesn’t hold back, he just makes music and will do whatever he feels like doing in-studio. He might make techno some days, but also has a funny salsa-flavoured house project under the alias Senor Coconut. I’ve always felt that making music should be comparable to an ultimate feeling of freedom. If you don’t feel free, your brain is stuck on something. I think that easiest way to approach solve feeling stuck is to make music using my parallel production technique. When you save your projects, make sure to have folders or categories so you know what project sounds like what.

The advantages of working in parallel this way include:

  • You’ll never run into limitations or lack inspiration.
  • Learning techniques from multiple genres can be a very enriching experience.
  • You get to play with different sounds and tools in each session which will never be boring.
  • Exploring different genres can ultimately lead you to new breeds of styles, spawned from mixing two worlds together which creates your own original identity.
  • Perhaps you’re not aware that you are very good at making a specific genre until you’ve explored it.

However, there are also disadvantages to working on multiple styles in parallel such as:

  • It might take longer to get recognition in one genre if you’re all over the place. “Jack of all trades, master of nothing” holds true.
  • You might never get really solid at working in any genre. Each genre has different approaches and techniques which can take time to master.
  • Getting gigs might become confusing for promoters.
  • Managing multiple accounts/identites on Soundcloud or elsewhere can be a bit of an issue.

So, where should you start with deciding on your genre(s)?

I’ll speak for myself and say that for me, things started to make sense once I saw Plastikman do a live set in 1998 (I’ve said this in countless posts, sorry). I realized that what happened that day was a barrage of multiple personal insights:

  • His set was so inspiring, sounded so new, innovative, and different than everything else, that I fell in love with the sound. It was some sort of deep minimal, with a dub approach. My mind had a reaction of “OMG when this set is over, where am I going to hear this again?!” Back then, when a show was done, it was over. Insight 1: After this show, my brain felt I needed to make music to feed itself.
  • One of the other things that inspired me was how he was using panning and the stereo image to have sounds move in the space in real time. It was truly an exciting experience to hear movement. I felt that I had not heard this enough before and not in a live context. Insight 2: My inspiration came from seeing and hearing this creativity and exploration of new sounds.
  • A last point that’s important here was that this event was well attended and people really understood what was going on and dancing and enjoying the set. I was in awe to see that. Some events I play, people are on the dance floor talking the entire time which drives me bonkers. Insight 3: I wanted to be part of this community of people who liked exploratory music.

When you decide on a genre, there are different things to keep in mind: what are you making? Who are you making it for? Why are you making it? If you’re making music in multiple different genres, your purpose might not be clear, but once it is, it will make more sense for you to trim your genres of interest down to only a few (ideally, just two). I like to encourage people to be interested in two styles because you might get bored of one, or it will become difficult to introduce new elements to your routine.

There’s another important thing to keep in mind when choosing a genre to work in: before you get really good at it, that genre might go “out of style.”

Is working in an outdated style a bad thing, though? Well, when you love something deeply, you usually don’t care if it’s less popular because that genre is you in the end. However, if your goals are releases, bookings, etc., it might get tricky. When minimal techno’s popularity started waning around 2009, many DJs and producers all jumped on the house bandwagon – sometimes not even liking it – they felt they needed to make house if they still wanted to get booked.

To summarize, I think that if you’re not yet set on one or two genres, there’s a part of you that’s still searching for your style. It might take time to figure it out, but I believe that going out and really enjoying music, then listening to it at home, will help you narrow down your search.

SEE ALSO : Experimentation in music: how far can you go?

Common mindsets of musicians who have writer’s block and how to solve them

We’ve recently restarted group coaching after a few month hiatus. The initial idea for group coaching is to explore the participant’s current intentions and obstacles in their work, including overcoming writer’s block in music-making. Passionate producers spend a lot of time music-making; it’s a central part of their lifestyle, which means that when things don’t go so well, it can be a very frustrating experience.

While many join the group coaching sessions to get technical tips, often we spend time discussing how we approach music-making and try to understand the mindset(s) that we have towards the craft. I can give you all the technical tips in the world, but if you approach music-making with a foggy mind, you might not be able to apply any of them. This is why music producers often have patterns of creativity that include peak highs and extreme lows. But what causes this pattern exactly? There are a few common cases of lows I’d like to share with you from what I hear and see most often in working with clients.

“I can’t finish projects.”

This is a pretty familiar theme I see on a daily basis. Sometimes people have no issue sitting in studio and are excited to start a new idea. They’ll build it up for a while, but after a few sessions the magic is gone and it feels more appealing to them to start all over with new, fresh ideas. If you recognize yourself here, realize that your brain is in search of a dose of dopamine and starting a new track is instant gratification. I can tell you that finishing a track will provide an even bigger dose of dopamine, but the anticipation of finishing something can kill your momentum and will make you lose focus. Some people also fear messing up the project or have the impression that the more they work on it, the less impressive the track becomes, which often results in feeling like they’re not in control of what they’re doing.

Solution: Under the influence of a big dose of dopamine from creating a new and exciting idea, you build up expectations in your head for your track to become your next masterpiece. Usually, when I notice I’m thinking this way I usually just stop everything and do something else for a moment. Building up expectations that you’re working on something grandiose is a way of setting up yourself for inaction and lack of drive down the road. Here are some music-making habits I have to help keep myself from falling into this trap:

  • In idea-creating sessions, I’ll focus on working on several different ideas and will not elaborate on any of them until a future session. This helps in not getting too excited about anything specific, and the break away from the idea(s) also helps me in understanding the real potential of the track.
  • I never, ever, think of a track as a potential hit. I’m more focused on finishing it and moving on. Finishing something gives the mind clarity, and will give you a sense of accomplishment and build self-confidence.
  • I never forget that because a track has been declared “done”, that this won’t stop me from reopening the project in a few months to change something. Many songs can have multiple versions, and sometimes you need to test it in a club or show it to others for feedback.

“I need perfect conditions to start working.”

This one is also pretty common and I’ve seen it in friends for years. Some people will always say that they can’t be making what they want because they’re either missing something in their setup or because something is stopping them. You often see this in people who constantly buy new gear or plugins but don’t spend much time exploring the real potential of any of their tools.

Solution: To make music, you don’t need much. You need a DAW such as Ableton Live, a computer, and a pair of headphones. That’s pretty much it. If you can’t make something using only this minimal setup, expect to be very frustrated down the road; the more options you have, the more you might become confused in how to use them all together. I often recommend for beginners to try to get the most out of their DAW alone using tutorials (you can learn basically everything on YouTube). You’ll be surprised with what you can create by limiting yourself. “Yeah, but it won’t sound the way I want“. This is what I call a brain distraction. It’s more important to get your skills together and to find ways to sound better later. There’s also nothing wrong with using or buying presets to see how things are made so you can get inspiration from various sources. Here’s how you can avoid getting caught up in waiting for the right conditions to work on music:

  • Realize that there will never be a perfect setup or time to make music. Great sounds and ideas are created while working and exploring, not while you’re imagining how you’d do if you had this or that.
  • How you use your time is up to you. When I had my son, I maximized the little time I had by squeezing in power sessions here and there, sometimes in a 5-minute spans. When you work within a limitation like that, you get crazy productive and don’t get stuck on time-sucking details. When someone tells me they “don’t have time”, I wonder how much time they’re actually setting aside for production.

“I need musical recognition from others.”

This is a complex one. Recognition is often something people chase for a big portion their time. They’ll try different things to get recognized such as releasing music by themselves, asking others for feedback, or sending music to blogs/magazines/etc. Whatever you’re chasing, there are good chances you might not get what you want anyways. Asking for approval is basically saying “I give X the power to decide if what I do is good.” Sometimes we place a lot of importance on one person to give feedback because of their reputation or talent. Even if someone you are pursuing for feedback listens and doesn’t like your work, they could be wrong because they might not be in the right state of mind or right person to listen.

Solution: Usually, the main piece of advice I give to a person who chases recognition is to be aware of their intentions. Sometimes there’s relationship between external feedback and internal feedback. “Are you making music for yourself?” This is the one thing I ask people in this mindset. Sometimes people are so lost in music-making that they forget the initial root of their relationship with music, which was often simply to have fun. If you’re not having fun making music, do you think other people will have fun listening to it? This is why I find it’s important to celebrate music we love in order to understand what we love and why we love it.

“I need to get to the next level of quality in my production skills.”

Very often, people will feel they’ve learned a lot with production – enough to make music – but that something is still lacking. This usually comes after some years of music-making; sometimes when you’ve had a few releases and you perhaps start repeating yourself multiple times in the genre of music you’re making.

Solution: Try to achieve specific goals for yourself. If you’re not reaching the level you’re aiming for, perhaps you’re not pulling your information from sources that actually solve your problems. But there could be nothing wrong with where you are at the moment. I have moments where I’m making music and notice that I’m repeating myself, feeling limited in what I do, but that’s just where I happen to be at that moment; I just continue doing it with what I have. Feeling like you’re stuck on a plateau in your musical or production development is not a problem, but making a big deal about it is, because it stops you from actually working.

I hope this was helpful!

SEE ALSO : Self-Sabotaging Your Music Career

Learning how to make melodies

One of most difficult things for a self-taught musician to get the hang of is writing melodies. Even for a trained musician I believe melody is still a challenge; using theoretical knowledge to come up with the right melodic vocabulary to really express what one wants to express can be difficult. When I started to make music more seriously, I was hanging out with a few friends like Mateo Murphy, Mitchel Akiyama, and Tim Hecker. At the time, Mitch taught music theory and piano. I once asked him if he could teach me as well, because I wasn’t feeling confident with melodies at that time. Learning more theory really felt it was the right thing to do; if I was going to write music, I thought more theory would be for sure be an essential part of improving.

Mitch loved my music and after thinking about it, said:

There’s nothing wrong with your melodies. I understand you might not like them, but learning more music theory doesn’t mean that you’ll like them more. I think [music] classes would pull you in the wrong direction and I’m more interested to hear what you’ll do on your own in the years to come.

This is one of the most surprising things I’ve probably been told, even in the time that’s passed since Mitch gave me this feedback. At first I was confused if Mitch’s answer meant that I already knew enough “naturally”, or that I had a “beginner’s mind” which was lucky or naively interesting to him. In art, having a naive approach can have certain charm but can also be awkwardly odd. I read a quote from Picasso during my studies in arts that has stayed with me (I did theater and stage comedy for years before making music). Picasso once said “it took me four years to paint like Raphael but a lifetime to paint like a child.”

Children create and express themselves in a very spontaneous way, and I believe that Picasso was referring to their state of mind. Tim Hecker had the same kind of vision, and if you listen to his music, you’ll hear a lot of letting go in how things happen, but his approach is still controlled. While he was doing a lot of granular synthesis in metal music, I was dealing with melodies coming from a sound source or sample.

The beauty of electronic music is how we sample music to reinterpret it into a different form. Some will use a sample as-is, others prefer changing it a bit, and then there are the people who change it completely. In all cases, working from a source gives an artist healthy limitations in working with other tones and notes that must all work together.

One thing you can do is use Ableton’s Sampler and slice out parts from a musical loop you like, then with the MIDI notes you can change the order around and you’ll automatically have something new. If you don’t like the sound (say a piano) but you like the notes, then you can bounce the new melody and use Ableton’s melody extractor to have new MIDI to send to a synth or sampler using a different sound.

Next comes the need to add extra notes, but what if they’re off? What if they’re completely messing everything up? Again, what seems to most people like the best answer to this problem lies in learning more music theory.

There are multiple ways in which knowing more theory would potentially help, but let’s first consider some facts.

First off, if you like electronic music or more low key music, I’m sure you all know some songs that have very little musical content. Some songs are made on 2-3 notes/chords and can still pull it off. So why not try to see how far you can go with whatever material you already have before making it more complex? You’d be surprised sometimes that less might actually be better. The clearer the message, the more powerful the bond you can create with the listener, and sometimes this implies to reducing melodies to essentials.

However, some people think that if you stick with only simple content, you’ll never really evolve as a musician. I don’t believe this. I could say the same thing about sound design, synth design, mixing, and mastering. You can’t expect to know everything so fast and that you’ll instantly be great at it. But the more you work with one thing, the more comfortable you become. Once you have a good base skill set, you start to take risks that intuitively lead you to the results you are looking for. Same thing goes for percussion design. People often think that using a sample is not being creative, but it actually makes you study the best sample for a particular percussive element, and when you find great ones, then you’ll want to know how they’re made. If you start by designing sounds before sampling, you are venturing into territory where your references might be poor. And again, this also goes for melodies and production.

In other words, it’s more important to practice and actually finish songs; keep it low key and constantly be on the lookout to find inspiring references or source material.

Again, some will say that music theory would do no harm in helping. Of course it won’t, and if you dig, you can find multiple music theory classes or tutorials online. There are also plugins like Scaler that can help you with propositions. But for me, I find myself agreeing with Mitch and encourage people to try to approach melodies more personally.

One of my current musician buddies is Bryan Highbloom who is a jazz musician who I’ve collaborated with. With his 40+ years of playing, he’s seen a lot of shows and explored many different approaches [to music], so I often like to ask him questions to hear his views. Yesterday I asked him about the importance of progressions, theory, and such.

The most exciting time of my life when I started to learn to play was when guys like Coltrane came up with something that was completely different from anyone else. He had his own vocabulary. At the time, people were really fed up of doing the same progression, scales, and routines. It felt like we were making music for others to get, not music the way we want to make it. Coltrane was fresh. He knew what he was doing, but it was also because he wanted to break rules and get out of the cage. I’m a free jazz guy. I like to try new things all the time. I feel like I see more that way and then it gives me ideas for the next jam based on what was inspiring me. But the thing is to be in the moment and to record yourself, all the time.

Though he didn’t mention it specifically, listening to past sessions we’ve recorded, he liked to have a melody frozen in time, something you don’t catch and have to let go. But with MIDI, we usually trim out the parts we like less and move them around. So in a way, to get interesting content you need to spend a lot of time in the arranger and move things around. Trust your ears – they should know when something is off. If you’re unsure, use Ableton’s Scales and you know you’ll be in tune.

From my circle of friends, Mateo was on the other side of the spectrum with his approach to melody. His view was that it was important to have structured melodies and that it would have to “work” harmonically speaking. His background and main interest at that time was DJ’ing, so melodic and harmonic structures were essential to help him achieve his sets. I like to have one person I talk to that has a different view, because it keeps me structured in my work and stops it from being too all over the place. Mateo’s and my common interest for DJ-oriented music has always been there, and having that always in the back of my head made me think about pushing my boundaries somewhere between Mitch’s vision and something more accessible.

This is why I learned about progression and theory only when I felt I needed to have one point clarified when I really needed it. But not to create an entire melody, all at once.

I once had a contract where I was asked to finish a melodic song. The first thing that I noticed was that the melody was out of tune and sounded very off. But the client loved it as it was. I showed him that just by adding scales, we could “remove” off keys so he sees the real tones of his phrase. But of course, this would change the vibe completely, which was not what he wanted. We both asked a few people to validate the track, and while everyone pointed out that there was a problem, the client wanted to keep it the way it was.

The moral of this story is, if you’re in doubt about a melody, ask around. If you’re tone deaf, it’s important to learn this about yourself sooner rather than later, and work to improve it. But then again, if you actually love dissonance that’s all well and good, but be ready to face a lot of frowns. Not being good at writing melodies doesn’t mean you can’t get anything done, maybe you have other strengths that you can focus on!

SEE ALSO : A Guide to Percussion

Is sampling wrong?

Sampling in electronic music involves two main types: using another person’s idea (e.g. using a harpist’s melody for your deep techno song, or sampling electronic music that isn’t yours) and using prefabricated samples for making your song.

As time goes on, I read and hear about more and more debates regarding sampling in electronic music. I refer to electronic music because in other spheres, such as trap or hip hop, the debate is non-existent. We all know it’s a matter of culture derived from how producers have approached their art.

You might ask yourself, “are there more benefits from making all my sounds by myself? Will I get more recognition that way?”

It’s hard to answer this question, but I’ll try to debunk the source of that question to help clarify a few things.

Firstly, the world of electronic music really started in the late 80’s with a DIY mentality. Back then, electronic music was not really well-known, and producers had a hard time getting support from traditional media and distributors; they had to do everything themselves. The same thing goes for their equipment. Equipment was extremely expensive and not easy to find, so many artists would work with whatever they could get their hands on. Then came a huge rise in popularity in the electronic music world, and by the 90s, it had its own culture. DIY was the established way to do things; everyone was contributing in one way or another. Making everything yourself – a form of being independent – had been rooted in the culture of electronic music. One of the big differences between that era and now is that back then, many producers were obsessed with making the most original music possible. Going out to an event was all about hearing new songs you’d never heard before that would make you dance; you were also aware you might never hear those songs again.

Secondly, with growing access to technology, it became essential to showcase your skills as a one-man-band. I’m not sure if if this was an ego thing, or more of a way of overcoming this tour-de-force, but while it can be impressive, it can also be counter-productive. There was no electronic music school out there until around 2005, where some appeared online. Prior to that, people that wanted to make electronic music had to be learning everything themselves.

Thirdly, as access to technology increased, as did the possibility to get pretty much anything you want via the internet, a certain snobbery amongst producers developed. Some people are able to do certain things a certain way, and will pass on a very clear message that if you don’t do things in their way, you’re doing it wrong. I think this approach – which I see a lot – has put many people in a defensive mode as well as made them less likely to share their work.

That said, sampling has always created polemics. You often hear a pop artist sampling others then getting into lawsuits as a result. In the underground scene, there are similar stories (such as Raresh sampling Thomas Brinkmann without understanding what consequences would ensue). There were multiple occasions where people would sample a part of a record that was released 10-15 years ago and make a song out of it. It would piss people off, mostly because it goes against two concepts:

  1. The person who sampled failed to be original and took the work of someone’s hard work to pass it off as their own.
  2. It’s a “violation” of the culture norms of music making, which have been in place for decades.

Is there a way to use sampling “correctly”?

Well, yes, there is a way. Sampling is not frowned upon in hip hop and, it’s also okay elsewhere too. However, there are rules to respect. When I launched my sub-label Climat in 2012, I wanted to use it to find artists that were talented, had beautiful content, and that once put into a groovy context, would make something new and refreshing. I was looking for music on obscure sites then tried to make music with it. Whatever samples I would keep, I would take the time to contact the artist, explain the concept and ask for their permission. Honestly, this is the least you can do and you should absolutely do it. Imagine if someone were to sample your work; I think you’d want to know. Plus, who knows, it can be the beginning of future collaborations.

How can I make use of samples from someone else’s work?

Contact the original artist, ask them if there are conditions associated with using their work, and then promote them too when you release something.

Is using samples a bad thing?

Many people feel ashamed to use samples. They think if they’re going to have an 808 kick, they need to buy a drum machine to make it. There is also a shame one feels when using presets which don’t feel original. Indeed, they aren’t, but you’re missing the point if that’s the only thing you consider.

When I make music and hit the studio, I want to be productive. I use samples to make a structure, a groove, to complement my idea, so that things come together faster. I’m not using samples as my final form. If I need a breakbeat, I don’t want to lose time trying to program the best beat possible. I’ll take a pre-made loop so I have a target of what I imagine it to be in my mind. As I work on the track, I’ll chop the loop, rearrange it, and swap the sounds out with something I’ll design myself.

Your main enemy in music making is your own mind getting distracted with things it thinks are important.

When you make a new song, you need to have a core idea. However, you can take inspiration from many things including samples. Gather them all in your project, analyze them, sample, process, and create. Don’t leave things so unchanged that could easily recognize a sample as being unoriginal. See your project as if you were a painter gathering images from magazines to use as guidelines.

Honestly, samples are the best way to get out of your routine. I’ve never understood people who were super stubborn about making everything themselves, just to end up sounding like every other song out there anyways. if you venture in genres that aren’t yours, you’ll get new ideas for sure.

Tip: I find that using layering multiple samples is a great way to make new sounds. For example, you can make your tiny clap sound fat if you combine it with a tom.

Your best companions in processing samples are just a few plugins away. With all the technology available, it’s silly not to use them:

Fabfilter Pro-Q3: Amazing GUI and pristine sound. This is a must to fix your samples into another, original way.

Mangledverb : This is a reverb for intense sound design. It can really bring alive some parts of your samples.

Discord 4 by Audio Damage: For subtle to extreme changes.

Shaperbox: The ultimate tool to recycle any sound into altered material.

Crystalizer: Great for granular synthesis and shaping sound.

SEE ALSO :  Setting up your mix bus  

Tips and recommendations for compression (Pt. 1)

After two important posts on EQs, it’s time to start discussing how to use compression, as these two work so well hand-in-hand, and I’ll offer my own recommendations on some of the best compression VST plugins. Your own selection of VSTs should always start with a few of these two categories:

For EQs:

  1. One Parametric EQ for surgical needs.
  2. One Shelving EQ for toning.
  3. One analog based EQ for coloring.

For compression, there are also several choices and it’s easy to get lost, so one of the things I find important to start with is to explain the different families of compressors (more suitable to relate them to as models).

FET

This type of compressor is one of the most popular out there. It’s known for its aggression and for its use of adding tons of punch to sounds, mixes, with a lot of attitude. The FET compressor, which means Field Effect Transistor, appeared later in the history of compressors, when they switched the tubes for to a model that helped make sounds warmer and richer; it became an instant favorite in studios. The 1176 is one compressor that became one of the most popular models in studios.

Use: Amazing punch on percussion and add life on textures, pads.

Recommended plugins:

FET Compressor (Softube)

FETpressor (PSP)

Black Limiting 76 (IkMultimedia)

Opto

This type is pretty much the opposite of the FET (although there are people who will argue about this). The Opto model is smooth and super warm. Not idea for percussion but I do use it in parallel (see techniques below), which can give beef to a kick, for instance. The way this model works is very interesting. It’s basically a lamp that reacts to the incoming sound and will light up depending of the incoming signal. I’m not the best at explaining this, but that pretty much sums it up,  and this makes the Opto compressor not the most aggressive, as it offers smoothness.

Use: Ideal for pads, synths, textures and I would recommend you experiment it with percussion, but in parallel mode.

Notable suggestions for VST:

Bx_Opto (Brainworx)

Opto compressor (IKMultimedia)

Renaissance Compressor by Waves also offers an Opto mode.

VariMu

VariMu is like the prince of compressors because it has finesse and elegance. Manley popularized the VariMu with their famous version of it. It is a cousin of the Opto in the way it works, and is also very smooth. Often used in mastering, it works like a charm to handle punch problems or to keep coherence in a mix that needs general glue to it. It’s not the best to create punch and this is why, but when used in pair with another compressor, it can really create beautiful results.

Use: On your mix or on a group. It will glue it all together in the most luscious way.

Suggestions of plugins:

The Manley Compressor from UAD

MJUC by Klanghelm

DynaMU by IKMultimedia

VCA

This type of compressor is also very popular just like the FET. I’d say that most generic compressors are often based on that model. Since it’s based on voltage control, this compressor is a surgical type of tool. It is really effective to produce snappiness to percussion but it can also be used to control harsh transients.

Use: Smack those kicks with it and control the transients of hats with another setting.

My favorites:

TDR Kotelnikov

U-He Presswerk

API 2500 (There are a few imitations from UAD and Waves, so check it out)

Techniques

You may have the best plugins but if you don’t know how to use them, you’ll miss the full potential of these amazing tools. I’d say that if you don’t, please know that a large number of producers out there, even experienced ones, struggle to fully understand them. So while you will find so many tutorials out there, I’d like to explain you my simple vision.

But first, let me explain what compression does. It takes the incoming sound and monitors the loudest peak and checks if it is louder than a certain point: the threshold. If that’s the case, it will push down the signal above the threshold, down. I like to picture it as when you sit in a bath, where the water rise as you sit in it. The way a compressor “pushes down” the audio will be controlled by the attack (how fast it reacts), release (for how long) and ratio (how much).

I’d like to compare a compressor to an oven and the incoming music as the dough. The compressor doesn’t work like, let’s say a reverb where if you put it on a sound, you’ll automatically hear what’s being altered. How compressor VSTs work are really, to me, like a oven. You need to bring in the sound, cook it, then push it out.

So, use these parameters when dealing with compression:

  1. Incoming signal. You’ll need to raise the volume of the incoming signal to make sure it meets or is above the threshold. If the signal is too low, it won’t be processed.
  2. Threshold. Lower it down if needed. You’ll see that most compressors have a “GR” for gain reduction meter. This will start to pump as the signal meets the threshold. If nothing happens, lower down the threshold and or boost the incoming signal.
  3. Attack/release. A fast attack will make the pumping start react quickly while a slow one will be less aggressive. You can then adjust the release to control for how long the pumping will last.
  4. Ratio. This is how much will be pushed down. For instance, a 2:1 ratio means that for 2dB over the threshold, it will be turned down by 1dB over the threshold. Eg. 8:1 is a more aggressive result.
  5. Make-up gain/Output. Your output signal will be turned down in the process so you can use the make-up gain to adjust the processed signal to match or be louder than the incoming signal.

So yeah, it sounds weird on paper, but compression is about lowering the volume to make things louder.

Regarding my analogy with the bread, you need to make sure it bakes (gets compressed) before pushing it out.

Now, the techniques you can use compression for:

  1. Limiting. This is the most known use of a compressor. It is a way of making sure the sound never goes above a certain level. Ideal on a master bus to avoid clipping. You can use it to a certain extent on busses to maximize the volume. But make sure it’s not too much as it can then distort in mastering.
  2. Side-chain, ducking. Popular in electronic music, this makes the compression work based on an incoming signal. I’ll get back to this in a future post.
  3. Parallel compression. To do this, you need to put the compression in an AUX/Send bus and then send whatever needs compression to it. This ensure the original signal is mixed with the compressed one, adding power, loudness, precision.
  4. Serial compression. To be used with care, but has very powerful results. This is about putting two (or more) compressors back to back. One can be in parallel (thanks to a wet/dry) and the second one, not. This makes sounds really powerful, punchy, fat. Ideal on sounds that are wimpy and pale.

That’s it for the basics of compression! I’ll discuss the art of sound design using compression and EQs next.


SEE ALSO : Tips for compression: The Multi-band compressor (Pt. 2)

The best EQ plugins and various EQ’ing tips (Pt. II)

In my previous post regarding the best EQ plugins, I covered some of my favorite EQs and some of their uses. After receiving many compliments about that post, I’ve decided to continue with a part two. In the following post, I’ll share a few tricks with you that you can easily do yourself when facing certain mixing situations, and I’ll also briefly outline compression.

Filters

In case you didn’t already know, EQs are filters; really complex mathematics which each developer has coded in more or less slightly different formulas. This explains why some EQs are really expensive: because of the time invested in perfecting the curves. Many people don’t realize it, but EQs do sound different from one another and you can tell once you have a high quality sound system.

“Most people don’t have a high quality system, so what’s the point…”, you say.

Well, if you use high quality tools, in the end, your regular sounds will be “upgraded” in quality too, which will eventually make a difference where ever you play them.

The number one tip for a better mix is to use filters; this alone can make dramatic improvements.

For instance, your kicks might sound muddy if you don’t remove the garbage frequencies that are below the fundamental note of it. If this sounds complicated, let me explain it in the most simple terms:

  1. Use your EQ and the first point on the left should be switched to filter, then low cut.
  2. The slope should be put to 24db/octave.
  3. Then roll it to 20hz to start with and then go up frequencies until you hear your kick losing power. If that happens, you’re now filtering too high and you have to roll back a bit.
  4. My general rule is to cut kicks at 20hz by default.

Now that tip was for kicks alone, but you should apply this idea to basically everything in your mix. However, besides the kick, I wouldn’t use a slope of 24db/octave on anything else unless there are big issues. It’s up to you to experiment but if you want to test something interesting, try 18 or 12 for cutting other sounds and you’ll see that this leaves less of a digital feel, giving your sounds clarity and warmth.

I’d also cut the highs where they’re not needed, but not too much either.

Percussion, melodies, and high pitched sounds such as hi-hats would benefit from a 6db/octave, high cut filter; this smooths things in a lovely way.

Some of my favorite filters for this kind of use are:

EVE-AT1 from Kuassa

SliceEQ by Kilohertz

PSP MasterQ2: Smooth!

Sharp cuts

Surgical, sharp and static cuts are very useful for a ringing resonance. Many people ask how to spot it these and how to know if it’s really something to cut or if the it’s something to do with the acoustic of the room. There’s no real way to know but to often cross validate with reference tracks.

So often, I get clients sending me a project in Ableton and I see really odd cuts. Is that bad?

Yes and no.

First off, if you use Ableton’s native EQ, switch it immediately to oversampling mode for better quality.

Second, cutting might change something in your environment but you’ll also permanently cut frequencies that might not be needed to change, which could also potentially induce phasing issues (i.e. during the entire length of the song).

*Note – do not use too many EQs in one chain because that will definitely cause phasing!

So, how do you spot one rogue frequency?

Sometimes I just use a spectrum meter to get hints if I can’t pinpoint where it is. Try to always use a spectrum meter on your master to have an overall indication of your mix. If you see some sounds that start to poke above 0dB, this *might* be a problem; not always, but it could. What you want to look for is one thin spike coming up out loud about +3-6dB. This might really be an issue.

My instinct would be to try to lower the volume of the sound itself if that’s possible. Sometimes it’s not and that’s when you use an EQ.

  1. Isolate the sound in the appropriate channel.
  2. Drop your EQ of choice (see below for suggestions).
  3. Pick an EQ point, set it to the frequency you spotted, then adjust the Q to 3-4. Cut 4dB to start with, but more if needed.
  4. On the EQ, there should be a output gain. If you have cut that frequency away, it might be great to just increase the gain by about the half of what you have cut away. Ideally I like to compress but we’ll get into that later.

TIP: Avoid sharp cuts in the low end. That can cause issues such as phasing, muddiness. If you really have to, make sure to use a mono-utility after.

I revealed some of my favorite EQ plugins in the first post in this series, but I’ll add some more:

Cambridge EQ by Universal Audio: Works amazing on synths and melodies.

AE600 by McDSP.

Voxengo CurveEQ: Solid on percussive content.

Valley cuts, boosts, and shelving

Many readings on the subject of EQ’ing only will recommend that if you need to boost, go moderate and try to have a very low Q to have an open curve. However, there are really no rules on what you should or shouldn’t do. Explore, fail, and be audacious, because sometimes great things come out of it.

My only red flag would be on those really complicated, several points EQ curves you can do in Fabfilter ProQ2. This sometimes induce weird resonances when you’ll bounce, which is no good for mastering unless you are OK with annoying people’s ears.

Also, think differently. If you’re going to use 3-5 points that are all boosting, then why not start by turning up the gain on your EQ’s output and cut down whatever you don’t want.

But if you boost, I like to have a Q below 1. It gives really interesting results!

  • For instance, try to boost 2-3db at 500hz to instantly give presence and body to a song.
  • Try it at 8khz to add a lush, bright presence to metallic percussion.
  • Boost at 1khz on your snare to make them pop out of your mix.

Experiment like this. At first it will appear subtle but with practice, great results will come.

My favorites of the moment:

Sie-Q by SoundToys for really doing beautiful shelving.

MEqualizer by MeldaProduction.


SEE ALSO :

Tips and recommendations for compression (Pt. 1)

Alternative music arranging techniques

Music arranging techniques are a topic I’ve been asked about most in the last few weeks. For many people, this is the part of music-making that causes issues. And rightfully so; arranging is all about storytelling. In past posts, I’ve said that even though your sound and production might be awesome, if you have nothing to say or if you can’t express your ideas properly, the song will feel shallow and will be quickly forgotten.

In this post, I will explain a few things you can do to create exciting, original arrangements – mainly tips on how to work on transitions, which is one of the most important parts of electronic music.

The “perspective” method

One of the most important aspects of arranging are something I’ve explained in past posts, which I call “perspectives”. A quick summary of what I mean by perspectives: split your song in sections using the Markers in Ableton (or your DAW). I usually put a marker at the end of the song, then one in the middle, then others so the song has four similar sections of the same length. Basically, you need an intro, an outro, and the middle part of your song, which is now split in two.

These marker points are critical moments where you could lose the listener’s attention. They are critical pivots for where you want something to happen to keep the flow going and to roll into the next section of the song. Each section should have a surprise and some development or an element to relieve the tension. These points are also moments where the tension can rise or be released; with a proper transitional approach, this can be done easily.

TIP: Find your main idea and try to see if you can create two different developments of it as well as add supporting sounds/melodies. Try to distribute your melodic content across all the sections so the song feels like it evolves.

The jamming method

Recently, I was trying to explain to my son movies are made. He thought a movie was shot as-is, continuously, and didn’t understand the editing aspect of the process. A lot of people think the same way about songs; they’ll grab material and spread it across the song linearly.

I like the idea that making a song is like a movie, or a bit like how songs were recorded in the 70s/80s. You need many, many, takes and jams to find all the possible ideas for your motif. Here are some methods to jam withing your project to help it evolve further:

Jam the clips of your project in the session view of Ableton Live and record the results after the original song structure so you have alternative ideas on how your song could evolve next to your original idea. Many artists jam the clips, then add effects and such while recording for a good 30 minutes to see what comes out. You might be heading down a totally new arrangement path after this way jamming once or twice.

Stop making the song in a linear fashion from start-to-finish and try to chop up your sections and move them around within the timeline. Writing a song is not like writing a story; in the era of DAWs you always have the option to chop out a section and move it to other points in your arrangement. Personally, I like to jam for about an hour so I can really capture the best moments, but this also means I have to chop out a lot of crap out afterwards.

Use re-sampling on a loop. This is my favorite technique in sound design and arranging which is about taking every single loop I have in my project and passing it through a lot of effects, while recording in a channel that re-samples the master. You’ll end up with long files filled with many alterations of your sounds.

  • Add 100% wet reverb to create intense, transitional, swoosh moments.
  • Use LFOs from Max for live to add movement and life to certain parameters.
  • Map your effects to a controller and record yourself physically turning knobs – you can fine tune the automation later.

Use new material in the transitional, focal points of the song. This is a powerful way of re-inserting your recordings into your arrangements and will ignite creativity; your song will get a huge dose of vitality and movement from doing this. This technique can provide you with a lot of ideas for making original transitions, but also spice up your arrangements in sections that fall flat.

Other types of transitions you can try which rely on this technique include:

  • Programing alternative patterns using a controller like PUSH.
  • Slicing certain MIDI sequences and then rearranging them.
  • Punching in and out of certain channels in real time and recording yourself. All your gestures, and work can be recorded by engaging the recording button in the upper part of the window.

Most importantly though, use references! Try to analyze your favorite songs and see how they are arranged in terms of transitions, and then try to replicate them. Music arranging is not rocket science; you’ll learn by copying and eventually by practicing, you will develop your own tricks.

Adding life to sounds: movement in electronic music

Creating movement in electronic music

One of the most misunderstood concepts in electronic music is movement. By movement, I am referring to the way that each sound constantly evolves throughout a song. I was once talking with someone who is very into modular synthesizers and he was saying that he cannot stand recorded sounds such as samples because according to him, those sounds are “dead”. With modular synths a sound can be repeated for minutes and it will never be exactly the same because the hardware components constantly give the sound slight variations. A recorded sound is frozen just like a picture. Since we don’t all have the luxury to own a modular synth, let me explain how we can use software tools to make sounds feel “alive” and develop some movement in our own electronic music.

First, let us agree that movement in electronic music is about having some elements that are in “motion”. There are a variety of different ways to create that feeling:

1. Changes in volume (amplitude)

Volume change in percussion are often associated with groove and swing. Both can alter the volume of the sounds. That said, you can apply a groove template not only to percussion, but also to melodies and basslines. If that’s not enough you can also use the midi effect velocity which can not only alter the velocity of each note, but in Ableton Live it also has a randomizer which can be used to create a humanizing factor. Another way to add dynamics is to use a tremolo effect on a sound and keep it either synchronized, or not. The tremolo effect also affects the volume, and is another way of creating custom made grooves. I also personally like to create very subtle arrangement changes on the volume envelope or gain which keeps the sound always moving.
In general, using LFOs – such as what is offered in Max patches – can be used to modulate anything, and they will automatically create movement. For each LFO, I often use another LFO to modulate its speed so that you can get a true feeling of non-redundancy.
Tip: Combine the use of LFOs and manual edits and then copy sequences until the end of the song. I suggest you try stepping out of 4/4 and regular blocks structure to step out of a “template feel.”

2. Filter

Another great way to create movement is to have the sound always changing its tone. Using a filter in parallel mode is a very efficient way to create colours. The important part is to make sure that both the frequency and resonance are constantly in motion by using either LFOs or envelopes. By being in parallel the sound always appears to be the same but will have some added body to it because of the filter. What many people don’t know is there are different types of filters, so you can try different types of filters into different send channels and then your song will feel like its moving. While filters are great for subtle changes, you can also do the same trick with an equalizer but still in parallel. Adding an envelop on the filter so it detects incoming signal and change the the frequency is also a very nice way to keep things organic sounding.

Tip: Try comparing how a Moog filter can differ from any regular ones.

3. Textures

Background textures or noise is another great way to emulate analog gear. There are many ways to do that, but the one that I recommend is to get a microphone for your iPhone and then record a part of say, your next visit at the coffee shop or restaurant, or even in your house where we don’t realize that there is still a very low level of noise. Adding that recording at low volume to your song automatically adds a layer of every evolving sound. if you want, you can also convert certain noise into a groove pattern which creates a form of randomization on your sounds. Some high quality effects such as saturation used on certain sounds will add a form of texture that prevents your samples from sounding stale.

Tip: FM modulation on a filter or oscillation can create gritty textures.

4. Stereo and Panning

For this point there are different effects that play with the stereo image and – while you should be cautious – it’s good to have at least one or two sounds that have these kinds of effects. Some of these types of effects include of phaser, chorus, flanger, delay, reverb and auto-pan. They can all give the sounds movement if the modulation is unsynchronized and if the wet/dry is constantly being slightly modified.

Tip: Just be careful of what effects you use as overusing can create phasing issues.

5. Timing

A sound’s position in a pattern can change slightly throughout a song to create feelings of movement; a point people often overlook. This effect is easier to create if you convert all of your audio clips to midi. In midi mode you can use humanizer plugins to constantly modify the timing of each note. You can also do that manually if you are a little bit more into detail editing but in the end a humanizer can do the same while also creating some unexpected ideas that could be good. Another trick is to use a stutter effect in parallel mode to throw a few curve balls into the timing of a sound every now and then.
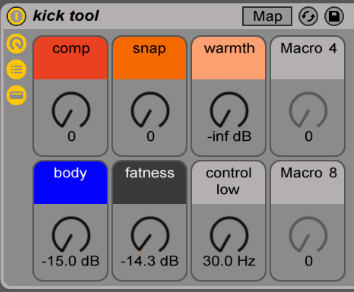
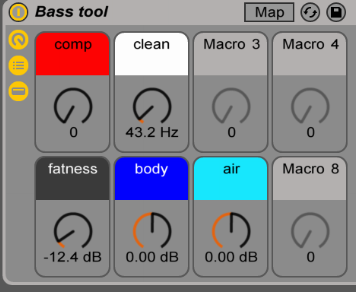
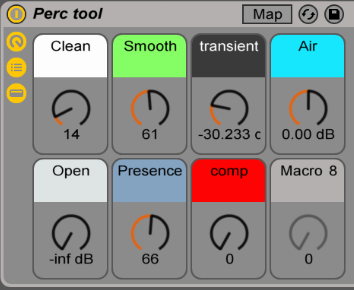
Tip: turn off the the grid locking in the arrangement section to intentionally be imprecise.


SEE ALSO :   Dynamic Sound Layering and Design 

Free Ableton Live Mixing Template

(Update May 2023: When we moved to the new site, the template was lost. It was obsolete anyway as I’ve learned so much since that I can do better. I did a new one, but it’s more basic. In my opinion, it also does a better job. You can still gather ideas from this post and I will make another one but the basic is at the end of this post. The information below is for the old template, but the one to download is the new version. Sorry for the confusion. I will fix this soon.)

I’ve put together a free Ableton template after receiving feedback that it was very helpful for many people I’ve worked with. The template available on this page is aimed specifically at mixing. I’ve noticed that many aspects of mixing are often misunderstood; I’ve assembled a starting template that has bundled together many useful tools to deal with basic things – this free Ableton template will be useful for those involved in music making!

This template includes:

  • 6 Groups: Kick, Bass/low end, Percussions, Hihats, Atmosphere, Melodic.
  • 3 Busses: Low end (Where kick + bass are routed), Percussion, Melodic.
  • 1 MIXBUS: Where the busses are routed and is actually your pre-master channel.
  • 1 Reference channel: Where you drop the your reference track.
  • Multiple Sends as enhancers.
  • Macro tools on each groups and busses to help you tackle tone and potential issues.

This template looks very close to what pro engineers use like the one Andrew Scheps did for Puremix, but I found Andrew’s template wasn’t really as suitable for electronic music. I’m sure he would disagree but underground music isn’t really handled like commercial music is.


Is this template for producing or just mixing?

You could use this template to start producing with if you feel comfortable with it, but I’d encourage you to export stems from a project and then use this template to mix. Yes, it’s a bit more work, but it will also make free up your CPU and make your project ready for a new phase of production. It’s fun also to put an end to tweaking details and then focus on the mix alone.


How do I use this template?

There are many ways you could potentially use a template like this but I’d like to explain a few things to get you started quickly. First off, grouping your sounds is always a good start. I like to to think of it this way:

  • Kick group: This group is made to hold the different layers of your kick(s); the best way to make full range kick is to have up to 3 layers, but that will be handled by the group’s macro tool that uses compression and saturation. I created another little macro tool to help beef up your kick with a sub generator and a transient enhancer. I included some sounds from my collection for you and feel free to add more. If you balance everything properly, you’ll have beautiful, warm and punchy kicks.
  • Bass/Low end: This group is essentially the same thing as kicks, but to be used as the bass. Include the multiple layers of your bass (sub/mids), and I’d encourage you to also include anything that is below 200hz such as toms, synth, pads. The macro on that group will help balance it out.
  • Percussions: Anything percussive from bongos, claps, snares or percussive synthetic sounds. This group can get busy so don’t be afraid to add multiple new channels in the group itself.
  • Hihats: Hats or anything that is regular in your group and an important part of your groove could be put in this area. In my case, I sometimes include snares. Please note that there’s no right away to use the Percussion & Hihats group and experimenting might get you some interesting results.
  • Melodic groups: These two work hand in hand. One is for anything in the background and the other is for the melodic elements to be forward. The way the macros work, they will help you position properly the sounds and make the best of them. Try playing with the various knobs to see how they influence the groups.

Please note – I’m applying high pass on these groups and feel free to change the steep which can influence the sound in some good ways, sometimes.

The three busses are quite interesting to work with once you get the levels of your groups finished. For instance, you want to find the best relationship between bass and kick that are routed together. Once they are balanced, the bus allows you to control both the bass and kick at once; this can help you more easily decide on the tone of your track by moving the bus up and down.

I’ve also included a reference channel to remind you to use a track that can be used as a mood and reference board. Reference tracks are great to help you to take inspiration from parts of other tracks you like and would potentially like to use in your mix.

The various sends are simple tools to just beef up or open up your sound. Sends are really for finishing touches to your mix and they’re meant to be used as gently as they can be; subtlety can also make things intense.

Thanks to everyone who provided feedback for the development of this free Ableton template; I am glad I can continue to help everyone enjoy making music!

Click to download this free Ableton template: (New version 2023)

Pheek’s template 2.0 for Ableton Live 11.3+

My tracks always have the same song structure

(Cover Photo by Luca Bravo)

One of the common things I often see and also struggle with myself is that sometimes I feel like my songs are always arranged in the same way; my song structure is often the same. While there’s nothing inherently wrong with following a regular song structure, often I feel like I need to have more arrangement variations in my work and new ways to present my music.

ableton live, ableton, structure, arrangements

So, what’s wrong with repeating song structures you already know work?

There are secret ways to consistently get great results with certain arrangements that, for the most part, will always “work”. When I used to DJ hard techno or drum and bass in the late 90s, eventually I became really bored of all the tracks had the exact same structure. Yes, it was extremely easy to mix the tracks together once you understood the “tricks” but at the same time, it was also underwhelming for listeners and DJs with a creative minds who preferred more challenging music and mixing.

It’s important not to fall into repetitive habits and patterns; you might find new arrangement tricks while exploring and experimenting with new song structures.

Before jumping into slice mode to get your arrangements upgraded, let’s outline a few rules that will be very useful to consider before we actually begin editing:

  1. Export a wav file of the last track worked on (any project!), finished or unfinished. Especially if you’re working using my method of Parallel Music Production; this technique will be very useful. Start a new habit of not only saving your project at the end of your session, but also bouncing a wav file of what you have.
  2. Import your file into the current project you’re about to work on. By importing, I’m referring to the arrangement section where you can drop in an empty, dedicated channel.
  3. Use markers for the arrangements as for where there are key points, changes, transition. With these references, you can see if your current project has similar points as your previous wav file, and then you might want to change it up if they are similar.
  4. See if the two projects can be easily mixed by a DJ. This is a good test to see if your track has too much going on, or if things will be fun to mix. I’ve said countless times before that if your music is fun to mix, DJs will carry a copy of your track for all their sets.

Slice your song structure

With your new habits in place, now go into slicing mode and get things started. As I’ve discussed before in a previous article, How to Turn a Loop Into a Song, you’ll need to decide the bpm and length of your track as starting point and build from there. I invite you to refer to the post if you need the full tutorial on that topic.

So let’s say you finally have a structure made up that you’re happy with. Here are the main key points I often use to avoid redundancy:

  1. Find the main sections of your song, and slice off the beginning and the end. A “section” of a song is a part that is different than others for its content. In pop music, we refer to these sections as bridges, breakdowns, choruses, etc. In electronic music, these types of sections might be a bit more subtle or non-traditional, but they’re still there.
  2. With your sections isolated, determine if your perspectives are balanced. By “perspective”, I mean this just like it is used in photography; see if your track has balanced ratio.
  3. Insert empty slices in middle of the parts as well as some random points in the song. Check some “winks” that you might be able to make from the reference track you originally imported. “Winks” are when one song might “talk or reply” another if mixed properly.
  4. Move around your sliced blocks/sections. Try wild swaps and mess with perspective. Be creative. In contrast to the often useful “use your ears not your eyes” advice, in this case I highly suggest working on your structure visually alone without any sound at all so you’re not biased or held back in your arranging experimentation. If you’re new to the idea, make sure you make a backup copy first of your project. Personally, I spend quite some time to make something visually appealing with my blocks even before listening.
  5. Intentionally leave mistakes. Did you move something slightly off the grid? Did you paste a section at the wrong place? Try leaving in it the structure until next time you come back to it.

Try messing with your song structure; let me know how it goes!

SEE ALSO :   Lego Blocks as Song Structures 

Intuition for decisions in music production

In a sense, musical intuition is what defines someone who can bring a bit of creative magic into something, in comparison to someone who sticks to truly technical application of software. I’ve often had the chance to watch experienced producers make music, either while I was visiting one’s studio or on the spur of the moment of a jam. For instance, we once had the infamous Narod Niki experience at Montreal’s MUTEK in the early 2000’s where Zip, Villalobos, Dan Bell, Akufen, Cabanne, Dandy Jack, Monolake (even Cassy sang for some minutes) all synced their laptop and gear to improvise a show for us. Our local festival gave us many opportunities to watch, what I would call, masters in what they do, play in front of a crowd to present how to create and perform. The live act itself, when done properly, should sort of represent what the artist is doing in his or her studio, but in a way that can bring the crowd on a journey.

When I state a live set done properly, I refer to something that is partly prepared, partly improvised: a set that relies partly on musical intuition. Musical intuition is the happy combo that allows for “happy accidents” and creates a sense of risk-taking. There are a lot of pre-recorded performances that I don’t get the point of. What interests me here, is the topic of musical intuition. Ever since I started teaching, this one question is often brought up:

How does one teach musical intuition, or intuition at all?

There are 3 points about intuition that we need to discuss first. Intuition can be:

  1. immediate apprehension or cognition without reasoning or inferring.
  2.  knowledge or conviction gained only by intuition.
  3. the power or faculty of gaining direct knowledge or cognition without evident rational thought and inference.

What I refer to by using the word intuition is a bit different from those three points. For me, intuition in music is how someone does something that seems to be random, but is actually done in a very effective way. Partly unpredictable, partly guided by experience, but entirely guided by a personal vision to arrive at a specific result. This is musical intuition.

A notable example would be an artist, during a live show, dropping some sounds or a musical idea that was unexpected but works with what’s happening at the current moment completely. Another example could be a musician proposing a random idea and having that incomprehensible idea make total sense after 2-3 minutes or development.

Can musical intuition be learned or developed in music making?

I firmly believe it can be. Some ways to get there would imply:

  • Listening to a lot of music genres, be diverse in the selection. The best way to get new ideas for one song and bring a wind of freshness into something is to translate an idea from somewhere else. The number of ideas I get from free jazz or Indian music are too large to count, but I find a lot of depth into these genres; they have been around for so long that they have developed so much maturity. Try to dig into realms that seem obscure or spend time listening to folkloric music as a starting point.
  • Knowing your tools. This one is overwhelming as there’s always something to learn. I often say to people, what you need to know about your DAW should be just enough to make blocks and build tracks. The rest of it, you learn as you go. But the main part is that you should be at ease with the DAW, and using it should be second nature to you. Moving blocks around, copying & pasting, and arranging basics must be something you can do fast so you never lose your flow. It’s when you start looking for how to do something very simple when you struggle too much and lose your initial idea. Imagine you couldn’t explain to a friend how to get to the nearest grocery store because there are too many details to explain; it would be confusing for him and you.
  • Be attentive to your routines and things you don’t like. We get caught up in what has previously worked, and will tend to repeat it ad nauseum. While part of what attracts people to our music sometimes one specific sound, if we become a slave to ourselves and to people’s expectations, we will fail to grow as artists. Musical intuition progresses with your personal dedication to grow and stepping outside your comfort zone. The easier it gets for you to explore, the more easily you can express yourself. The sense of becoming fluent in music-making will allow you to become more spontaneous and able to come up with new ideas.
  • Nurture technical curiosity. Spend tons of time reading about music, but also, non-music related topics. I have had so many ideas come to me by reading sci-fi novels, watching dancers, reading about architecture, drawing with my son, running in the woods, etc. Your brain needs to do other things other than spending time in the studio. You can only learn to a certain extent in there, you open yourself up to new ideas by doing other things.
  • Rehearse alone and with others. If you can jam on your own to get comfortable in your art, that is one important thing. But when you can then play with a friend, it becomes very interesting as the dialog forces you to interact/propose/listen/adjust. This will improve your communicative music skills by a few notches.
  • Play for friends. I used to do intimate, living room concerts where I would play for 3-4 friends, sitting on the floor, sipping tea, drawing, dancing, chatting but mostly, listening carefully. Those moments are where I’ve learned the most and this is often overlooked as people think playing in front of a lot of people is where the fun is at; it can be, but it’s not the only option. The advantage of playing for a handful of guests is about getting intimate and instant feedback, which can be a very rich experience.

Experiment with these ideas and you should slowly develop your musical intuition. Let me know if you have questions or join my mentoring service to explore your music more deeply.


SEE ALSO : What Is A Mature Sounding Track?