Tag Archive for: inspiration

My Music Doesn’t Sound Like Me

Does this happen to you? You start a project with an idea and a direction, “I’m going to make a techno track”, you fire up a drum machine, get a baseline going, start jamming, looking for sounds, creating a groove, and an hour later you listen back to an 8 bar loop that sounds totally different than what you set out to make? “My music doesn’t sound like me”. Yeah, it happens to a lot of people, and it can be really frustrating to make music that sounds totally alien to you.

There is a special kind of disappointment that comes with not being able to make the kind of music you want to create. Many producers I’ve worked with talk about starting a project with one direction in mind but as the track evolves they find the sounds they’ve chosen and feel of the song completely opposite to their original direction.

Why does this keep happening? What is going on here?

From experiencing this myself, I understand the confusion. I want to suggest looking at this situation from another perspective, which I believe will be much more positive, and productive for you as a producer. It’s all about context.

Firstly, our moods and our thoughts are always changing. We are dynamic, and there are multiple versions of us. What I mean is, you are one person when driving with very loud music on, there is one while enjoying music at a party, there is another you while listening to music made for earphones. There is a big difference between the person you are enjoying music and the person you are when making music. Both matter, both are ok.
Tip– as soon as you start a project, save it right away with a name that describes the genre or feel of the song you want to create. A name as straightforward as “techno …. ” or “house ….” is easy enough.

It’s helpful to start your productions with a clear focus and intent in mind – otherwise, it’s quite easy to drift off. That being said, my personal opinion is that drifting is a good thing, and goes hand in hand with being in the moment, and more in touch with the YOU who is in the studio in that moment.
If you are truly in touch with your emotions or follow the sounds you are excited by, drifting off into other directions is going to happen. It’s simply a process of discovery.

The way I see music is similar to the birth of a strange, alien creature that has come out from nowhere. Even if the music you’ve created sounds completely foreign to you, it’s important to be patient with the material as later in the production or mixing phases, you learn to gently tame something raw and undeveloped into an evolved creature with a unique personality. If your music sounds a little different than what you set out to do, I believe that’s a good thing.

If you’ve been reading my posts over time, you’ll know I strongly encourage The Bonsai Method, and the habit of not spending too much time on any one track. Working quickly and finishing fast will significantly sharpen up your production skills, and you’ll be a much more prolific producer for it. You want your sounds to be a little raw, out of control, and strange. These sounds are the unsculpted gems you can only do when you stop censoring yourself. This is the stuff you are striving for.

Embrace unexpected results, and embrace change.

Imagine the number of ideas you’ll have to work with if you start 20 tracks from scratch as opposed to trying to polish one song for 20 hours. Spending too much time on one track will often take away from the rawness of your initial recording. This liveliness is precisely the sound that made us excited in the first place, and it’s important to embrace these unexpected noises, rhythms, and grooves. Taking away all the rough  charm of your material could be compared to photoshopping a beautiful and natural adult woman’s body into the thinness of a child to achive some measure of perfection. Here are a few essential tips to starting your tracks off right ~

Your work is whatever you want it to be.

As a people, we are always evolving, and our tastes in music will evolve as well. It’s ideal for your music to sound alien to you and progress yet understand that your progression may happen in an order you can’t predict. Through time and work, who you really are as a musician will begin to take shape.

Hearing the music you’ve made in the past is like looking at pictures of yourself from another time. It leaves a stamp. Find the photos of yourself from the past and pay attention to the ones you love. They might be aesthetically good, but I’ll bet that your favorite images will be the ones that recall a particular moment in your life. See it with raw, original sounds you find. The ones that are bold are the sounds that will stand out through years and perhaps bring you unexpected attention.

Tip: Bounce a version of your track before saving and closing your project. Compare how it evolves. Share it to people who know you. See what freak them…

As always let me know if you have any suggestions or questions about this post and leave a comment below and tell me what projects you are working on right now.

JP

SEE ALSO : Deconstructing A Reference Track

Templates As Seeds

As a producer, you’re likely trying to balance several tasks all at once while working on your music. If you’re spending time to look through four or five reverbs in search of the perfect sound, setting up buses and groups to pre-mix your tracks while you arrange it, or just feeling frozen looking at a blank project screen and finding it hard to get going, it’s no wonder you aren’t as productive as you’d like to be.

Good news, this post is all about setting yourself up to win before you begin. Begin to see your templates as seeds. 

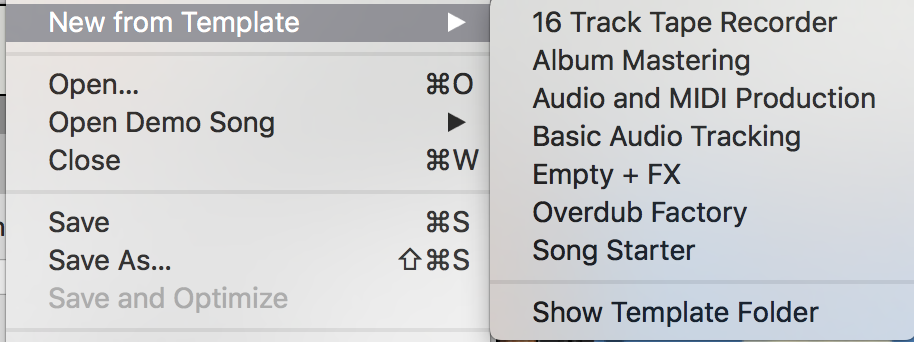
Many DAWs can be setup to load a template as an initial starting point. Reason will propose a pre-made environment, and Studio One will propose if you’d like to setup a project for mixing to speed up your getting started time. Ableton Live doesn’t have that feature by default, but you can easily change that to open a custom startup project.
Even though most DAWs have this helpful feature, that wasn’t enough for me. But it felt like I could do better.

In one way this is a follow-up post to the previous Bonsai Technique that I shared a few weeks back. It was super popular, and many people sent in comments about how it really helped them develop tracks from little ideas. Now, I’d like to follow up with this idea as I realized that many people are missing out on the fun of using a template to get their projects started. Also, there are a few things we can add in that will also be valuable for your next productions. Let’s have a look at the techniques to get rolling fast.

I’m going to suggest something simple in essence, but it’s very effective to get new projects sounding great right from step one.

Start your next project using the last song used. I heard about this technique from Matthew Herbert’s manifesto, and it got me inspired. Herbert would pick up the mixing board where he left things off from the last session. Why is this a good idea?
Starting from the last mix would provide a faster workflow but also, the random EQs, compression, effects, would be set to something he would never have set up beforehand. I thought this concept was brilliant and began doing this myself. Very often I would start with the last project loaded but would make the next song right after the end of the previous one. The same configuration and settings for the kick, percussion etc… were the same, which often led me into directions I didn’t expect at all. This is a big advantage. 

Consider keeping the effects on each channel as is, but drop your new clips into existing channels at random. In some situations, I also would copy the arrangement of one song and paste it into another song’s arrangement view. Very strange results would come up, often leading to unexpected yet very usable sound design results. I often have one “mother” project which will be a safe place for me to develop and grow these ideas. Then I will copy some loops into another project’s arrangement view, and sometimes move the clips between channels to see which one fits the best. I even did the exercise of dropping a full arrangement into another project keeping it as intact as possible. From there I wouldn’t even listen to it before bouncing it out. I’d then listen to it weeks later and get blown away. I made a handful of tracks from my album Intra or White Raven this way.
Next, challenge yourself to keep your bus routing and groups intact. It’s great to have pre-made sends channels or busses that you can re-use quickly. Of course, an easy way would be to be to assemble a macro of the chain of effects you’ve used, but I like the idea of opening a template and have no idea what effects would be awaiting me. I will sometimes swap my most used effects with others I newly acquired or some I’ve forgotten about. It’s often nice to dig up older, legacy plugins that can bring up a particular grain to your sound.

Clear your finished project from the clips and save it as a template.

One exercise you can start applying today would be:

  1. Create a folder for your templates.
  2. Each time you finish a song, you do a “save as…” to that folder. You’ll then clean it from the clips in the Arranger view. I will often leave what I call ‘leftover’ sounds that weren’t used in the project. I’ll set these clips in the session view in a channel named “Leftovers.” Doing this allows you to re-purpose those sounds, which may be a perfect fit in your new project.
  3. Midi clips could be left there as well because it is usually interesting to have on hand some midi material you can quickly throw new sounds onto and see what it gets that sounds like.

Now, an extra tip, which is to make a template for the design of an EP/LP. As you know, it’s always great to have a common feel for an entire release, and one of the things I would recommend would be in the way you apply your effects.

  • Reverb. Either you pick a reverb from one specific company (ex. Altiverb) and use some presets to get started, or you try to remain in the same family of space such as Plates.
  • Delays. Using the same plugin but changing the delay speed.
  • Saturation. Try to pick one type and stick to it. I recommend applying this through a send channel where you have more control over how each sound is colored.
  • Compression/EQ. Some apply a distinct color and are more or less transparent. It can be a good idea to keep the same type of combination through your channels.

As always I want to hear your feedback on anything mentioned in this post. Feel free to share this post or leave a comment below and tell me how these creative, and time-saving techniques are working for you. 


SEE ALSO :  Pointers To Define Your Sound

Bonsai Method

Are you having a hard time writing music? Are you confused what DAW to begin using, what plugins to download, what samples to get started with? Never before have producers had so many questions to answer, and to be honest, if you are struggling to make music with such a wealth of options and tools at your fingertips you might be simply overwhelmed by all the options.
This frustration also carries over into production itself. So many possibilities can be done from what you have that even making music can be frustrating. Given that, it’s no surprise that many producers fall into making music that sounds very similar to others because the process of making music is easier to do what other producers have already done. What gear others use, what techniques people use, (we can thank Youtube for exposing all the secrets) and all too often we try to replicate one’s success instead of focusing on the act of our own personal creation.

With so many tools anything is possible.

It’s predictable that faced with so many options you’ll struggle to pick one, and later worry that your choice may not have been the right one, you waste time endlessly worrying about other directions your song could have taken. Not productive right?
I once read an article that explained how negotiators work in difficult situations, where multiple options are available to them.

They will try to sum all all it up to 2 final choices.

That advice really stayed with me whenever I work on a project and will clear out my options until I can chose simply between A and B.

Throughout my posts I have been providing ideas and answering questions to help make your time more productive, and now I’d like to do propose an exercise I know has helped me greatly, I call it the Bonsai Method.

In a past post, I talked about the Rule of 10, where working on multiple projects at once might be one of the most productive way to approach creation. While feeling slow, it later fuels down to a huge batch finished almost all at once. The Bonsai Method was used for latest album where I ended up making 25 songs over 6 months, and in a matter of a few days, that all the tracks took their final form.

What is the Bonsai Method?

It’s inspired by how the Japanese make bonsais trees. Growing something with great attention under strict limitations. This evolves through 3 phases:

• Sprouting. Generating a new idea for a song is one of the most difficult parts of making music. Once you have your idea, you set off in one direction. Finding that idea can be the hardest part mostly because at the moment of making it, you may become so absorbed in it that you become biased if it’s cheezy or genius material. You’ll know with distance or you’ll grow the idea in something that would be more suitable.
• Taming/pruning. This part is when you have material on hand and that you want to give it a direction.
• Growth to final product. This would include the final arrangements before mixing. This method of creation is based on finding ideas uniquely.

In the past, I suggested ideas for new ways to create content. What makes a song memorable on my opinion is the power of one strong idea that is showcased and developed over time. Your song will suffer if you use a lot of individual sounds because nothing may stand out on it’s own, and your track will sound too busy, and lack a clear focus. The minimalist way of making music (or cooking) is to take one idea and really put it forward by using an effect with the mix down in mind, to make it shine.

Sprouting is about finding that gem. My biggest take on finding new ideas is complicated to explain, and there are so many ways to come up with ideas on your own. One quick way to sprout new ideas is quite simple.
1. Take a track you like.
2. Loop it’s last 1/3 (outro).
3. Throw ideas on top of what could be the best complementary track to mix over it. This could mean you can add a chord hit, some percussion, a simple bassline, etc.

Basically, you’re building the intro of your track that would be mixed by a DJ, over the track you selected. Once you listen to both of them and notice that have something there, mute the reference track and listen to what you have put together.
It’s possible that this process may seem underwhelmingly simple or plain weird, by itself. We’ll work on that on the second phase but remember that this is the beginning of something which will grow into a future track. Patience my friend.

Taming and pruning. This one, just like described in the post Rule of 10, is about coming back to what you have created over several days, and work on it little by little. You’ll need to focus on the content, the idea, not necessarily over the percussions, mixing, kick, etc. All those will come by themselves once you nail down what this track is about.

  • Don’t discard anything, keep everything.
  • Resample and record the little takes you do. Instead of putting blocks in the arranger, play a melody in a loop and record yourself tweaking it.
  • All these new takes are the pruning of the original idea.

Things you can do to alter and modify your sound:

  • Change the pitch.
  • Stretch it, warp it.
  • Change the groove. Change the sequence, rhythmic feel of it.
  • Add effects: compression, EQ, saturation, filter, are the main ones to look for.

Growth to the final arrangement.
Ableton, arrangements, live, techno, cleanIn a past article I’ve explained how to turn a loop into a song but for this method I’d like to take a special approach that might surprise you. It’s based on one simple rule – once your have your idea down: you may only make 1 correction per time you open the project.
This is important, you’ll come back on multiple occasions and adjust little details in your last touches. Just like the Bonsai Method, you have to come back, adjust one little detail, save, and close the project.
You’ll spend only a few minutes on your song at one time to keep your impression of the track as if you listened to it for the first time.
You’ll be more efficient if you come to your project with the idea that you can only make one single change and then save it until next time.
As you probably know, the main goal here is to make the first 1/3 of your track and then, the rest will be pretty much-duplicated ideas and add-ons.

As always I want to hear your feedback on anything mentioned in this post. Feel free to share this post or leave a comment below and tell me how the Bonsai Method is working for you. 


JP –

SEE ALSO : Two birds one stone. Separating ideas.

Finishing Your Projects

I want to tackle a huge, big-time topic of much discussion and effort among many music producers – finishing your projects. Like many of my friends, readers of this blog, and clients of mine, finishing your music is really important to you. Yet, we all have loads and loads of music with real firepower that will never get past the finish line.

As someone who has finished dozens of records, remixes, and projects of my own, I’m going to get right down to business of showing you how to finish all the projects you want to. Let’s do this.

Firstly, I need to get a few things out of the way.
1. From my perspective, I believe a song might never be done. Even if you’ve finished it, mixed it, released it, (which you defiantly need to do) and heard it played in mixes all over the world, to you that track might never really be complete.

2. It’s (almost) never going to be perfect. Do not let perfection kill all your efforts. The more you hear it, the more you’ll pay attention to that part you could have tweaked better, or that part in the arrangement you could have brought to a totally new level. Let’s face it, you need to remember that a listener will likely never hear that song as much as you have and will never notice the few imperfections that are loud and clear to you. It’s okay, let’s get it done the very best we can in the time we have.

3. Taste is subjective. What you feel is perfect, likely won’t be in the eye’s of someone else, and vice versa. Yet at some point, you have to put your foot down to what the song’s theme and structure is and embrace it by telling yourself “ok, this is my song and there won’t be compromises, I’m moving forward.”

4. Use your reference tracks. I keep coming back to using musical references in many of my posts because it’s your personal target for what sounds good, and what you want your production to sound similar to. The more you work with one, (comparing your sounds and levels to the reference track) the more you’ll understand how your track is progressing, or not.

The next part is going to be exciting, and scary.
After writing and developing all the right parts of your track at some point you’ll come to feel your project is ready to be canned down into it’s finished form. “What are the signs that a track needs to enter it’s finished form”?
• Your track has a beginning, a middle, and end.
• The imported reference track in your arrangement has about the same length and number of sounds as your track.
• The sections of your track are very clear and your transitions from one part to the next flow well, and feel right.
• All channels have a rough mixdown and an overall healthy balance. Now, we’re really good to go.

“If you want to make music the #1 thing you have to do is finish your productions. Open a project that is ready and follow these steps – we’re going to finish one right now.”

finish your music productions

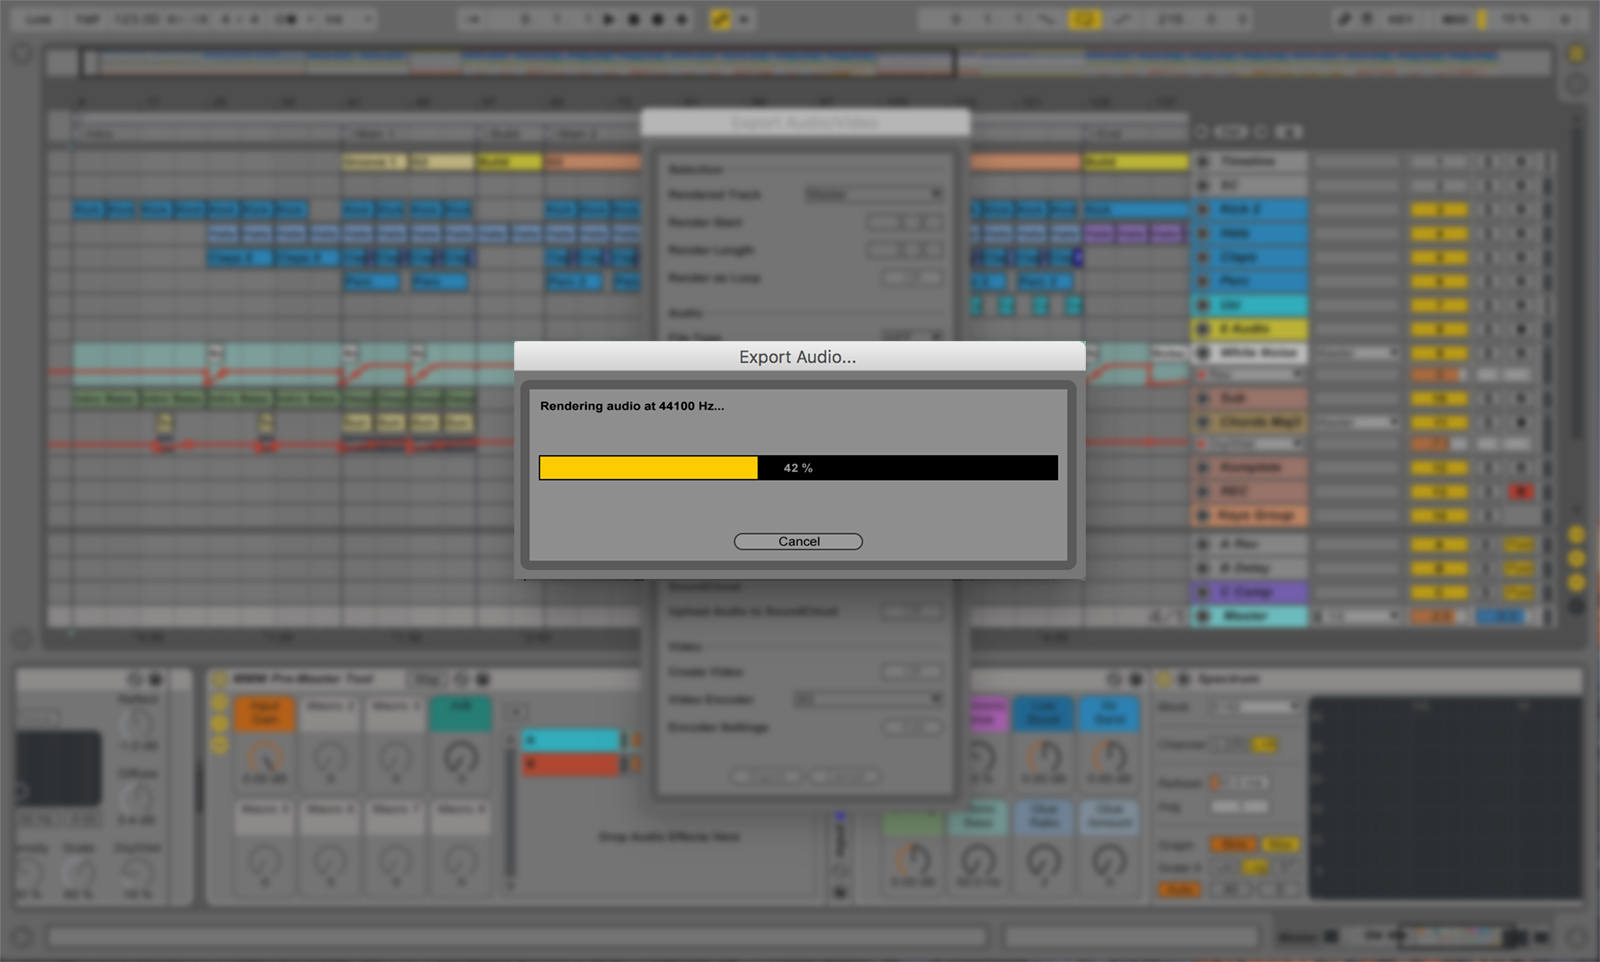
Getting to this point is the goal ~ crossing the finish line, exporting your finished music.

Since the main sections of your track are already there, we’re going to starting at the beginning and listen closely to each part of your arrangement.
1. Loop 4-8 bars at a time – mainly rely on your ears and listen. You’ll quickly hear if something stands out and needs to be adjusted, or removed. After running through each section, continue doing this every 8 bars or so.
2. Give your ears a break. After 5-10 minutes of active listening stop the music for at least 20 seconds. Our ears get tired easily and right now we need to stay sharp to make the right corrections to our track.

We’re in the last phase of finishing your project now. Here’s how to make sure your track has all the right elements to be interesting and keep the listener’s attention.

• Notice how sounds come in and out. Some sounds come in abruptly, to cause a surprise, while others will come in slowly (fade-in). Alternating how sounds come in is a great way to keep interest.
• Percussion sequence. Is the way sounds are programmed making any sense or can be improved? A good way is to put one or multiple channels in solo and listen carefully… Are you making a coherent phrase?
• Transitions. Are the transitions between each section supporting the evolution of the main idea? Some transitions will be used to announce incoming sounds or the exit of others. Some transition can also be used to build or release tension. Be aware of the effect of both.
• Don’t overdo it. The biggest issue when working in micro-mode is the danger to over listen to your idea and changing too many things, nearly starting all over.

One more important thing – once you have about the song completely revised, I would greatly encourage you to take a macro, global view of the project. These are the points you want to look for:
Perspective 1/3. Zoom out of the window so you can see the song entirely in your arranger. You should be able to see clearly 3 distinct sections. If not, you might want to look into that. What defines each sections? They should have different intensities, and a number of sounds playing.
Why is this important? Your song is a story and it needs the right timing and elements our ears to come to expect. The most dramatic reason though is, each section should showcase a strong moment. Having 3 of them is a good formula to make a song interesting and memorable, but any more than that and you’ll likely take away the power the previous peaks.

Sequence of how sounds come in, out. Keep a logical and fluid transition of how sounds come in and out. Your percussion parts can come in a certain way, then you can repeat it later. Don’t showcase all your sounds all at once, or you’ll burn your idea out pretty quickly.
Repeating ideas. As seen in the lego post, if some sounds happen in a certain sequence, try to keep that until the end for coherence.

For any musician or producer, not finishing your projects can be really frustrating, but it happens to the best of us.

This post is all about sharing my own personal way of starting and completing projects so that you can confidently go into your next session with a game plan I know will keep you on track to get things done.

As always let me know if you have any suggestions or questions about this post and leave a comment below and tell me what projects you are excited to complete.

JP

SEE ALSO : Pointers To Define Your Sound

Reverb Tips to Boost Your Creativity

This isn’t just another article explaining what reverb is and what it does. If you dig a bit, you’ll find all the technical facts and information you need out there already. So instead, I’ll focus here on the little tips and tricks I use daily that you can try right away. And I’ll invite you to reflect on what reverb can do for you and your music.

Why?

Because reverb’s primary role is to add depth to a song.

I’m talking in the technical sense, but also in the way its 3D-like effect can give your song a soul. No kiddin’. Have you ever watched a movie where one of the characters is lost in thought or reliving a moment? Very often, the voice will be drowned in reverb to evoke an internal feeling, something deep and subconscious.

There could be a correlation between the reverb effect and the womb, perhaps, where it emulates the way a fetus hears the world, as if under water. Whatever the reason, the sound of reverb in our culture pretty much always conveys something hidden or profound, and using it in your music can change things dramatically.

Pros. Adds mysticism, warmth, and smoothness to percussion and melodies. Reverb can round out transients and stretch the release of sounds, which can also add dimension and that wet feeling you hear sometimes in songs.

Cons. Some people prefer a dry aesthetic in their music, which can also work very well. If the music is played in a warehouse or other large venue, adding reverb could make it sound more imprecise or confusing, perhaps removing a certain punch. This is why reverb should be used with care if you’re interested in producing dance-friendly music.

There are different types of reverbs, and each one has different uses. Here are some explorative avenues for you to try. They’re suggestions to get you started, but you could end up taking them in a completely different direction. I always encourage people to test out a few things, and most especially, to try whatever is contraindicated or not advised. This is the best way to figure out for yourself why it’s not recommended, but you might also find that you can pull something out of it.

My favourite tips are:

  • Convolution exploration. Convolution plugins extract the reverb from a song so you can apply the resulting image to other sounds. In theory, a good image is a white noise spread in a room, so that its impulse can be analyzed. You don’t have to respect this though. You can basically drop any short or long sample to see how the plugin will analyze its impulse. You can extract a sound from an old pop song, movies, your iPhone, or anything else you can think of. You can even drop a pad with no reverb and see what it does. Sometimes it gives you weird results. Same if you use a percussive loop, since it has a rhythmic impulse.
  • Panning reverb. Using multiple send channels or busses, you can combine multiple reverbs to create your own personal desired space. Pan one to the right and another to the left. Adjust the pre-delay and decay, and maybe change one to a hall and the other to a plate. See what happens.
  • Reverb EQing. Abbey Road made this popular with their trademark sound, which added an EQ before a reverb. Generations later, reverb plugins now often come with their own integrated EQ. One tip to increase precision is to cut off anything coming in the reverb for percussion and pads as it tames any edgy or problematic frequencies.
  • Adding subtle automation. A reverb that constantly moves will feel alive. You can use automation on the decay and pre-delay. These two usually add a lot of space. They will give the weird impression of being in a room that’s shrinking or expanding, as if you’re moving around it with the walls getting closer and further away. Used well, it can be very psychedelic.
  • Astronaut in spaceMultiband reverb. If you know how to split your signal’s in-frequency ranges, you could use a deeper reverb for your mids and a longer one for the highs. That can also be done with send channels, again where one filters out highs and the other filters out mids. This one is particularly effective with percussions, and it can add a really nice shimmering effect to them.
  • Resampling reverbs for convolution. Send a clap in your reverb experiment and resample it. That sample can then be dropped in the convolution. This will usually reshape the sound, giving you more freedom than managing multiple reverb plugins at once (unless you have a good controller).
  • Gates and envelopes. These are a lot of fun on a reverb, as they can create weird reactions. Imagine a strong impulse that drops abruptly, or one that shapes in a off-rhythmic. They can add a nice texture to pads.
  • Infinite reverbs. There are a few reverbs that have this feature. If so, you can send any sound you like through them and it can become a pad or smooth synth. If you resample it yourself, it can be dropped into a sampler where you can play notes from it.
  • Reverb + Chorus = killer combo. Just try it, no questions.

As a gift, I made these two convolution images for you to use in your music. Should work very well in dub techno as well.

I hope this helps. Please share any ideas or tips you come up with!


SEE ALSO : Intuition for decisions in music production

Experimental music

It was suggested to me to write about experimental music. The topic is extremely broad, and even when limited to electronic music production it could make for the subject of an entire blog all by itself. After a long while spent thinking about how best to approach it, I realized that for many producers, it is something that is largely misunderstood. Let’s try to clarify what we mean by experimental music, so you can see how useful it could be for your creative development.

First off, defining experimental music can be difficult, and it’s often a matter of perspective. What’s experimental for one person might seem fairly conventional for others. No surprises here. One way to understand it is “music made with the intention of centering its content around an experience (instead of trying to replicate an existing model or genre).”  An experimental approach is one that chases a bunch of “what ifs…”, and that takes you out of your comfort zones to break free of your usual routine of sound making.

I saw a nice video with Deadmau5, who I’m not a fan of personally, though I respect him very much for what he has done. In it, he was explaining how his life is all about trying things just to see what will happen. A lot of producers seem to want results quickly, and will try to emulate recipes, use presets, or buy samples to get to where they want. The problem is that this lack of experimentation will only slow their artistic development and pursuit of a personal sound signature.

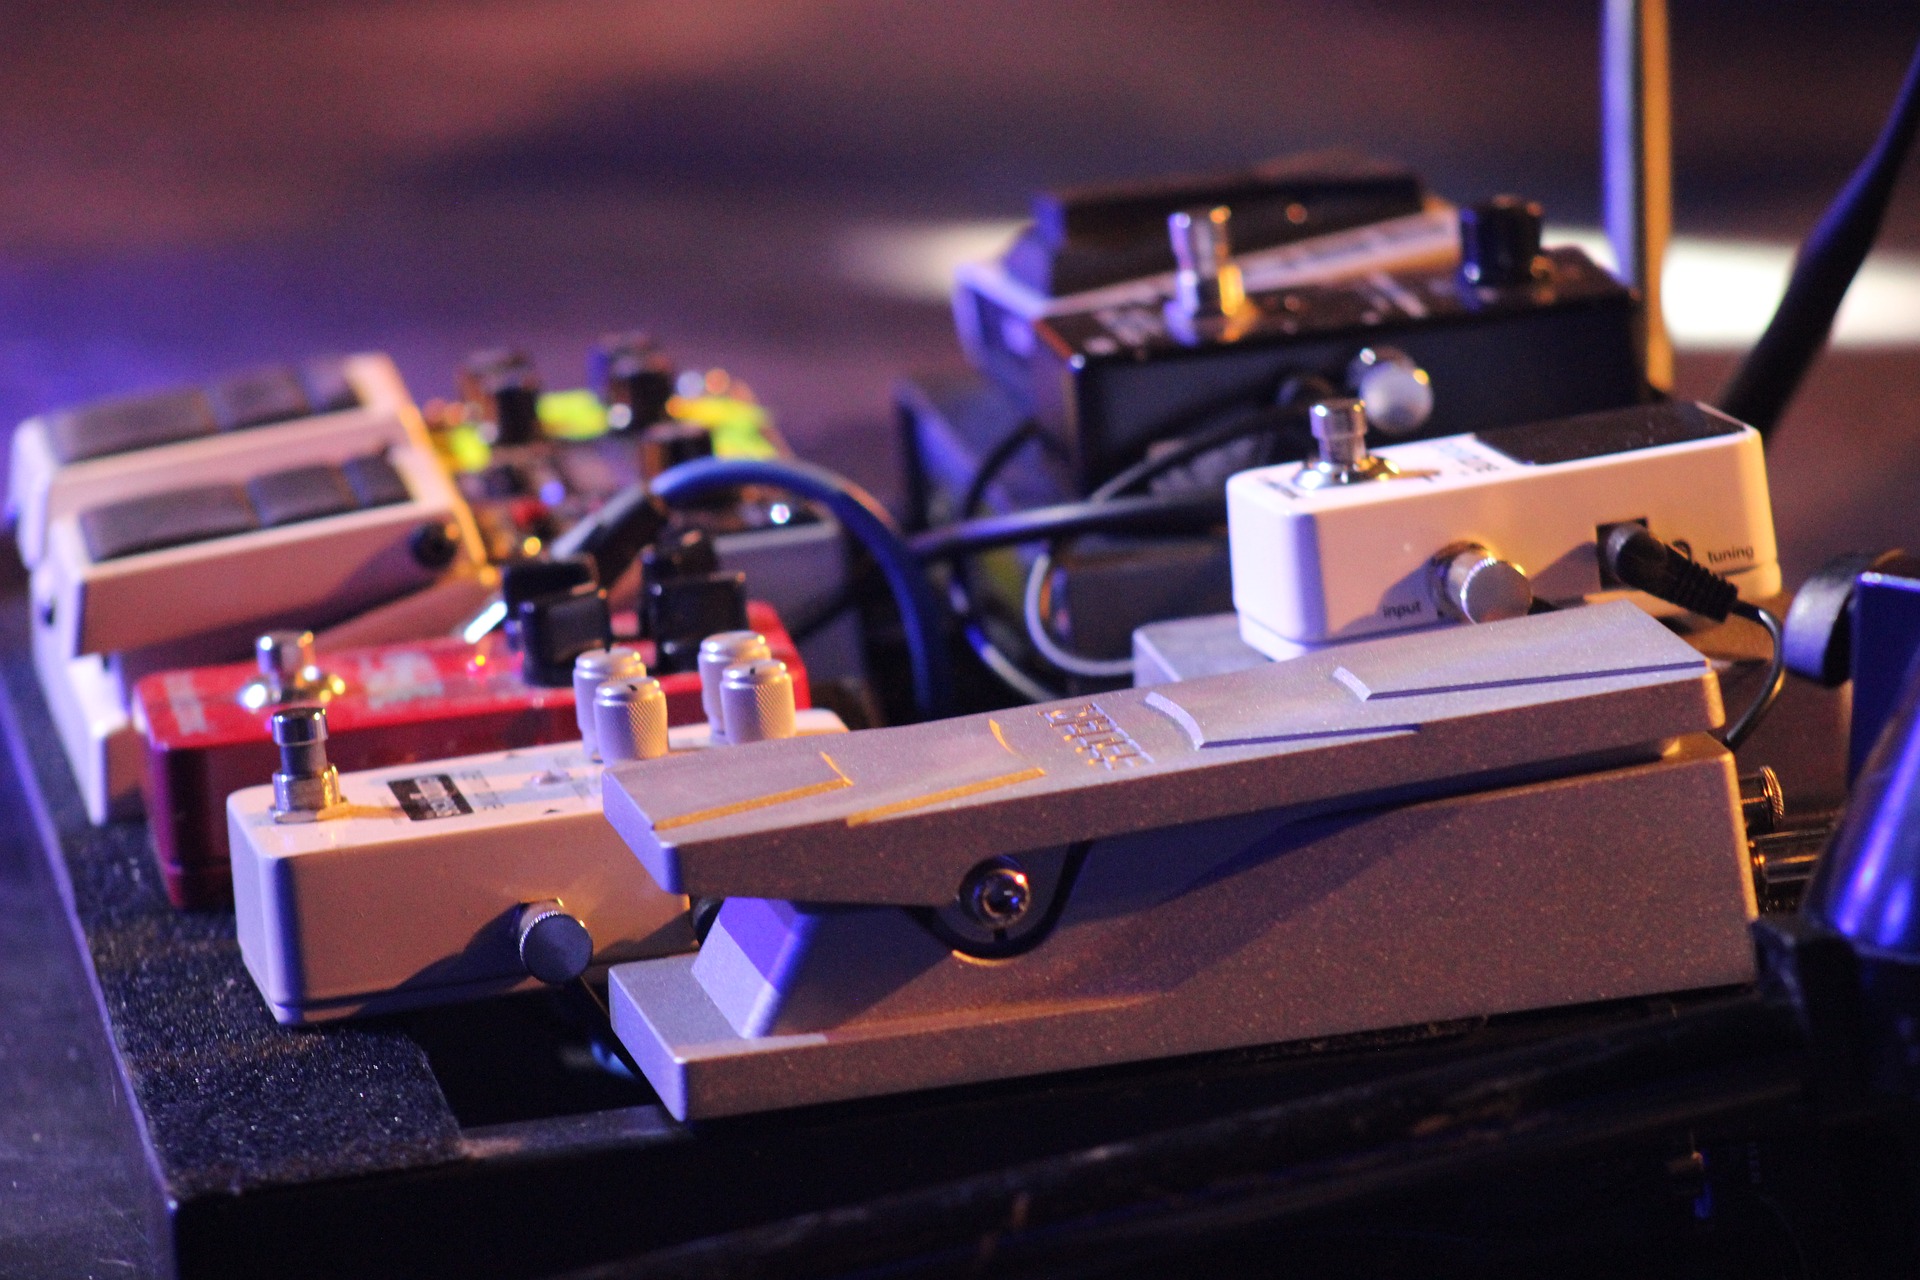
guitar pedals, experimental musicSo is experimental music nothing but pure noise and nonsensical buzzes and beeps? Not necessarily. There doesn’t have to be a lack of structure unless you decide that the structure is what you’re experimenting with. Other areas you can experiment with include:

  • Sound design.
  • Mixing technique exploration.
  • Arrangement reorganization.
  • Unusual routing.
  • Unusual effect uses.

The most rewarding part about experimental music is how you’ll end up somewhere you never thought you would go. Along the way, you’ll learn something new and provide the listener with a fresh experience. Trying to sound like nothing else can become one of the key motivations, but the intention itself is what matters most.


The audience watching the concert on stage.

One of the main reasons experimental music has received a lot of recognition in the last decade is that it’s become an ever-growing nest for new ideas. Some of the now normal tricks found in commercial music initially sprouted from experimental grounds. At some point we completely forgot where it came from. Even electronic music itself grew out of a long journey of trials and errors that lasted nearly 50 years. I mean, back in the 80s, the hypnotic techno we’re so used to today was considered very weird…


So with all that being said, let’s talk about some pointers for how to start your very own experiments.

  1. Create a new project with the sole intention of it being an experiment. I might have just heard you say “duh!”, but having a firm intention before setting to work really focuses your mind on a specific task. Why bother stressing this? Because one of the most crucial parts of making experimental music is learning to let go of any expectations you had beforehand. It’s one of those activities where the journey is more important than the destination. This is a tough one for music producers, because the usual goal is to arrive at the most polished song possible. Let’s try to change our mentality for this exercise.
  2. Decide your area of experimentation. Consult the list above or come up with your own personal focus. I find that listening to music that you don’t really understand is a good source of inspiration. You can test the concept by replicating one sound in that song.
  3. Record the tweaks as you work. This is something guys like Ricardo Villalobos do. He’ll record 2 hours of himself tweaking the sounds. It will become pure chaos at some point, but he’ll edit out the parts he likes the most. The great thing about Ableton Live is that it will also record your knob and fader movements, which can then be edited.
  4. Give yourself a deadline. A good way to leave material in its raw form is to impose a deadline on yourself, and then just bounce the track and declare it done, with all its strengths and flaws. Accepting a track with its imperfections is a great way to move beyond what you initially thought of as a good result. If mistakes can inspire you for the following track, it can actually influence your listeners too!

Once you have a bunch of these experiences, they’re also really cool to recycle into other tracks if you haven’t released them or use the experiment to develop new sounds in new projects.

And please share your tracks with me. I always love seeing what readers come up with!

SEE ALSO : Creating Beauty Out of Ugly Sounds

Resistances and Procrastination

I like to believe that creating music goes beyond simple clicking and assembling. The whole process of making music has always had, to me, a very deep feeling of inner exploration. It’s the same when it Screen Shot 2016-01-03 at 13.27.58comes to listening. Apparently, music has this effect on about 60% of the population, so not everyone gets the same chills from listening to music. But if you do get a sensation like this, then you’ll try hard to get more of it.

Now, when it comes to making music, that honeymoon phase after you first discover how to make your own sounds can be an exciting moment. But for so many, soon after, a sense of frustration begins to set in. It can come from:

  • Not being able to get things to sound quite the way you imagined them.
  • Things seeming to take an awful lot of time to get done.
  • You feeling embarrassed by the sound of something you made.

The next thing you know, you’ll start procrastinating. You’ll feel like there’s some sort of inner balance to achieve each time you’re about to make music. As David Lynch points out in the clip below, a lot of artists think that suffering is a necessary part of creativity, when in fact any kind of suffering just cramps up the creative flow. In my view, this is not a healthy approach to getting new ideas.

So how do you avoid suffering?

That’s obviously a very difficult philosophical question to answer, though it’s clear that relying on substances is not the way to go. They might do some good in the short term, but you don’t want to develop that as a habit. To me, the essential question to ask is existential: why are you making music in the first place?

If the first answer that comes to your head is anything more than simply enjoying yourself, then you’re setting yourself up to feel resistances. When I say “resistances,” I mean those frustrations or blockages you might experience once you sit down and try to make music. You might feel like you’re wasting your time, or be tempted to just stop and play video games instead. You might conjure any range of excuses to plunge into procrastination.

The solution to this is to build up your appetite for music-making.

Here are some tips for doing this:

  • If you’re feeling uneasy or anxious, listen to your body and move away. Do whatever you need to do to regain your calm and motivation.
  • Discover your creative triggers. These can be as simple as listening to music you love, enjoying a rich cup of coffee, or going for a walk. The most important thing is to keep track of when you feel creative, and what triggered it. The more you know about your creative triggers, the more you can fuel your creativity when you’re lacking in energy or ideas.
  • guy-walkGo to your creative place. As Lynch said, if you can go to a place that inspires you, such as to nature or on a trip, then go there if you can.
  • Apply a creative fast. That’s right. If you want to be hungry, you need to empty out first. This means withdrawing from making music, or if possible, from listening to any music in the genre you produce. Observe your musical fast strictly, until you feel that tingling sensation return that tells you you need to make music again.
  • Discover your creative downers. This is the opposite of the above point about your creative triggers. Have you noticed when you feel creatively down or uninspired to make music? In my case, as weird as this may seem, I have a physical downer around 4PM every day, when I know I need to stop and drink tea. What’s yours?

I hope this helps!

SEE ALSO :  The Rule Of 10: Production in Rotation for Big Results 

Deconstructing A Reference Track

Note: This article is partly related to the Non-Linear Music Production technique explained in my previous post. It offers a complementary method for finding inspiration in your workflow.

Now that you’ve been exposed to my non-linear approach to music production, you know that the early stages of production are focused on building ideas and content. Once that has been attacked, you can start looking into creating a temporary structure for a loop. If you’ve also checked out my One Loop Per Day challenge on YouTube, then you’ll see that the following step is to build a storyline around the idea.

One of the best and fastest ways is to devote your time to carefully analyzing the work of artists you admire. This entails actively analyzing and interpreting others’ work within your DAW so as to carve out a path that you can easily implement in your own production.

But before you dive into your sources of influence and follow the process outlined below, I’d like you to consider this famous quote:

“Art is theft” – Pablo Picasso


Step 1: Finding Your Track

  • Pick a track that you really like and whose arrangements you would like to more or less imitate.
  • Make sure that the track is un-warped so that it doesn’t sync with your DAW’s BPM, and so that it’s unaffected by any transient markers you might have set.
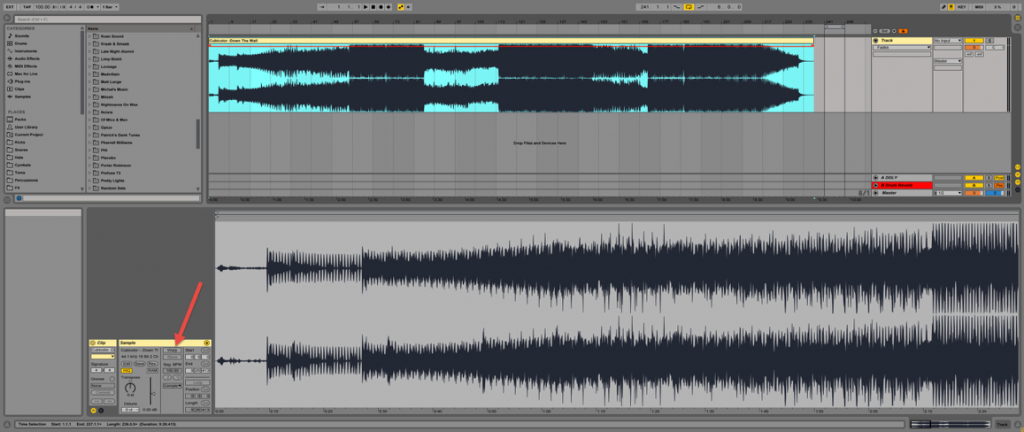
  • If your track is in Ableton’s Session View, drag it into the Arrangement View by hovering over the 3 vertical lines at the top-right corner of your screen, or by simply pressing the tab key.


Deconstructing a reference track Step 1: Find your track


Step 2: Correcting Grid Settings

  • In order to properly match the grid with your track’s tempo so that you can use the waveform to spot what happens at what time, you need to find the BPM. You can do this in many ways, by:
    • Finding your track on Beatport. The track information should include its key and BPM.ableton, arrangements
    • Accessing the track’s metadata by right-clicking on it in Windows and then clicking on “Properties>Details” (if it’s available).
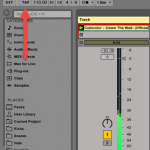
    • Finding the BPM on your own using Ableton’s Tempo Tap.
      • Make sure to tap “tempo” in the Session View or else it will fall out of sync in the Arrangement View.
    • Type in the appropriate BPM.
      • Manually adjust the track with Ableton’s grid so that the sections of your track begin on beat.


Deconstructing a reference track in Ableton, Step 2: Correcting Beat Grid


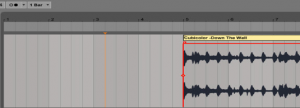
  • Picture4You will notice this will help you to analyze your track’s arrangements by determining at which bar a section will start.e.g.: The breakdown starts at 80 bars.
    • Feel free to cut out any elements such as silence,noise, or “pre-intros” before the actual intro, as in my example above.


Step 3: Placing Markers and Locators

  • If your sections are starting on beat and are properly aligned with Ableton’s grid, this is where you will be able to start learning how tracks are arranged.
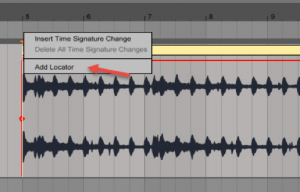
  • Listen to the track a couple of times, and marPicture5k its waveform with appropriate section locators. To do this:
    • Right-click in the Scrub Area.
    • Click on “Add Locator.”
  • Mark all relevant sections with locators throughout the whole song. It should look like this:
    • Note that you can label your sections however you wish, depending on the style of music you’re writing. You don’t need to call a section a chorus, for example, if you just want to call it A or B.


Deconstructing a reference track, Step 3: Placing Locators


Step 4: Analyzing

Now for the important part…

  • Pull out Ableton’s Loop Brace in the Scrub Area above the track’s waveform, and stretch it from the beginning of a musical section to its end (from verse to chorus).
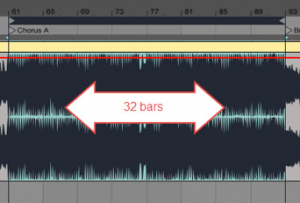
  • Count the amount of bars there are within that section by subtracting the last bar of the section from its first.
    • Example: If your section starts at 61 and ends at 93, do 93-61. That’s 32 bars.
  • Count the amount of bars for each section and you’ll start to notice when new elements emerge: sections and themes begin and end every 8 to 32 bars. That’s just how dance music works.
  • For example:In dance music, sections begin and end every 8 to 32 bars.
    • Everything works in multiples of 4.
    • You won’t hear a new section begin on bar 5 unless you’re not writing in 4/4.
  • Once you analyze how many bars are within a section,it becomes easy to understand how long your instrumental arrangements should be and where to place them in your own track.
    • Example: “My reference track has a chorus that lasts 16 bars. It also has a pad for that entire section. I can apply this to my own productions by placing a pad in my chorus for 16 bars only and making sure that it doesn’t overlap with the bridge.”


Step 5: Taking Notes

Once you map the structure of the track with locators, it’s important to take note of all the musical elements that come into play for each section. This is how you’ll get to understand what to place and when within the sections of your own track.

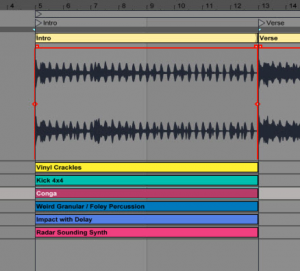
  • You can take notes down on a piece of paper, or even simpler, directly into Ableton’s clips. Here’s how:
    • Split the waveform into multiple clips by clicking on it and pressing [CTRL+E/CMD+E], or right-clicking on it and then selecting “Split.”
    • Once you’ve split the waveform into multiple clips, write down the most important elements for each section.
    • Then right-click on the Ableton clip and select “Edit info text.”
  • For the build-up section, you can write things like “white noise sweeps, risers, automated filter cut-off, percussion repeating faster and faster,” etc.

In Ableton, you can save notes directly in the clips


Bonus Tip: Creating Ghost MIDI Clips

The last trick I want to show you for deconstructing your Bonus Tip: Creating Ghost MIDI Clipsreference tracks element by element is to create ghost MIDI clips for every instrument. This is the best way to learn from other people’s tracks, because it will allow you to break them down layer by layer.

  • Create MIDI channels for every instrument you hear in a section, and label them.
  • Make sure there’s nothing in them.

Using this method, you can even go as far as deleting your chosen reference track and just filling in the MIDI skeleton with your own synths, pads, drums, effects and more! You’ll have the same arrangements as the artist you chose to mimic, but it will be your sound!

SEE ALSO :  Where to Get Fresh New Ideas for Tracks

The Day I Refused Exclusivity to a Label

I don’t always talk about things that happened in my “career.” Since this is a blog though, I thought it would be fun and instructive to share some of the different decisions I had to face, and the consequences of each of them. I have a bunch of fun stories going back to 1998, and some might interest you.

If you haven’t read my bio, I can tell you that I early on took out the standard line all artists have, where they say they’ve been into music from an early age. Instead, I will point you to 1998, to the year where I created my alias, Pheek. What really ignited the project was a performance by Richie Hawtin, who made a rare live show (back then) as Plastikman/Concept:96. It was amazing!

That inspiration was critical in my development. It took me 5 years to figure out where I wanted to go and for me to feel confident enough to send a demo to Rich, which I finally did around 2003. He loved it, and he asked me for more music for a release. What followed was one of the most creative moments of my life: I made and sent him 5 CDs full of music over a span of 2 years. He finally picked one track, “Le Plan B,” which was released on the first Minimize to Maximize compilation, on Minus.

That was a big deal for me. Well, not just for me, but for everyone in the netlabel scene. You see, in 2005, there was no Beatport, selling MP3s was a bit of a weird concept, and people releasing on netlabels were seen as outsiders, even nerds. It was one of the first times that one of the guys from the community graduated to a big label like Hawtin’s Minus. Almost at the same time, there were other artists that followed, and netlabels became more and more recognized as a source for quality music.

I wanted to stay a free artist so I could pursue my own label Archipel, which I launched in 2004.I had my own label, Archipel, that I had founded in 2004 and that I wanted to pursue. There was no doubt that a release on Minus could only mean a great push for my personal projects. I started touring more, and soon there came a big milestone for my career that I still think about often. The guys at Minus offered me exclusivity, meaning that Pheek could only appear on their label, which would have given a huge boost to my career.

I refused. Yeah, you read right. I said,


“No, I don’t think I can see myself being exclusive, but maybe under another alias?”


To be honest, when I think of that day every now and then, I wonder what would have happened if I’d said yes. It was around that time that Minus was exclusively signing big names like Barem, Gaiser, Troy Pierce, Heartthrob and others. If I’d said yes, I think I could have pretty much become someone else entirely than the person I am today. But in a way, I have no regrets.

One thing to keep in mind is that it’s hard to achieve alone or with friends what an established label and group can do for you. You can build from scratch, but it will take a long time to get things to the same level. I released for labels like Sushitech and Leftroom in their early days, and I watched them grow as they became what they are now. I’m proud do say that I was a part of it at their beginnings.

If I decided to work with other labels, it was because I was producing a lot of tracks and felt like I wanted to tap into different networks and reach out to people I liked, even if that was the more difficult path.

There are two types of artists out there:

  • The ones who want to work with you for the long term. Those are the ones you connect with intellectually, and you love each other’s musical output. The connection is real and both parties feel it.
  • Then there are others who you only want to work with in the short term. Both labels and artists can qualify. Unless there’s drama, if the arrangement ends organically, then it had to be this way.


The reason labels want exclusivity is to get a return on their investment (ROI) by farming their own artists. The constantly changing branding is risky and tiring for labels. If the sound constantly changes, it can be an irritant for fans too.

I hope this helps you understand the complexities of label exclusivity from another perspective.