Tag Archive for: mixdown

How To Mix A Track As You Arrange


One question I get a lot when I teach production is, “Should I start mixing as I work on the track?” There isn’t a precise answer to that as each song is different. I will say though, I do start working on the mix in the beginning, but it isn’t necessarily in the way that people would think. 


There are 3 things I look into when it comes to making sure my mix is right, from the start.


  1. Gain staging. This is something I cover in mixing tutorials and workshops but it’s mostly about normalizing. You want your input (sample, synths) to be close to 0dB. Then you’ll adjust the fader to the level you want (ex. -10dB).
  2. Amplitude hierarchy. Which sound is the leader? That one would be the loudest of your mix for most of the song’s duration. The others will be adjusted in relation to the leader.
  3. Sequencing and negative spacing. This is where the important part is played. Many people struggle with the mixing done at the end of a song’s production because of all the overlapping in the song’s amplitude (volume) and timing. For example, if you need to use side-chaining between the kick and bass, that’s because you didn’t prepare any negative space for the kick to lead. Then you’ll have to carve both frequencies sharing and amplitude.


Proper Sequencing Means A Proper Mix


My motto is that if your sequencing is done properly, you won’t have much to juggle with once in the mixing stage. You basically don’t want the sounds to overlap so much so you won’t have to carve into masking issues.


When I get a song for mastering, one of the main tasks I have to do is adjust the loudness. If the gain staging is poor, then I need to boost it much to reach the standard loudness. If I need to boost the loudness, this means any sound that is overlapping will be squashed and merged with others, killing all the precision an airy mix would have, creating a muddy and lifeless master.


Now some sounds can share the same position in sequencing, such as how, in techno or house music, kicks, claps and hats will shuffle around. But as you know, they are not in the same frequency areas. Kicks will be in the lows, claps in the middle, and hats in the highs. Therefore there is space in the spectrum for all sounds to cohabit. The claps’ transients can also accentuate the kicks, giving them more punch. 


(H2 Tag – Make sure to adjust this on WordPress) Pay Attention To Dynamic Range

That said, those sounds will have more punch if you have control of their length. Dynamic range accentuates punch and precision. What we refer to as dynamic range is the difference between the loudest peak and the lowest part. If you insert negative space (silence), your sounds will hit harder in theory.


This means reverb, delays, and background noises can kill the dynamic range as they will take some space out of the noise floor. Adding too much will make a song sloppy and muddy.


When you have this in mind, you’ll start by picking sounds and adjusting their length, then normalize them (eg. bring them near 0dB). 


Be Strategic With Your Voicing


When it comes to creating the main idea of a song, we will refer to the sounds as voices. You’ll make your life easier by sticking to 4 maximum.


One voice can be a synth or an instrument. If you add layers to it, then it’s still one voice. But if you add a second instrument that plays different notes at different times, it will be a second voice. So four of them make it quite busy.


Space In The Mix


Amplitude wise, we know the levels must differ, but panning and stereo positioning can also make a difference. You want to keep in mind that you will try to avoid stereo overlapping as well but in terms of amplitude, if two sounds are fighting, you can pan them differently so then you have space, and clarity.


Again, when it comes to amplitude, you can cut some frequency based so that some low-end or mid-range don’t interfere. This is why EQs that are passive, such as Pultecs or 3-4 band EQs come in handy. They’ll let you adjust a range of frequencies without changing the whole spectrum.


In the end, I invite you to consider how you sequence your music with care and I believe your mix will be way easier.

Mid Side Processing Explained

Often when I listen to tracks in my coaching group, I notice that the mid/side processing is often really off. Not having a solid M/S mix makes mixes sound thin, and muddy, rather than expansive and crisp. It’s often the M/S that is the make or break between an ok mix and a radiant one. Therefore, it felt prudent to write an article on what mid/side processing is, and how producers can have it done properly in the mix. Therefore, without further ado, here is Mid / Side processing, explained. 


What Is Mid/Side Processing? 

So what is Mid/Side processing? Basically, if you want a wide-sounding mix, you’re going to have to concentrate on mid/side processing. Often these sort of mixes sound “better” to the listener, and allow the producer to throw more sounds in their mix, without it sounding cluttered. While a wide-sounding mix can be accomplished through a bunch of different panning and stereo processes, mid/side is a strategy that can really dial that in, and create a spatial mix.


Mid in Mid/Side Processing, Explained

The “mid” part of the mid/side process is basically mono. It’s the sound(s) that sits in the center of the mix. Kick drums, snares, melodies between 200 – 500hz (like a pad), and any other “static” sounds can, and often should be placed in mid. Sure, there are artistic exceptions, but this is a good rule of thumb. 

Also, bass below 100hz. This is best practice. Why? If you print a vinyl, and if the bass is in stereo, the needle will jump. Also, in clubs, they do serial summing, where anything under 100 will be summed into 1 mono signal, but if your bass is in stereo, and it’s summed, it can quiet phased parts of the mix.


Side in Mid/Side Processing, Explained

The side-channel is the edges of the mix. Note: This is not to be confused with panning, where you can move sounds specifically into the left or right stereo field. Side processing is strictly hard to the right, or hard to the left, and is technically a mono signal.

When the side’s amplitude is increased, the listener hears a wider, fuller sound. A good way of using it is to increase the width of leads, or strategically move a percussion bus to the sides of a mix to create a fuller listening experience.

You can even get creative with this, and widen parts of the mix at different intervals in the song. For instance, whenever the chorus comes in, you can widen the leads on it, to give it a more present feeling, allowing it to become more expressive to the listener.

Pads are great for the sides as well, since it’s audio that “hugs” you, in a way. Other things that work well on the side are background noises, like field recordings, or weird ambiance -, that stuff works well on the side, it’s not present. Only present stuff should be in the middle. All decorative percussion can technically be on the side – swingy hi-hats, bells and whistles.


Side Processing May Cause  Phasing

Once mid/side processing is explained to many newbies, often they just go out and start messing around with it. However, side processing can reveal one of electronic music’s most dastardly foes: phasing. Basically what happens with phasing is when you have two of the same sound, on opposite sides of the stereo field, they cancel each other out. That means, we have to be judicious with the sounds we put on the sides. Generally, “less is more” is a good approach when dealing with phasing since there are fewer chances of frequencies canceling each other out. 


How To Correct Phasing

If you want to correct phasing while keeping them in stereo, the trick is to have one of the sounds reveal itself immediately after the other, so they don’t phase. This can be done with a very short delay. When dialed in, the sound will perceptually happen at the same time, but be delayed ever so slightly, allowing the other sound to peek behind the other one and be heard.

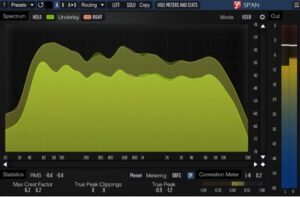
A more immediate, definitive way to correct phasing is to make the sound more mono. There is a tool you can use, called SPAN. This plugin allows you to see in yellow, mono, and in red, side signal. When the red goes beyond the yellow, you have to reduce. The tool you use to fix this is the utility plugin, native to Ableton. You can control the width in this. If you want it more mono, you just adjust the width down, and then turn the volume up. 

mid side processing can be explained well with the VST SPAN. Here's a photo of it.

However, let’s say you have a purely mono signal that you want to add some subtle stereo width to. There are certain effects that can impact this. You can use reverb with little decay (otherwise it will be too loud). 

You can also use a chorus. Eventide made a harmonizer that is beautiful for that. It’s two delays – left and right – and when you play with the delay of each other, it creates a weird signal/shape, and then you can play with the wet/dry to add degrees of stereo. However, if you don’t have the money, you can use the echo delay, and control the left-right, and create a very short delay to create a little more phasing and the width you can play with opening and closing it.


EQing in Mid/Side Mode Is A Must

In my opinion, all EQing should be done in MS mode. Sometimes people hear things that they don’t like in the mix, and if you just cut, you are cutting both the left and the right at the same time. However, sometimes you want a sound to be EQ’d differently, depending on the channel that it’s in.

For instance, let’s say you have a synth in your left channel, and it doesn’t exist as much in your right channel. When placing decorative percussion, there will most likely be a crossover in the panning.

But since the synth is primarily in the left channel, the percussion in the left channel is going to have to be EQ’d different to not conflict with that synth. However, since there is all this open space in the right channel, there is no need to EQ out some of the frequencies, allowing that sound to better express itself.

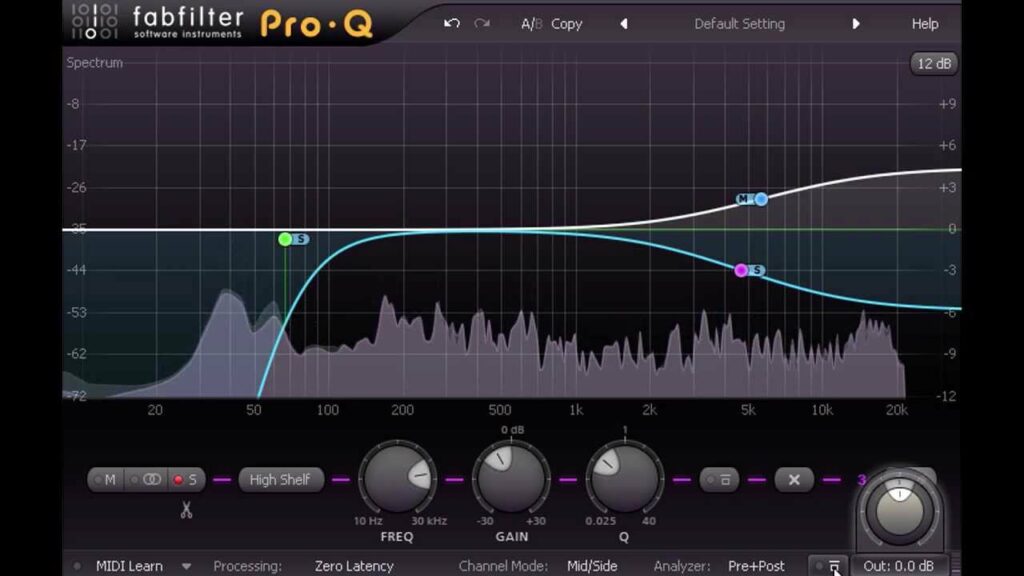
Fabfilter ProQ3 allows you to easily enter MS mode for EQing, and make precise cuts to the sound. If you don’t have ProQ3, you can unlink the left/right in Ableton as well. On EQ 8, there is a mode called stereo, but you can unlink left/right by clicking edit and then selecting left or right. You can also switch it to MS (Mid/Side), where you can edit either the mid or the side or you can treat left/right independently. When you do this, your sound feels more organic, because you’re not cutting in one place. 

A photo of ProQ 3 which has a mid/side processing mode.

More Plugins That Impact Width and Phasing:


Panman

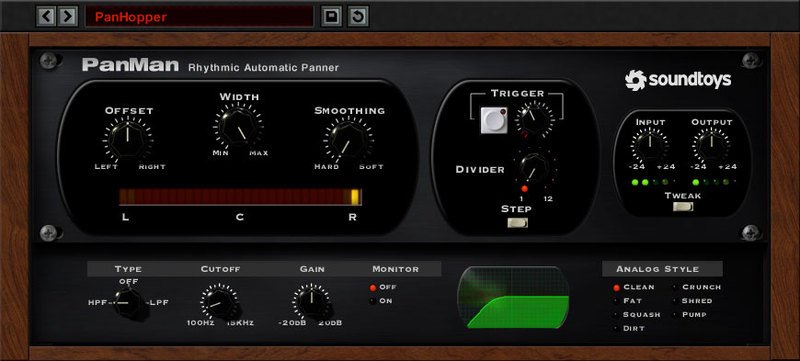
mid side processing explained through the vst Panman. This is a photo of that VST.


PanMan really splits open the possibilities of panning. First and foremost, it’s a hardware emulation, which allows producers to mimic the syle of vintage hardware panning gear. You can also trigger panning if the track hits a certain parameter. The automation allows you to generate complex rhythms and stunning sweets.


Microshift 

This is an image of Microshift, a great plugin for modifying your stereo field

Need some width? Well Microshift’s got width. It provides you 3 separate kinds of stereo widening in just a single button push. It uses a specific algorithm to pitch shift and add delay to your sound, that morphs over time to generate brilliant stereo width. It’s very easy to play around with and can be used to give more flavor to instruments, or create nice blends.


MStereoGenerator

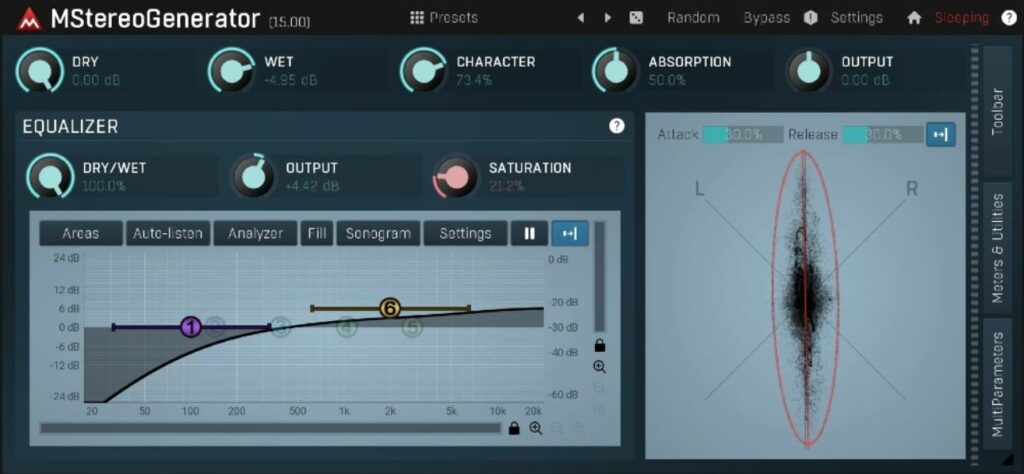
an image of MStereoGenerator, an excellent plugin for stereo imaging

With MStereoGenerator, you can convert mono recordings into stereo (or even surround). MStereoGenerator is a unique natural-sounding mono to stereo (or even surround) expander, which makes your tracks sound wider, stronger and punchier.  It’s especially good for acoustic instruments. 


Panshaper 3 by Cableguys

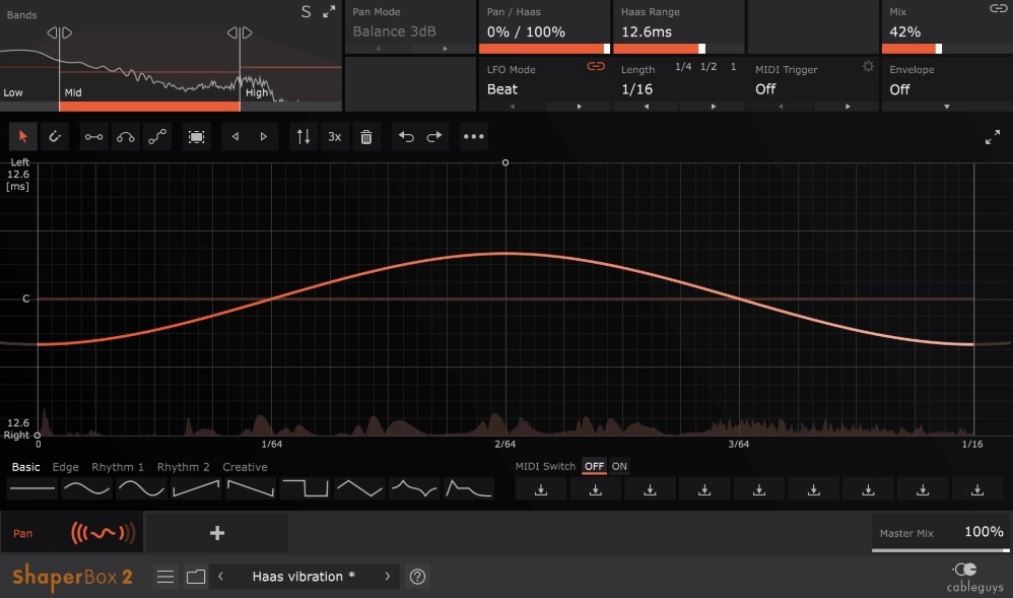
An imagine of Panshaper, which allows you to do crazy stuff with MS Processing and panning.

PanShaper 3 takes control over your stereo field to another dimension. The real-time LFO that can be drawn on every band and the envelope follower allow you to design evolving, dynamic pan patterns and make dialed-in stereo edits in seconds.


Energy Panner

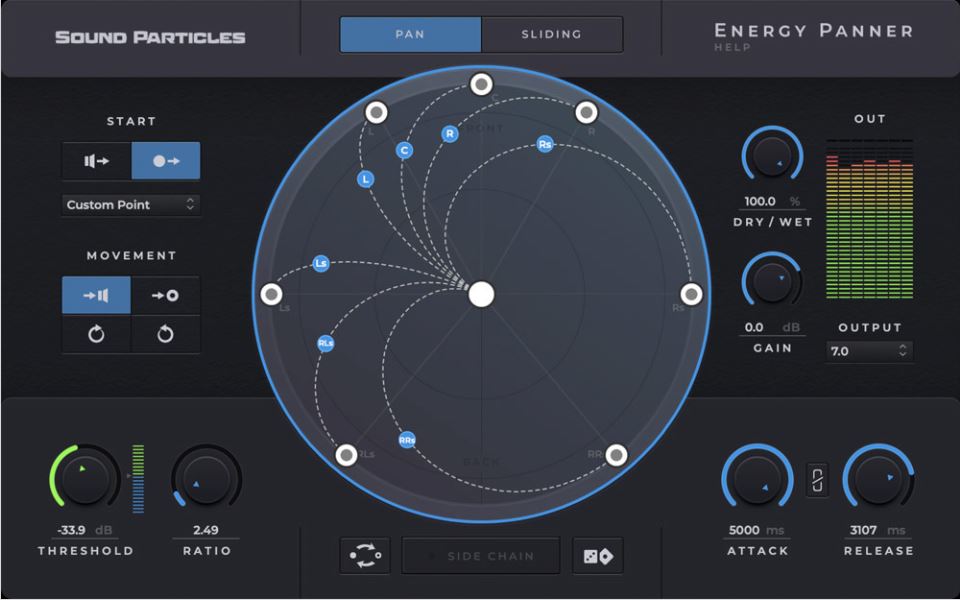
an image of Energypanner which allows for dynamic panning responsiveness to inputs

Energy Panner reacts to the sound intensity by moving in response to it. A drum kit that moves to the beat, synth notes that move on attack, and many other behaviors are possible. Whether it’s stereo or Dolby Atmos, Energy Panner is a plugin you shouldn’t be without.


Width Shaper 2 by Cableguys

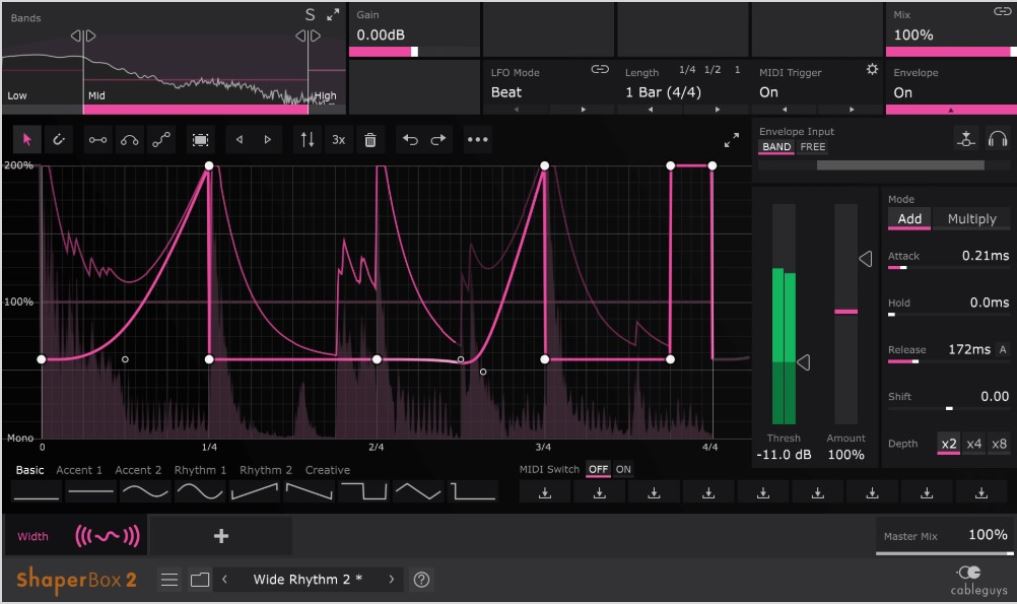
an image of the vst WidthShaper 2 which allows for amazing stereo mid/side processing.

With WidthShaper 2, you can fine-tune your stereo image to the finest detail. With three mid/side stereo adjustment bands, each with its own drawable LFO and envelope follower, you can gain precise control over the sound. It is perfect for sound design, mixing, and mastering, and can be used on single tracks and buses.

Once you have mid/side processing explained to you, you can see there is way more to stereo than just left and right. With M/S EQing you can surgically cut into sounds, and make them fit precisely in a mix. You can expand and retract sounds at different points in your mix, creating those illusionary, almost psychedelic effects in music that are almost inexplicable, since they are best described as space, rather than music.

However, with this power, comes the responsibility of not phasing your sounds out, and destroying the punch of your songs. Keeping in mind space, and how sounds relate to each other is a paramount skill in music production, and often an overlooked aspect.

I understand this can be complicated. If you need coaching or you just want to delegate this process to me, I’m available to help. Check out all of my services here.

How To Mix In Headphones

Not everyone has access to a treated studio, with perfectly placed acoustic padding, bass traps, and calibrated studio monitors whose balance is perfected by professional metering. Many aspiring producers have aspects of this, but ultimately will fall short when it comes to setting up everything perfect, since a well tuned studio is something that professionals charge a lot of money to do correctly. 

Therefore, a lot of my students ask me what they can do instead, since many don’t have thousands of dollars in order to tune their room. The answer is simple – mix in headphones. But should you mix with headphones? There is a lot of chatter online saying that if you mix in headphones, you will screw up the mix, since it’s not an accurate representation of sound in space. They’ll say in a true stereo field, your left and right ears hear both channels, not each in mono. And while this is true, there are plenty of artists, myself included, who do a lot of mixing on headphones, and their productions turn out fine.

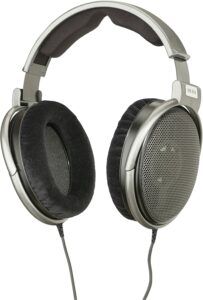
A photo of Sennheiser HD650, which are great to mix in headphones

Sennheiser HD650

A Good Mix In Headphones Starts With Quality Headphones

My first piece of advice is that you need a really good pair of headphones, and you need to get used to them. I’d recommend Sennheiser HD650 on the high end, and for the best budget mixing headphones, I’d recommend Sennheiser HD350BT which are also bluetooth.

Once you get these, or equivalent, don’t start mixing right away, since you have no idea what these headphones truly sound like. Instead, choose 10 or so songs that you really respect, buy the lossless version of them, and listen to them intimately through the headphones. Learn how the kick sits in the mix. Learn how the different layers sidechain when said kick is introduced. How bright are the hi hats? How crisp is the lead? After listening to this set of songs over and over again for a month or so, then you’ll be ready to give it a go on your own stuff. 

Mixing In Headphones Is Like Cooking Authentic Food

Another good tip is to choose songs that have a particularly excellent element. I liken this a lot to eating authentic food. Whenever I visit a new country, I make sure to ask the locals what location has the truest food, and what elements of that food really define the regional cuisine. 

With music, I take a similar approach. For instance, when I started mixing a lot of Romanian techno, it became apparent that the aspect that producers craved the most was the kick. Therefore, if you want an example of a really pretentious kick, a good place to start would be with Romanian techno. It’s like with a food like Mexico’s mole. If you wanted to replicate the best mole, you’d use Oaxacan mole as your reference.


Mix In Headphones At Multiple Volumes

Listen to your mixes at multiple volumes to get a good idea of how it truly fits in the mix. Different levels will expose what’s wrong in the mix pretty accurately. While it may sound good at high intensity, when you listen to it at a low intensity, you may notice that it doesn’t quite fit. In my experience, it’s the low volumes that reveal the most, so if it sounds good, low, and just ok, high, then chances are that the lower volume is the correct one.

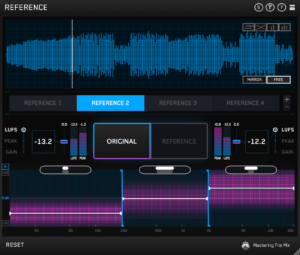
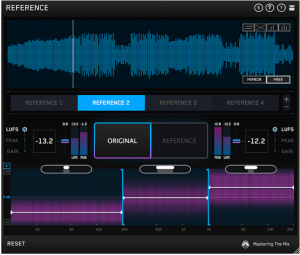
REFERENCE Plugin is great for mix in headphones

REFERENCE plugin

Best Headphone Mixing Software

The best mixing with headphones plugin has to be Mastering The Mix’s REFERENCE.

Ever felt that your mix was not quite comparable to your reference mixes? 

In order to keep you closer than ever to the sound of your favorite music, Mastering The Mix created REFERENCE. It’s packed with powerful features and insights that allow you to get closer to your reference than ever before.

With REFERENCE you can:

  • Compare your master with up to twelve reference tracks, and creating several loops will allow you to quickly compare various sections of your track with a reference track.
  • Match the loudness of your track and the references instantaneously and accurately. This will enable you to make more informed decisions about shaping your sound.
  • Make matching the true peak, loudness, EQ balance, punch, and stereo width of a reference track smoother than ever. 
  • Adds a source plugin called REFSEND to make loudness-matched A/B comparisons.

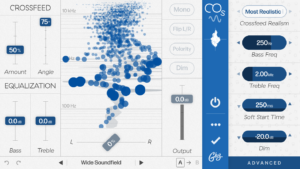
If you want to emulate stereo crossfeed like you’d get on loud speakers, you can also use a VST such as Goodhertz’s CanOpener, which simulates the stereo bleed you would get with loudspeakers. I’ve personally never used a crossfeed emulator, but they do exist.

CanOpener allows you to mix in headphones more accurately

CanOpener

Stereo Is Different In A Headphone Mix

The biggest hurdle to overcome when mixing on headphones is that the stereo field is mono in each can. Especially in electronic music, we tend to have extreme pans, which in headphones can prevent that natural left/right bleed that you get when you listen to a song with both ears from monitors.

To fix this, you can simply tweak left/right panned instrument settings a little but don’t overdo it because this will compromise the loudspeaker performance. Keep in mind that stereo, when heard through loudspeakers, will have a noticeably narrower image than when listened to on headphones.

Another trick is to add just a tiny bit of reverb to up-front exposed sounds (5-10% wet). This allows them to glue themselves together like they would in a natural room.


Judging Low End With Headphone Mixes

Having an idea where the bass sits in the mix is difficult unless you have some serious subs. However, we live in the 21st Century, where Subpacs are a thing. If you’re not familiar with Subpacs, they are essentially wearable subwoofers, where they use your body as a bass transducer. Therefore, they produce all the sensation and feeling of low end, without any of the decibels required to pump it out. Therefore, with a solid set of headphones, and a Subpac, you can get a full frequency experience, and accurately judge where the bass sits in the mix. 

I often prefer using a Subpac to even using a good set of subs, because unless you are in a place where your mixing isn’t going to disturb anyone, having club ready loudspeakers that allow you to feel the bass is usually intenible in most environments. It’s also a faction of the cost.


A Mix In Headphones Reveals The Small Details

The best aspect of mixing in headphones is their precision. Even with a well tuned room, and professional grade monitors, you often miss many of the finer details of a mix, such as hisses, artifacts, unwanted distortion, and clicks/pops. With headphones, these become abundantly clear, allowing you to surgically correct these issues.

On the flip side of this, it allows you to add small details that you wouldn’t otherwise be able to. Let’s say you want that synth to have just a touch of white noise to give it a warmer feel, a mix in headphones allow you to do that with immense clarity.

As you can see, there are many advantages to mixing on headphones. However, nothing truly beats a professional mix. Therefore, if you want it done right, consider going through me. I’ve mixed thousands of songs, all for a very reasonable rate. Your music will last forever, so you may as well have it sound as good as it possibly can, at an affordable price.


Links may contain affiliate offers.


How to balance a mix

In general, I find that there are certain common elements found in mixes I’m sent, and I’d like to share my thoughts on how to balance a mix. If you google “mixdown tips”, you’ll see that mixdowns have been covered in a lot of detail online, but most articles on the topic are geared towards rock music. Since I am dealing with electronic music and DAWs like Ableton, I thought adding my own perspective to help correct and polish different types of mixdowns might be beneficial.

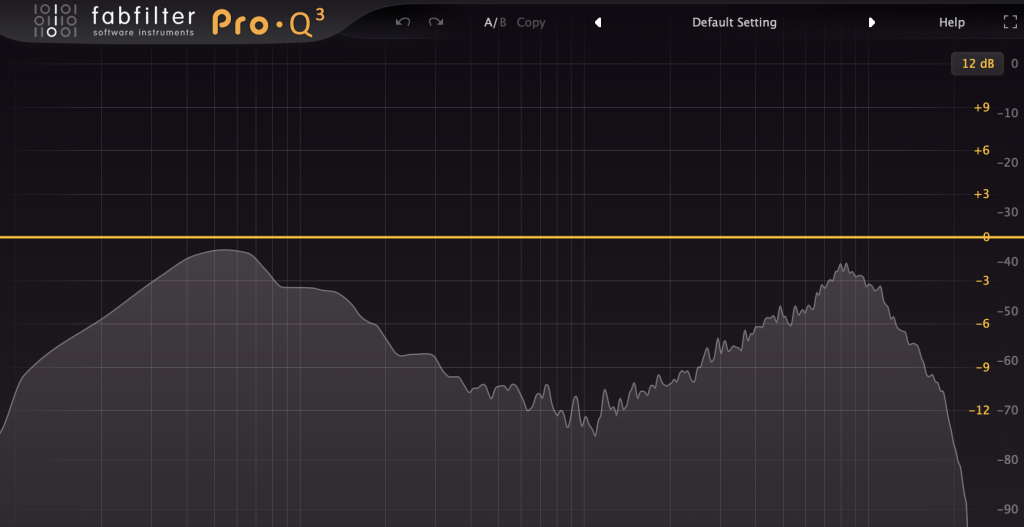
Let’s run through a basic mixing exercise together. To do this, you’ll need an FFT—like SPAN by Voxengo—to analyze the overall frequencies in your mix. The more time you spend checking a frequency analyzer as you work on your mix, the more likely your mix will come out balanced and have fewer mistakes.

Why does a balanced mix matter?

Balanced mixes are important because you don’t really know how clubs’ PAs are EQed until you play on them. If a club has too much low end in its system, then a bass-heavy mix will sound incredibly messy. Yes, a DJ can tweak the mix , but it will never sound the same as if he/she started with a track with a nicely balanced mix.

When people send me music to be mastered, they often forget to double check the frequency analysis of their mix, and sometimes it’s just not balanced.

A balanced mix (or flat, if you prefer) usually has a full range of frequencies more or less hitting 0dB on an FFT reader. You can go -/+3dB around it, but keeping it around 0 is the best. For electronic music, it’s pretty normal to have the low end sticking out by about +3dB though.

Now, the classic mixdown curves I see most are fairly common—they have something appealing about them, but also create downsides with risks.

But I check masters, and they’re often not flat,” you say.

Well yes, that can happen, but the mastering engineer’s job is also to remove unwanted resonances before boosting. It’s always better to have something balanced that won’t need a lot of cutting before the engineer can make the critical decision(s) of boosting a range of frequencies.

That said, let’s examine some common mixdown curves I see that aren’t really balanced, according to how they look in a frequency analyzer.

How to balance a mix according to different types of mix curves

The Smiley Curve

Look at that smiley, similar to a shark I believe.

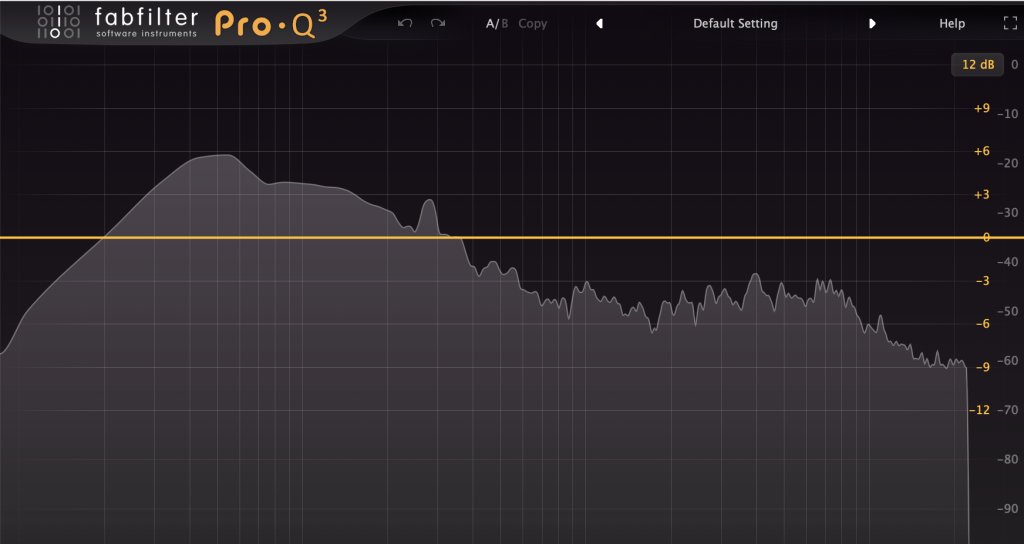
This shape is well-known, and sometimes you’ll see EQ presets with this name—it means the lows and highs are boosted, hence the curve looking a bit like a smile.

The good: First impressions with this curve is that it’s instantly gratifying. Exciting feel, bright and shiny highs, and low end power—pretty much what humans love in music; foundation and excitement.

The bad: A lack of mid-range frequencies can mean that on a large system it feels hollow, confusing, lacks body, presence, and emphasizes hi hats and kicks over everything else, making the main theme of the song hard to discern. Harsh, boosted highs are also quite tiring on the ear and produce listening fatigue.

The fix: If you look at the FFT and your mix is smiley, there are a few ways to fix it. The first, is to manually readjust the elements who have the hot frequencies and turn them down. Highs are mostly likely high-frequency percussion, such as hats, but could be transients or the very upper part of synths and atmospheric elements. If you can spot which sound(s) have that range exaggerated, filter it with a low pass curve of 6dB/octave. Another way to fix this curve is to put a 3 band EQ on the master and lower the lows and highs, then boost the master for the loudness lost. The mids will magically appear and might feel overwhelming at first, but that’s simply because the human ear is sensitive to mids—more mids mean more presence and power, plus clarity on most systems.

The bright mix

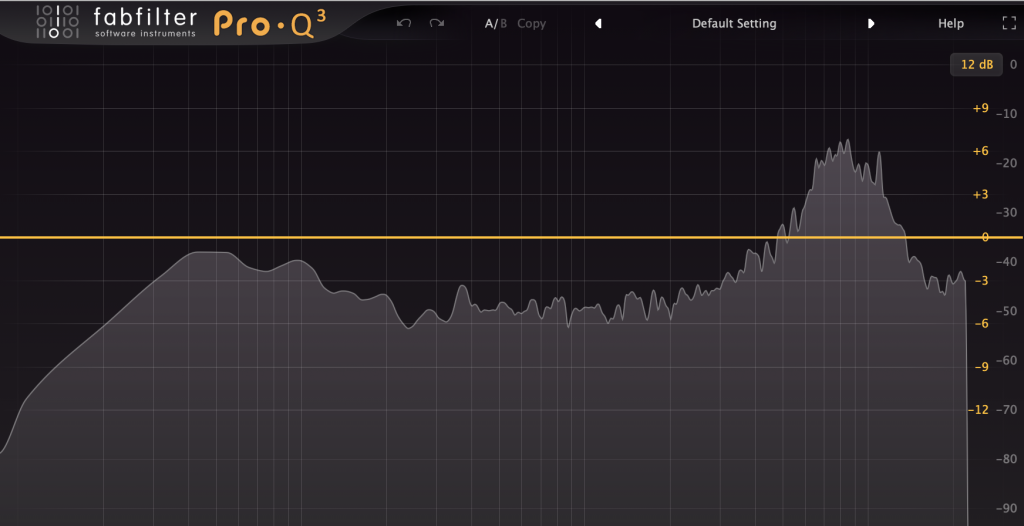
A bright mix is dominated by an accentuation of the highs. Many of my clients frequently mix this way because it’s exciting and electric, but bright mixes also very harsh on certain systems and as previously mentioned, they’re very tiring on the ears.

The good: Excitement, air and powerful transients.

The bad: Bright mixes will sound rough at high volume level and I swear that in 50% of the time it will be played in a club, the DJ will have to turn down the high-EQ. If the system isn’t great quality, bright mixes can also create distortion.

The fix: Use a shelving EQ and turn down those highs. Look at your curve and see where the steep part starts (sometimes at 5khz, sometimes at 8khz), then just lower it down by 3-5dB until the FFT becomes a bit more flat.

Note: If you feel like you really need it bright, try to keep it under +3dB.

The bass-heavy mix

Bassy mixes are ski slopes.

Bass-heavy mixes are very common in electronic music because of the lows needed to make people dance. It sometimes becomes a huge issue for me where clients really want their kicks to punch through, but a kick will sound powerful if it exists on a full-range frequency scale (also in the mids, and high mids).

The good: Bass-heavy mixes will be powerful and can blow away the crowd.

The bad: After a few minutes of pounding lows, if you can hear anything else, it feels very dull. Bassy mixes will sound muddy, messy, blurry, and insignificant. For instance, on a Sonos (like the one I own), all you’d hear would be a thump, thump, thump…annoying, not nice sounding.

The fix: Just like the bright mix, add a shelving EQ but work with the lows. I’d encourage you to revise your kick-design process if they sound too bass-heavy, and also get to familiarize yourself with how your favourite home sound system is calibrated.

The peaky mix

Look at this peaky curves! So sexy… not…

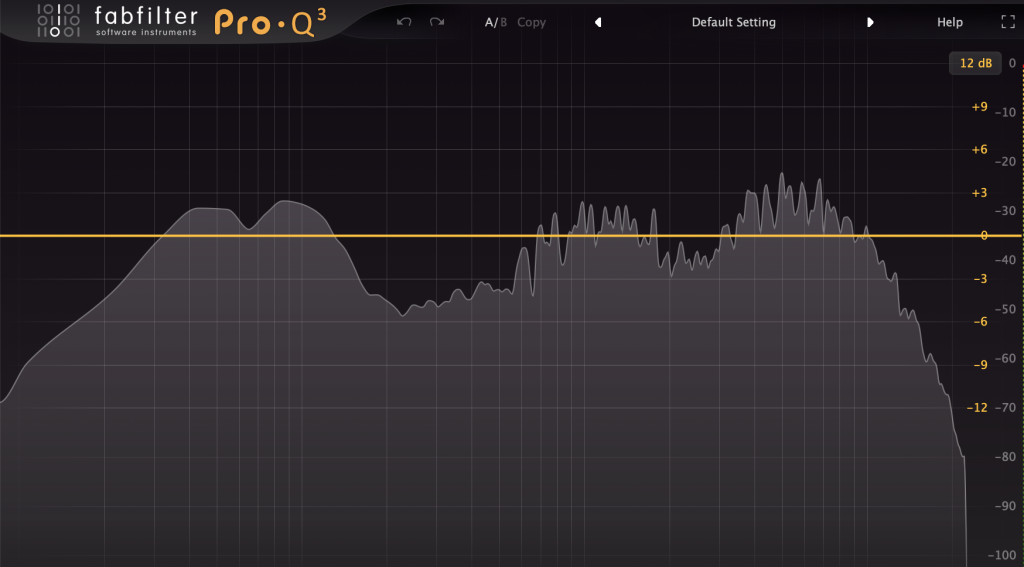
A “peaky” mix is my own term—it’s when I look at a mix and the curve has these big frequencies sticking out, while everything else is low (hence “peaks”).

The good: If done well, emphasizing certain peaks can be a good way to create dynamics in a song in terms of volume differences between your sounds. In some cases, it can create a sense of depth, but in doing so you demand a very active listening experience from the listener to be able to achieve this effect. This technique common in jazz, for instance.

The bad: Done wrong, a peaky mix just feels like there’s no power to it and the song will feel thin and some sounds will feel resonant.

The fix: Revise your mix entirely. Pull down the gain on the peaking sounds, then turn up the gain on the master to create something more even. Fixing peaks demands patience and practice.

The Gruyere mix

A rare specimen that is a mix between Gruyere and peaky, wearing red glasses.

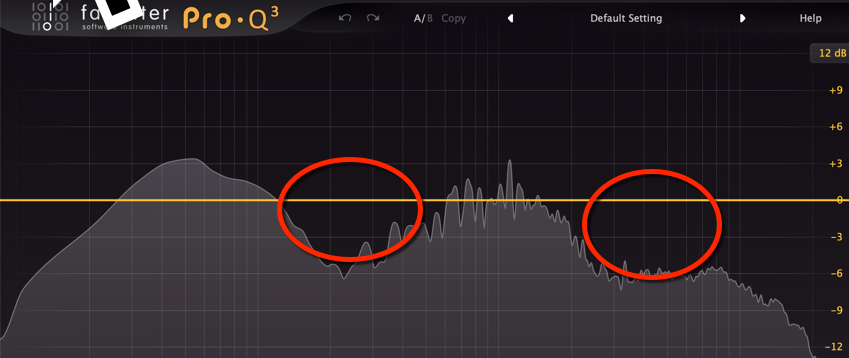
A Gruyere mix is one with hole(s)—on a big sound system, they can feel partly empty, or just wrong. Basically, the feeling of holes in a mix is a sign that it could tweaked to cover the missing areas.

The good: Truth be told, you can always live with a mix with holes. You won’t really face any serious issues, but your sound might feel flat.

The bad: Let’s say you could cover more mids with your percussion to cover a hole—then perhaps your percussion would feel more powerful. If your pads are lacking body at around 200hz, they will lack power. These holes are simply pointing out that some sounds could use a bit of tweaking.

The fix: Revise your mix. Try to see if you can boost weak parts of certain sounds. On the master, use a high quality EQ and gently boost the holes up, as that can make a difference.

The thin mix

A thin mix is one that, on the spectrum, looks good, but somehow doesn’t seem to drive at all.

The good: It’s gentle. Maybe you like it that way on purpose?

The bad: No power, no loudness, dull.

The fix: Add a compressor in parallel mode (50% wet) on the Master bus to give the mix a bit of thickness.

The punch-less mix

Punch-less means a mix just doesn’t punch, slap, or kick as it should.

The good: Non-punching mixes could be good if your music on the ambient side of things.

The bad: For dance music, you need at least some elements with punch, like the kick and/or clap.

The fix: Use transient shapers and/or compression with a slow attack and high ratio to turn your lifeless elements into something with attitude.

All these fixes need practice before you come out with a nicely balanced mix—I hope this has been useful advice on how to balance a mix!

SEE ALSO : The benefits and risks of using a reference track when mixing

Creating organic sounding music with mixing

I’m always a bit reluctant to discuss mixing on this blog. The biggest mistake people make in mixing is to apply all the advice they can find online to their own work. This approach might not work, mostly because there are so many factors that can change how you approach your mix that it can be counter-productive. The best way to write about mixing would be to explain something and then include the many cascades of “but if…”, with regards to how you’d like to sound. So, to wrap things properly, I’ll cover one topic I love in music, which is how to get a very organic sounding music.

There are many ways to approach electronic music. There’s the very mechanical way of layering loops, which is popular in techno or using modular synths/eurorack. These styles, like many others, have a couple main things in mind: making people dance or showcasing craftsmanship in presenting sounds. One of the first things you want to do before you start mixing is to know exactly what style you want to create before you start.

Wherever you’re at and whatever the genre you’re working in, you can always infuse your mix with a more organic feel. Everyone has their own way, but sometimes it’s about finding your style.

In my case, I’ve always been interested in two things, which are reasons why people work with me for mixing:

  1. While I use electronic sounds, I want to keep them feeling as if they’re as organic and real as possible. You’ll have the impression of being immersed in a space of living unreal things and the clash between the synthetic and the real, which is for me, one of the most interesting things to listen to.
  2. I like to design spaces that could exist. The idea of putting sounds in place brings the listener into a bubble-like experience, which is the exact opposite of commercial music where a wall of sound is the desired aesthetic.

There’s nothing wrong with commercial music, it just has a different goal than I do in mixing.

What are some descriptions we can apply to an organic, warm, rounded sound?

  • A “real” sounding feel.
  • Distance between sounds to create the impression of space.
  • Clear low end, very rounded.
  • Controlled transients that aren’t aggressive.
  • Resonances that aren’t piercing.
  • Wideness without losing your center.
  • Usually a “darker” mix with some presence of air in the highs.
  • Keeping a more flat tone but with thick mids.

Now with this list in mind, there are approaches of how to deal with your mix and production.

Select quality samples to start with. It’s very common for me to come back to a client and say “I have to change your kick, clap and snare”, mostly because the source material has issues. Thi is because many people download crap sounds via torrents or free sites which usually haven’t been handled properly. See sounds and samples as the ingredients you cook food with: you want to compose with the best sounding material. I’m not a fan of mastered samples, as I noticed they sometimes distort if we compress them so I usually want something with a headroom. TIP: Get sounds at 24b minimum, invest some bucks to get something that is thick and clear sounding.

Remove resonances as you go. Don’t wait for a mixdown to fix everything. I usually make my loops and will correct a resonance right away if I hear one. I’ll freeze and flatten right away, sometimes even save the sample for future use. To fix a resonance, use a high quality EQ with a Q of about 5 maximum and then set your EQ to hear what you are cutting. Then you lower down of about 4-5db to start with. TIP: Use Fabfilter Pro-Q3, buy it here.

Control transients with a transient designer instead of an EQ. I find that many people aren’t sensitive of how annoying in a mix percussion can be if the transients are too aggressive. That can sometimes be only noticed once you compress. I like to use a Transient designer to lower the impact; just a little on the ones that are annoying. TIP: Try the TS-1 Transient Shaper, buy it here.

Remove all frequencies under the fundamental of the bass. This means removing the rogue resonances and to monitor what you’re cutting. If your bass or kick hits at 31hz, then remove anything under that frequency. EQ the kick and all other low end sound independently.

Support the low end with a sub since to add roundness. Anemic or confused low end can be swapped or supported by a sine wav synth that can be there to enhance the fundamental frequency and make it rounder. It make a big difference affecting the warmth of the sound. Ableton’s Operator will do, or basically any synth with oscillators you can design.

High-pass your busses with a filter at 12db/octave. Make sure you use a good EQ that lets you pick the slope and high-pass not so aggressively to have a more analog feel to your mix.

Thicken the mids with a multiband compressor. I like to compress the mids between 200 and 800. Often clients get it wrong around there and this range is where the real body of your song lies. The presence it provides on a sound system is dramatic if you control it properly.

Use clear reverb with short decay. Quality reverbs are always a game changer. I like to use different busses at 10% wet and with a very fast decay. Can’t hear it? You’re doing it right. TIP: Use TSAR-1 reverb for the win.

Add air with a high quality EQ. Please note this is a difficult thing to do properly and can be achieved with high-end EQ for better results. Just notch up your melodic buss with a notch up around 15khz. It add very subtle mix and is ear pleasing in little quantity. TIP: Turbo EQ by Melda is a hot air balloon.

Double Compress all your melodic sounds. This can be done with 2 compressors in parallel. The first one will be set to 50% wet and the second at 75%. The settings have to be played with but this will thicken and warm up everything.

Now for space, I make 3 groups: sounds that are subtle (background), sounds that are in the middle part of the space, and space that are upfront. A mistake many people make is to have too many sounds upfront and no subtle background sounds. A good guideline is 20% upfront as the stars of your song, then 65% are in the middle, and the remaining 15% are the subtle background details. If your balance is right, your song will automatically breathe and feel right.

All the upfront sounds are the ones where the volume is at 100% (not at 0db!), the ones in the middle are generally at 75%, and the others are varied between 50% to 30% volume. When you mix, always play with the volume of your sound to see where it sits best in the mix. Bring it too low, too loud, in the middle. You’ll find a spot where it feels like it is alive.

Lastly, one important thing is to understand that sounds have relationships to one another. This is sometimes “call and response”, or some are cousins… they are interacting and talking to each other. The more you support a dialog between your sounds, the more fun it is to listen to. Plus it makes things feel more organic!

SEE ALSO : More tips about working with samples in Ableton

The EQ and compression combo (Pt. 3)

After going into details with regards to EQ and compression, in this post I’ll cover some practical tips on how they work well together. I’ll try to also clarify why many engineers will tell you that all you need is these two tools to accomplish most of the work in mixing and mastering.

Here are a couple terms and ideas that have to do with this topic:

  1. There are no rules for how to use EQs or compressors. You’ll read many different views online, and some people will affirm loud and clear that their point of view is right, but after 20 years of trial and error, I still feel that I’ve accomplished a lot of great things when I knew less than now. Relying on your ears is really important. Some of the most innovative trends involve people who have no idea what they’re doing else than following their gut feeling.
  2. Substractive correction. It involves only cutting the junk out.
  3. Coloring correctives. This usually means that you’ll boost frequencies. Sometimes, cutting might necessary.

To start with, I’d point out that in mastering or mixing, one of the most common chain would look like this:

[Corrective EQ]  –  [Compression]  –  [Color EQ]

There’s precise logic behind this. Basically, you want to take the rogue frequencies out first, compress and readjust the good ones with the compression, and finally adjust the tone or highlight details with a coloring EQ. My personal preference for better results would be that whenever I cut, I do it with a pretty narrow Q (resonance) on the EQ. A great starting point is to start with 2 or 3 and then adjust. Don’t hesitate to use visual reference of the FFT that is often included in the EQ’s display, especially if this technique is new to you. Then, I’d cut about 3dB at first, up to 5. You see how this changes your sound by bypassing the EQ and comparing.

When it then comes to compression, there are a few different things you could do here. For instance, if you go with an aggressive setup, then you’ll beef up what you have “open” by cutting away the bad frequencies. I’d suggest starting with a more exaggerated approach to see what will pop as annoying. It might not be possible to hear what’s wrong if you don’t push the sound to its limit.

Once you see and hear issues more clearly, you can cut again, then you roll the compression into parallel mode to have some of the incoming dry signal mixed with the compression.

If you haven’t explored the side-chain frequencies, this is an option where you can decide that your compressor won’t apply anything starting at the target (ex, anything under 100hz). With this, you might want to filter only a part of your song with the EQ and then compress to accentuate the part you want to put to front.

The last process in the chain is the color EQ. You can take any EQ you like but ideally, I’d go for either an analog emulation or a shelving EQ. Those will provide a nice enhancement to complement what the compressor has been doing. For coloring, you can explore. One way to approach it is to completely exaggerate one band to see how it sounds, and then roll down. This is not only very interesting for sound design, but also for mixing more subtly annoying details. It can help build body for a sound that feels week too.

Examples of where to start – EQ and Compression

A pad that that lacks body and roundness. In this case, it’s most likely that a resonance is poking through too loudly and that good frequencies are hidden behind it. You could start by checking if there is one peak on the spectrum and with your corrective EQ, with a not so wide Q (ex. 1.5 to 3), try to bring that peak down pretty severely with a cut of 5-6dB. Get the threshold of your compressor to meet the highest peak and then adjust the output to be the same as the input. With the shelving EQ, bring the mids up but 2-3dB.

A kick that lacks bottom. This might be related to the mids of the kick that are too loud. You could lower them by 4-5dB, then compress with a ratio of 8:1. The shelving EQ should then bring the lows under 100hz up by 4db. If that doesn’t do, cheat by using the corrective EQ to notch up a bell curve at 50hz.

Percussion that are harsh. This is usually because one frequency is resonating around 4 to 8khz. It’s hard to say but try to cut by 8dB and scan around to see if there’s at any point, something more comfortable. Bypass to double check and then adjust your cut so that you can make the resonance almost there. Compress with a fast attack to control the transient and glue them. The shelving EQ could be used to lift the highs.

EQ suggestion: The TDR SlickEQ GE will do a great job for correcting.

Compression: The new SphereComp is super lovely and affordable. I tested it in sound design and it does really nice gluing.

Shelving EQ: I tried the demo of EVE-AT1 and I think you’d like it just like I did. The price is incredibly good for what it offers!

SEE ALSO : Saturation Tips and Hacks

Tips for compression: The Multi-band compressor (Pt. 2)

Continuing with more compression tips, I’d like to discuss of my all time favorite tool for anything and everything: the multi-band compressor. For many, this beast is a bit of a difficult tool to tame, but I’d like to break it down for you so you can include it in any of your routine and needs. In order to continue, I hope you’ve first read the first post about compression, and also the two posts about how to use EQs.

Compression guidelines

Common Use-Cases for Compression

Controlling harshness. Using a compressor, you can set the attack to be fast and the release to also be pretty fast. This makes the whole action of the compressor fast, controlling any aggressive sounds and taming them. If the attack is too fast however, it can distort, so you need to juggle with the settings to find your sweet spot.

To add punch. This is the opposite of harshness. You’ll want the attack to be slow and the release to be fast. The compressor won’t jump on the transient immediately but will instead create some snappiness. The ratio should be around 5:1 or even higher to achieve this effect in most situations.

To add thickness. Using your compressor in parallel mode, you can set it to about 50% wet/dry, then compress with a medium attack and a medium-fast release. I’d make sure the ratio is as high as possible too. If your compressor doesn’t have a parallel option, then you can use the compressor in a AUX/Send bus.

To glue together a mix. Very similar to thickness and punch, you’ll want to add this to multiple channels and busses at once. Again, parallel compression, slow attack, high ratio. That should do it. Experiment with exaggerated effects and then tone it down.

To sum it up, a fast attack makes the compressor react quickly, which means it is there to control something. A slow attack is to enhance the beginning of the sound. The ratio is how much of that effect you want in action, and the release is for how long.

Multiband action

The multi-band compressor works exactly as the use-cases explained above, but with a multi-band compressor, we can set a range of frequencies to be affected. Therefore, you can set thickness in the mids, control the high-mids for harshness, and enhance the high’s transients with a single compressor, but with different settings for each section.

The multi-band compressor has an additional feature: the use of crossovers that set points for where each section starts and ends. A crossover is simply a frequency you set. For instance, Ableton’s 3-band multi band will have 2 of crossover frequencies. You set the lower crossover which will set where the low end ends in the mids (ex. 200hz) and the other crossover will be where the mids end and the highs start (ex. 6khz).

My perspective on multi-band compressors is that I use them like a shelving EQ where I control each section’s aesthetics in a different way. You can then shape the tone of a sound or mix, or extract minute details. Ideal for finishing touches, multi-band compression can also be used to bring forward parts of your sounds in the most effective way.

Now, here are some situations where the effects of multi-band compression can be useful:

  • Wimpy percussion: If your percussion needs presence, thickness and power, set your crossovers so you can control what’s happening between 200hz and 800, then up to 3khz. Beef up the first section with slow attack and high ratio and aim to add punch up there (refer to the notes above regarding how to do this).
  • Pale pad: Again, say a weak pad needs presence, beefiness between 250 and 600 hz. I’d also compress between 4 and 8khz to add some shimmering, which is like adding thickness. You could even lower your section to hit all the way down to 90hz to get some analog feel.
  • Crazy swirl: Sometimes transitional effects are great but can be not appropriate for your song. I like to control the highs over 7khz in a way were they don’t hit aggressively but will have the mids over 1khz enter smoothly. This is a way to control the harshness and presence; often very useful to create wobble, rubbery movement.
  • Dull mix: A dull mix usually needs brightness which can be created by stimulating the highs and mid highs. This can be a combination of adding thickness or stimulating the transients. I’d say try sharp sections around 4khz to 8, then another one until 11khz and even compress above that with a 3rd section to create what we call pixie dust.
  • Stellar reverb: A multi band with a reverb is pack of fun for me! I like to beef up the mids above 300hz and also create thickness between 2khz to 6. You can then control the levels to decide on the tone of the space you’re creating for your song.
  • Deep kick design: Compress a section under 50hz and then another until 120, plus a last one that goes all the way to 500hz. I can guarantee you that if you have the lower sub purring, then you can also add a bit of punch around the mids to have a super deep, but punchy kick.

When it comes to my favorite multi-band compressors, here are some of them:

Neutron 2 (Izotope)

General tool for mixing that makes pretty much the best all around assistant to deal with numerous problems. Transient shaper, exciters, gate, compressors and all of them are in multi-band mode. You can’t get better than that.

Drawmer 1973 (Softubes)

The Drawmer compressor is amazing for creating ambient so imagine if you can set it in multi band mode, then you get awe dropping moments.

Fabfilter Pro-MB (Fabfilter)

Elegant, precise and transparent would be the best way to describe this one. Really useful for the finishing touch of your mixdown.


SEE ALSO : The EQ and compression combo (Pt. 3)

The best EQ plugins and various EQ’ing tips (Pt. II)

In my previous post regarding the best EQ plugins, I covered some of my favorite EQs and some of their uses. After receiving many compliments about that post, I’ve decided to continue with a part two. In the following post, I’ll share a few tricks with you that you can easily do yourself when facing certain mixing situations, and I’ll also briefly outline compression.

Filters

In case you didn’t already know, EQs are filters; really complex mathematics which each developer has coded in more or less slightly different formulas. This explains why some EQs are really expensive: because of the time invested in perfecting the curves. Many people don’t realize it, but EQs do sound different from one another and you can tell once you have a high quality sound system.

“Most people don’t have a high quality system, so what’s the point…”, you say.

Well, if you use high quality tools, in the end, your regular sounds will be “upgraded” in quality too, which will eventually make a difference where ever you play them.

The number one tip for a better mix is to use filters; this alone can make dramatic improvements.

For instance, your kicks might sound muddy if you don’t remove the garbage frequencies that are below the fundamental note of it. If this sounds complicated, let me explain it in the most simple terms:

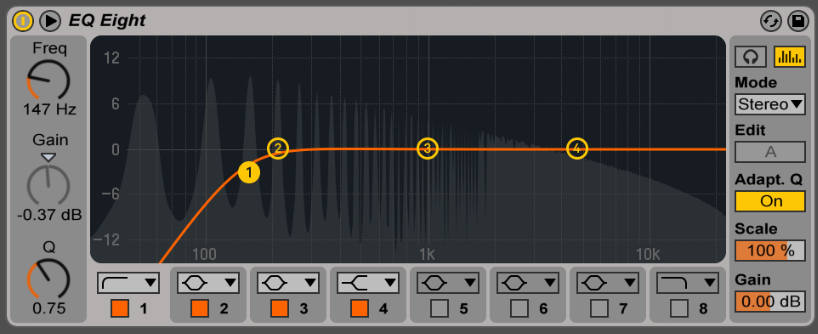
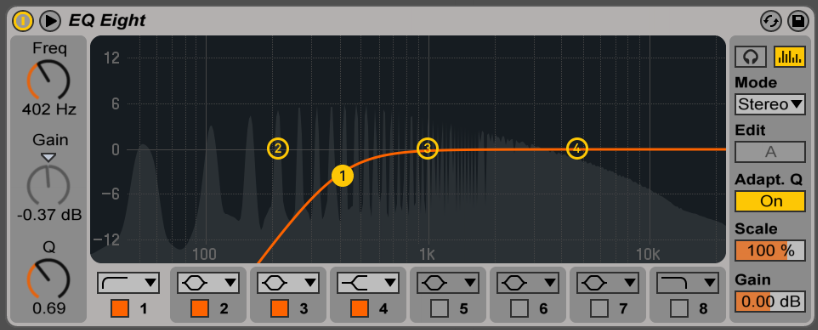
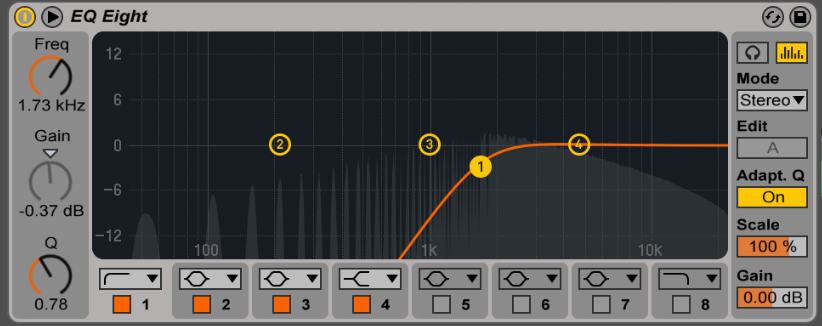
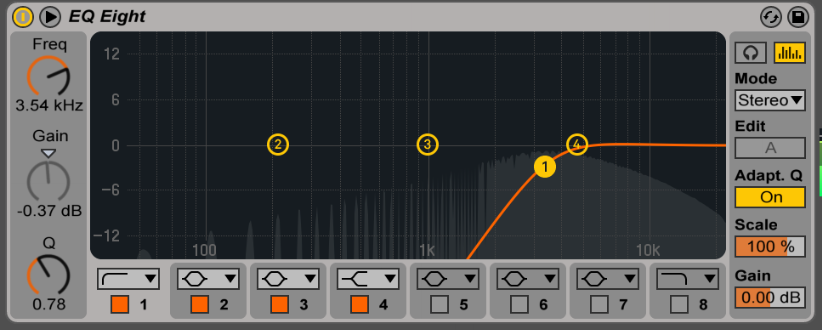
  1. Use your EQ and the first point on the left should be switched to filter, then low cut.
  2. The slope should be put to 24db/octave.
  3. Then roll it to 20hz to start with and then go up frequencies until you hear your kick losing power. If that happens, you’re now filtering too high and you have to roll back a bit.
  4. My general rule is to cut kicks at 20hz by default.

Now that tip was for kicks alone, but you should apply this idea to basically everything in your mix. However, besides the kick, I wouldn’t use a slope of 24db/octave on anything else unless there are big issues. It’s up to you to experiment but if you want to test something interesting, try 18 or 12 for cutting other sounds and you’ll see that this leaves less of a digital feel, giving your sounds clarity and warmth.

I’d also cut the highs where they’re not needed, but not too much either.

Percussion, melodies, and high pitched sounds such as hi-hats would benefit from a 6db/octave, high cut filter; this smooths things in a lovely way.

Some of my favorite filters for this kind of use are:

EVE-AT1 from Kuassa

SliceEQ by Kilohertz

PSP MasterQ2: Smooth!

Sharp cuts

Surgical, sharp and static cuts are very useful for a ringing resonance. Many people ask how to spot it these and how to know if it’s really something to cut or if the it’s something to do with the acoustic of the room. There’s no real way to know but to often cross validate with reference tracks.

So often, I get clients sending me a project in Ableton and I see really odd cuts. Is that bad?

Yes and no.

First off, if you use Ableton’s native EQ, switch it immediately to oversampling mode for better quality.

Second, cutting might change something in your environment but you’ll also permanently cut frequencies that might not be needed to change, which could also potentially induce phasing issues (i.e. during the entire length of the song).

*Note – do not use too many EQs in one chain because that will definitely cause phasing!

So, how do you spot one rogue frequency?

Sometimes I just use a spectrum meter to get hints if I can’t pinpoint where it is. Try to always use a spectrum meter on your master to have an overall indication of your mix. If you see some sounds that start to poke above 0dB, this *might* be a problem; not always, but it could. What you want to look for is one thin spike coming up out loud about +3-6dB. This might really be an issue.

My instinct would be to try to lower the volume of the sound itself if that’s possible. Sometimes it’s not and that’s when you use an EQ.

  1. Isolate the sound in the appropriate channel.
  2. Drop your EQ of choice (see below for suggestions).
  3. Pick an EQ point, set it to the frequency you spotted, then adjust the Q to 3-4. Cut 4dB to start with, but more if needed.
  4. On the EQ, there should be a output gain. If you have cut that frequency away, it might be great to just increase the gain by about the half of what you have cut away. Ideally I like to compress but we’ll get into that later.

TIP: Avoid sharp cuts in the low end. That can cause issues such as phasing, muddiness. If you really have to, make sure to use a mono-utility after.

I revealed some of my favorite EQ plugins in the first post in this series, but I’ll add some more:

Cambridge EQ by Universal Audio: Works amazing on synths and melodies.

AE600 by McDSP.

Voxengo CurveEQ: Solid on percussive content.

Valley cuts, boosts, and shelving

Many readings on the subject of EQ’ing only will recommend that if you need to boost, go moderate and try to have a very low Q to have an open curve. However, there are really no rules on what you should or shouldn’t do. Explore, fail, and be audacious, because sometimes great things come out of it.

My only red flag would be on those really complicated, several points EQ curves you can do in Fabfilter ProQ2. This sometimes induce weird resonances when you’ll bounce, which is no good for mastering unless you are OK with annoying people’s ears.

Also, think differently. If you’re going to use 3-5 points that are all boosting, then why not start by turning up the gain on your EQ’s output and cut down whatever you don’t want.

But if you boost, I like to have a Q below 1. It gives really interesting results!

  • For instance, try to boost 2-3db at 500hz to instantly give presence and body to a song.
  • Try it at 8khz to add a lush, bright presence to metallic percussion.
  • Boost at 1khz on your snare to make them pop out of your mix.

Experiment like this. At first it will appear subtle but with practice, great results will come.

My favorites of the moment:

Sie-Q by SoundToys for really doing beautiful shelving.

MEqualizer by MeldaProduction.


SEE ALSO :

Tips and recommendations for compression (Pt. 1)

Tips on how to pick your EQs and use them (Pt. I)

People often ask me about my opinions on what the best audio plugins are, and there are no doubts that investing in quality EQs and compressors is one of the most important things you can do for both sound design or mixing. You can do pretty amazing things just with EQ and compression, but of course you need to understand your tools to make the best of them. In this post I propose some exercises and tips, as well as covering the main tools I have gathered through the last years and my thoughts on the best EQ plugins.

Types of Equalizers

There are many types of EQs and I believe some are more important than others. It took me a while to understand how to fully use them all and how to select the right one for specific situations. This subject is actually so vast and complex, I could make a series of multiple posts and I wouldn’t get through it. I’ll try to avoid being too technical and will explain them in simple terms so anyone can understand.

The way I approach EQs are based on different actions:

  • Corrective. Sometimes a sound will have part of it that will feel aggressive and annoying. I will do corrective by spotting where where it looks like it’s an issue and then cut. Corrective cuts are usually not too narrow (Ex. Q of 3)
  • Surgical. A resonance in a sound makes your ears hurt and that will need a very narrow cut. (Q of 6-8+).
  • Tonal adjustments. An EQ can be used to make tonal changes such as deciding if you want your track more beefy or more light by either boosting lows or highs.
  • Coloring. Some EQs aren’t transparent and will have a musical touch to the changes it makes. This will add some personality.
  • Valley cuts. The opposite of surgical, where the Q will be make the curve really wide. It makes very subtle changes, somewhat tonal, a bit colored and sometimes a bit corrective. Try it at different points on a sound and see it change without being able to really know what’s happening.

TIP: The human ear will hear a noticeable difference if you cut 3-4dB minimum. If you cut 6dB, it will be quite obvious.

The main types of EQ plugin categories are:

  • Graphic/Fixed Frequencies. Influenced by older models and the first EQ, the frequencies you’d have access to are fixed and won’t be changed. In many of those models, the frequencies are based per octaves but certain companies will have their own way of deciding which ones are used.
  • Parametric. One EQ that is very popular is the Q2 by Fabfilter which allows you to drop a point anywhere and then be able to shape how narrow you want to cut or boost.
  • Shelving/Band. This is a part of the spectrum that will be affected. For example, on DJ mixers, the 3-4 EQ buttons are basically shelves of frequencies that are altered.
  • Dynamic. This one is advanced. You can “order” a point of your EQ to react depending of certain conditions. For example, if you have a recording of a drum, you can order the highs to lower down by 3-4dB if the cymbals hit too loud. Very practical!

TIP: If you love the sound of analog, you might want to dig in Universal Audio’s suite that does emulation of classic pieces of gear. The fidelity of replication is absolutely mind boggling!

Now let’s make some associations regarding which EQ does what:

  • Surgical and valley cuts are mostly done with parametric EQs. This type of EQ will allow you to precisely identify the rogue frequencies and then cut or boost, in the way you want.
  • Corrective EQ can also be done with parametric but with graphical ones too. Sometimes a correction needs precision but sometimes, it can just be a way to realign the curve of the sound which a graphical EQ can do easily.
  • Tonal adjustments. This is done with shelving and band EQ.
  • Coloring. This is basically fixed frequencies, but if you look for analog emulation or EQs that provide a type of saturation, then you’ll also get some coloring and personality.

My favorite EQ plugins

Here are my thoughts on the best EQ plugins  that are precious tools to have in your arsenal. I’ve also included low budget EQs alternatives that are similar.

1. Fabfilter ProQ2 (Surgical, Valley cuts, Corrective, Tonal)

This plugin seems to have found it’s way in many producer’s tool kit mostly because it can pretty much do it all. From complex curves, mastering touch-ups to shelving tones and copying the frequency of a sound to apply it to another… the ways you can use this beast are so numerous that you’ll have to watch a bunch of tutorials to get all the hidden things it can do.

Budget Alternative: TDR Nova GE by Tokyo Dawn

2. Electra by Kush Audio (Shelving EQ, analog replica)

Not so known by the masses but this EQ is an absolute wonder to have on hand. I use it in every single mixes I do and the results are always amazing. A bit of a learning curve to understand as the GUI is a bit weird but even if you’re not sure of what you’re doing, it shapes the sound in a way that makes it pop out and warms it too.

Budget Alternative: RetroQ by PSP

3. BX_Hybrid V2 by Brainworx (Corrective, shelving)

I don’t think there’s any plugin that can do what this can do in terms of results. Not as versatile as the ProQ2 but where this one stands out is for how buttery it cuts in the sound, smoothing things out. When I have people studying mixing with me, I would always require them to buy this one as the very first EQ to have and use.

Budget Alternative: Voxengo Prime EQ

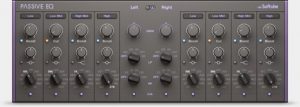
4. Passive EQ by Native Instruments (Shelving, correction, color)

This emulation of the famous Manley Massive-Passive EQ is a bomb EQ. I love to place it on a bus of all my melodic content and then smoothly shape it into something that magically turns organic and warm. It requires a bit of exploration but when you get your hands around it, you’ll always want to use it. I find it quite powerful for sound design as a way to warm up the lows.

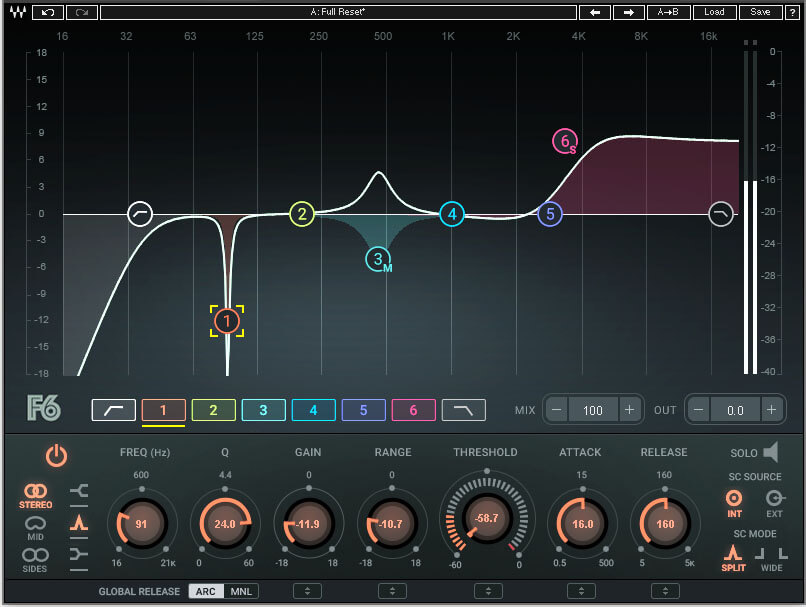
5. F6 Floating band dynamic EQ by Waves.

I’m not a big fan of Waves as well as their aggressive tactics for selling but this plugin is a really useful one to have. As described above, with a dynamic EQ, you can tame some frequencies that are randomly happening. The problem with a static EQ is, you’ll be cutting permanently a frequency so if what you’re trying to cut isn’t always there, you might cut something that doesn’t need adjustment. This is why you can have more control with a dynamic EQ. This one is also really easy to use if you’re familiar with the concept and the fact that you can use it in MS makes it really versatile. Not as easy and fancy looking as Fabfilter’s but it does more, in other ways. Wait for the price to fall but you might get it fro either 29$ to 49$ if you’re patient enough.

In the next post, I will go more in detail with my favorite plugins and will also explain certain ways, in details, for how to get the most of them.


SEE ALSO :

The best EQ plugins and various EQ’ing tips (Pt. II) 

How to get the right tonal balance for a mix

One of the biggest challenge of finishing a song is to properly adjust the tonal balance. There’s no doubt this part of track-making is puzzling; many people – even experienced producers – are still going to have some issues with tonal balance some days. There are tools and methods to correct tonal balance, but it’s always a challenge; I feel that it’s important to share some tips on how you can make adjusting tonal balance easier.

What is tonal balance?

I’ll keep this as simple as possible: tonal balance, from my perspective, is dividing your song into three frequency sections and figuring out how to adjust them. For instance, in certain genres, you want the tone to be totally balanced, while for dance oriented, electronic music, you’d want the lower end louder in the mix. While this sounds extremely simple to achieve, in reality, it can be a nightmare.

The biggest issue with tonal balance is that if your tone is wrong, your work when played in a specific context (ex. in a club) will sound completely off compared to similar songs of the same genre.

Common problems with tonal balance include:

Lower end anemic: The song will feel weak, energy less and hollow.

Lower end too loud: The song will feel muddy and lacking in body.

Mids lacking: The song will feel empty, no punch or body, far off.

Mids too loud: The song becomes unnecessarily aggressive and obnoxious.

Highs lacking: The song lacks definition and precision in the sounds.

Highs too loud: The song is fatiguing and harsh.

Using the right tools for tonal balance adjustments

Monitoring is of course, crucial to adjusting the tonal balance of a song. I’d say 75% of the time I get a file for mastering and the tonal balance is completely off, mostly because of the artist’s listening environment. While we don’t all have the budget or space to have a fully treated studio, there are some things you can still do:

  1. Cross-validating. With my speakers, I’ll always check a mix periodically with headphones as I work. I like to have a different perspective and I find that the sound I have between the two often reveals a perspective I missed.
  2. Mixing at a low volume. You’d be surprised at how you’ll automatically hear what’s wrong. Reduce by half the volume level you’re working with and listen to how the kick comes through, then the melody compared to it, then the high end, etc. Cross-validate with a reference track.
  3. Using a subwoofer. Many people will tell you that you don’t need a sub to do a good mix but it certainly helps to have an idea of what’s happening down there. Many of us will have issues with the neighbors so I suggest to only use sparingly just to check your mix. A good alternative is getting a Subpac.

There are also tools you can use in your productions to help you. I use many but here are some of my favorites:

Reference

This plugin is a life-saver, no doubt. You load in your reference track, adjust the volume to match and then you can swap between your mix and the reference. There are even some dynamic graphics to show you what part of your mix is too loud or lacking in comparison to the reference track.

If the track is already mastered, you won’t be able to rely on the compression meter but the levels will be used the same way. For 60$, this is certainly an essential to have in anyone’s collection.

Shelving/Band EQ

When I first started to make music, I really didn’t like shelving EQs as I felt they weren’t useful, but once I started looking into them, I have to say that it almost became one of those obsessions one can have for a plugin. There are many of them, so I’ll name a few and then explain how to get the best out of them.

  • Tonelux (Softubes): One of the most recognized and acclaimed tools out there. It gets things done, quickly. Often on sale too.
  • Solid EQ (Native Instruments): I love this one because you have some precision on what you do and it is a good mix between being a musical EQ and a transparent one.
  • Maag Audio EQ4: This one is great for highs. It’s one of the most used in the industry in mastering to get the proper “air” sound, right.
  • Hammer DSP (Kush Audio): Crazy musical, warm and outstanding all the time. Often something to just play with on the master bus to see all the different moods one song can have.
  • Sie-Q (Sound Toys): A bit like Hammer. Musical, and slightly magical in how it handles the mids.
  • ValvEQ (Kazrog): A good alternative to the expensive Bax EQ by Dangerous. It’s handling your tone in MS mode as well.

Using the right techniques in tonal balance

If the EQ, cross validation and other tools don’t seem to work for you, I’d recommend a very simple technique to help you nail down the tone.

Basically, we’ll limit it our tone balance to three sections but you can pull it to four or five if you want, but the lower the number, the easier it gets later on. Knowing this, I’d encourage you using Ableton Live 10 for the use of the groups in groups feature. You can make alternative groups where you push all the channels using lower end in one group, then mids, finishing with highs.

If you have only three groups or busses, you really limit your options to these 3 faders to control. The less you have in front of you, the more focused you’ll be.

The way I usually do it, I’ll start with the main, loudest channel and put it as the loudest one, then mix the 2 others accordingly. Pretty often I feel like knowing the level of the low end first will greatly help settle the rest.

Adding life to sounds: movement in electronic music

Creating movement in electronic music

One of the most misunderstood concepts in electronic music is movement. By movement, I am referring to the way that each sound constantly evolves throughout a song. I was once talking with someone who is very into modular synthesizers and he was saying that he cannot stand recorded sounds such as samples because according to him, those sounds are “dead”. With modular synths a sound can be repeated for minutes and it will never be exactly the same because the hardware components constantly give the sound slight variations. A recorded sound is frozen just like a picture. Since we don’t all have the luxury to own a modular synth, let me explain how we can use software tools to make sounds feel “alive” and develop some movement in our own electronic music.

First, let us agree that movement in electronic music is about having some elements that are in “motion”. There are a variety of different ways to create that feeling:

1. Changes in volume (amplitude)

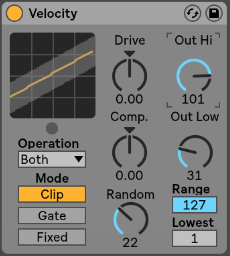
Volume change in percussion are often associated with groove and swing. Both can alter the volume of the sounds. That said, you can apply a groove template not only to percussion, but also to melodies and basslines. If that’s not enough you can also use the midi effect velocity which can not only alter the velocity of each note, but in Ableton Live it also has a randomizer which can be used to create a humanizing factor. Another way to add dynamics is to use a tremolo effect on a sound and keep it either synchronized, or not. The tremolo effect also affects the volume, and is another way of creating custom made grooves. I also personally like to create very subtle arrangement changes on the volume envelope or gain which keeps the sound always moving.
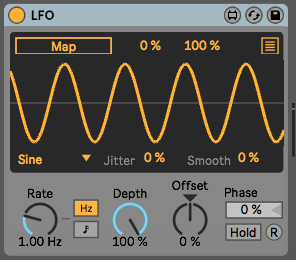
In general, using LFOs – such as what is offered in Max patches – can be used to modulate anything, and they will automatically create movement. For each LFO, I often use another LFO to modulate its speed so that you can get a true feeling of non-redundancy.
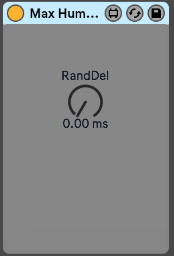
Tip: Combine the use of LFOs and manual edits and then copy sequences until the end of the song. I suggest you try stepping out of 4/4 and regular blocks structure to step out of a “template feel.”

2. Filter

Another great way to create movement is to have the sound always changing its tone. Using a filter in parallel mode is a very efficient way to create colours. The important part is to make sure that both the frequency and resonance are constantly in motion by using either LFOs or envelopes. By being in parallel the sound always appears to be the same but will have some added body to it because of the filter. What many people don’t know is there are different types of filters, so you can try different types of filters into different send channels and then your song will feel like its moving. While filters are great for subtle changes, you can also do the same trick with an equalizer but still in parallel. Adding an envelop on the filter so it detects incoming signal and change the the frequency is also a very nice way to keep things organic sounding.

Tip: Try comparing how a Moog filter can differ from any regular ones.

3. Textures

Background textures or noise is another great way to emulate analog gear. There are many ways to do that, but the one that I recommend is to get a microphone for your iPhone and then record a part of say, your next visit at the coffee shop or restaurant, or even in your house where we don’t realize that there is still a very low level of noise. Adding that recording at low volume to your song automatically adds a layer of every evolving sound. if you want, you can also convert certain noise into a groove pattern which creates a form of randomization on your sounds. Some high quality effects such as saturation used on certain sounds will add a form of texture that prevents your samples from sounding stale.

Tip: FM modulation on a filter or oscillation can create gritty textures.

4. Stereo and Panning

For this point there are different effects that play with the stereo image and – while you should be cautious – it’s good to have at least one or two sounds that have these kinds of effects. Some of these types of effects include of phaser, chorus, flanger, delay, reverb and auto-pan. They can all give the sounds movement if the modulation is unsynchronized and if the wet/dry is constantly being slightly modified.

Tip: Just be careful of what effects you use as overusing can create phasing issues.

5. Timing

A sound’s position in a pattern can change slightly throughout a song to create feelings of movement; a point people often overlook. This effect is easier to create if you convert all of your audio clips to midi. In midi mode you can use humanizer plugins to constantly modify the timing of each note. You can also do that manually if you are a little bit more into detail editing but in the end a humanizer can do the same while also creating some unexpected ideas that could be good. Another trick is to use a stutter effect in parallel mode to throw a few curve balls into the timing of a sound every now and then.
Tip: turn off the the grid locking in the arrangement section to intentionally be imprecise.


SEE ALSO :   Dynamic Sound Layering and Design 

Free Ableton Live Mixing Template

(Update May 2023: When we moved to the new site, the template was lost. It was obsolete anyway as I’ve learned so much since that I can do better. I did a new one, but it’s more basic. In my opinion, it also does a better job. You can still gather ideas from this post and I will make another one but the basic is at the end of this post. The information below is for the old template, but the one to download is the new version. Sorry for the confusion. I will fix this soon.)

I’ve put together a free Ableton template after receiving feedback that it was very helpful for many people I’ve worked with. The template available on this page is aimed specifically at mixing. I’ve noticed that many aspects of mixing are often misunderstood; I’ve assembled a starting template that has bundled together many useful tools to deal with basic things – this free Ableton template will be useful for those involved in music making!

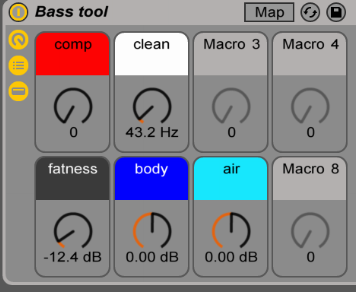
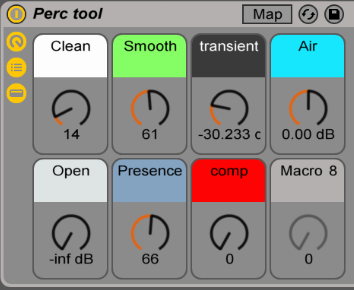
This template includes:

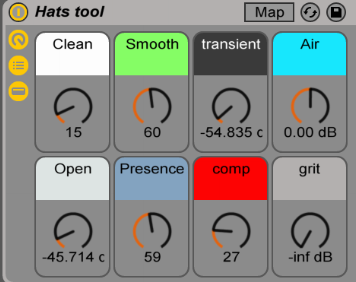
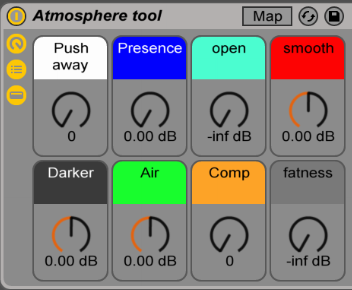
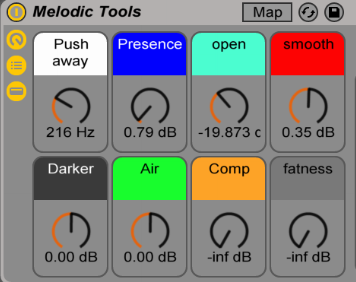
  • 6 Groups: Kick, Bass/low end, Percussions, Hihats, Atmosphere, Melodic.
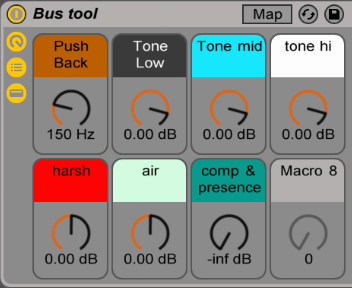
  • 3 Busses: Low end (Where kick + bass are routed), Percussion, Melodic.
  • 1 MIXBUS: Where the busses are routed and is actually your pre-master channel.
  • 1 Reference channel: Where you drop the your reference track.
  • Multiple Sends as enhancers.
  • Macro tools on each groups and busses to help you tackle tone and potential issues.

This template looks very close to what pro engineers use like the one Andrew Scheps did for Puremix, but I found Andrew’s template wasn’t really as suitable for electronic music. I’m sure he would disagree but underground music isn’t really handled like commercial music is.


Is this template for producing or just mixing?

You could use this template to start producing with if you feel comfortable with it, but I’d encourage you to export stems from a project and then use this template to mix. Yes, it’s a bit more work, but it will also make free up your CPU and make your project ready for a new phase of production. It’s fun also to put an end to tweaking details and then focus on the mix alone.


How do I use this template?

There are many ways you could potentially use a template like this but I’d like to explain a few things to get you started quickly. First off, grouping your sounds is always a good start. I like to to think of it this way:

  • Kick group: This group is made to hold the different layers of your kick(s); the best way to make full range kick is to have up to 3 layers, but that will be handled by the group’s macro tool that uses compression and saturation. I created another little macro tool to help beef up your kick with a sub generator and a transient enhancer. I included some sounds from my collection for you and feel free to add more. If you balance everything properly, you’ll have beautiful, warm and punchy kicks.
  • Bass/Low end: This group is essentially the same thing as kicks, but to be used as the bass. Include the multiple layers of your bass (sub/mids), and I’d encourage you to also include anything that is below 200hz such as toms, synth, pads. The macro on that group will help balance it out.
  • Percussions: Anything percussive from bongos, claps, snares or percussive synthetic sounds. This group can get busy so don’t be afraid to add multiple new channels in the group itself.
  • Hihats: Hats or anything that is regular in your group and an important part of your groove could be put in this area. In my case, I sometimes include snares. Please note that there’s no right away to use the Percussion & Hihats group and experimenting might get you some interesting results.
  • Melodic groups: These two work hand in hand. One is for anything in the background and the other is for the melodic elements to be forward. The way the macros work, they will help you position properly the sounds and make the best of them. Try playing with the various knobs to see how they influence the groups.

Please note – I’m applying high pass on these groups and feel free to change the steep which can influence the sound in some good ways, sometimes.

The three busses are quite interesting to work with once you get the levels of your groups finished. For instance, you want to find the best relationship between bass and kick that are routed together. Once they are balanced, the bus allows you to control both the bass and kick at once; this can help you more easily decide on the tone of your track by moving the bus up and down.

I’ve also included a reference channel to remind you to use a track that can be used as a mood and reference board. Reference tracks are great to help you to take inspiration from parts of other tracks you like and would potentially like to use in your mix.

The various sends are simple tools to just beef up or open up your sound. Sends are really for finishing touches to your mix and they’re meant to be used as gently as they can be; subtlety can also make things intense.

Thanks to everyone who provided feedback for the development of this free Ableton template; I am glad I can continue to help everyone enjoy making music!

Click to download this free Ableton template: (New version 2023)

Pheek’s template 2.0 for Ableton Live 11.3+

My Music Doesn’t Sound Like Me

Does this happen to you? You start a project with an idea and a direction, “I’m going to make a techno track”, you fire up a drum machine, get a baseline going, start jamming, looking for sounds, creating a groove, and an hour later you listen back to an 8 bar loop that sounds totally different than what you set out to make? “My music doesn’t sound like me”. Yeah, it happens to a lot of people, and it can be really frustrating to make music that sounds totally alien to you.

There is a special kind of disappointment that comes with not being able to make the kind of music you want to create. Many producers I’ve worked with talk about starting a project with one direction in mind but as the track evolves they find the sounds they’ve chosen and feel of the song completely opposite to their original direction.

Why does this keep happening? What is going on here?

From experiencing this myself, I understand the confusion. I want to suggest looking at this situation from another perspective, which I believe will be much more positive, and productive for you as a producer. It’s all about context.

Firstly, our moods and our thoughts are always changing. We are dynamic, and there are multiple versions of us. What I mean is, you are one person when driving with very loud music on, there is one while enjoying music at a party, there is another you while listening to music made for earphones. There is a big difference between the person you are enjoying music and the person you are when making music. Both matter, both are ok.
Tip– as soon as you start a project, save it right away with a name that describes the genre or feel of the song you want to create. A name as straightforward as “techno …. ” or “house ….” is easy enough.

It’s helpful to start your productions with a clear focus and intent in mind – otherwise, it’s quite easy to drift off. That being said, my personal opinion is that drifting is a good thing, and goes hand in hand with being in the moment, and more in touch with the YOU who is in the studio in that moment.
If you are truly in touch with your emotions or follow the sounds you are excited by, drifting off into other directions is going to happen. It’s simply a process of discovery.

The way I see music is similar to the birth of a strange, alien creature that has come out from nowhere. Even if the music you’ve created sounds completely foreign to you, it’s important to be patient with the material as later in the production or mixing phases, you learn to gently tame something raw and undeveloped into an evolved creature with a unique personality. If your music sounds a little different than what you set out to do, I believe that’s a good thing.

If you’ve been reading my posts over time, you’ll know I strongly encourage The Bonsai Method, and the habit of not spending too much time on any one track. Working quickly and finishing fast will significantly sharpen up your production skills, and you’ll be a much more prolific producer for it. You want your sounds to be a little raw, out of control, and strange. These sounds are the unsculpted gems you can only do when you stop censoring yourself. This is the stuff you are striving for.

Embrace unexpected results, and embrace change.

Imagine the number of ideas you’ll have to work with if you start 20 tracks from scratch as opposed to trying to polish one song for 20 hours. Spending too much time on one track will often take away from the rawness of your initial recording. This liveliness is precisely the sound that made us excited in the first place, and it’s important to embrace these unexpected noises, rhythms, and grooves. Taking away all the rough  charm of your material could be compared to photoshopping a beautiful and natural adult woman’s body into the thinness of a child to achive some measure of perfection. Here are a few essential tips to starting your tracks off right ~

Your work is whatever you want it to be.

As a people, we are always evolving, and our tastes in music will evolve as well. It’s ideal for your music to sound alien to you and progress yet understand that your progression may happen in an order you can’t predict. Through time and work, who you really are as a musician will begin to take shape.

Hearing the music you’ve made in the past is like looking at pictures of yourself from another time. It leaves a stamp. Find the photos of yourself from the past and pay attention to the ones you love. They might be aesthetically good, but I’ll bet that your favorite images will be the ones that recall a particular moment in your life. See it with raw, original sounds you find. The ones that are bold are the sounds that will stand out through years and perhaps bring you unexpected attention.

Tip: Bounce a version of your track before saving and closing your project. Compare how it evolves. Share it to people who know you. See what freak them…

As always let me know if you have any suggestions or questions about this post and leave a comment below and tell me what projects you are working on right now.

JP

SEE ALSO : Deconstructing A Reference Track

Background vs forefront to create dimension

Nearly every week I have a similar conversation with my clients. In good faith, and to save both my clients and myself time I’m writing this post to help answer the questions many producers keep wondering. The question of background vs. forefront to create dimension.

My clients often send me projects with a lot of sounds going on, which if you know me and my label well enough is something I’m a big fan of. That being said, there is a way to work with a song made up of lot’s of sounds without things becoming a bit too much.

During the production of your song, how many times have you listened to it all the way through? Twenty, thirty times? More? As songwriters, we need to consider the listening perspective of our audience, who will likely never hear all the nuances and details that we do. Perhaps if they’re big fans, they’ll listen to our track ten times. With that number of listens, the impression you get from a very busy song is very similar to looking at a very busy picture – You’ll discover different ideas on each view, but the whole image will be taken for what it is. What will sound like a mistake to you will likely be perceived otherwise by the casual listener.

When we use many different sounds together in an arrangement, it can be impossible to hear them all equally. As producers, we care for the work we’ve put into our sound design and often make the mistake (myself included) of trying to give every sound (big and small) the same amount of emphasis in hopes that nothing will be missed.

Even during active listening, both simple and complex music will often have subtle details we may not hear at first.

The important thing to understand is this – many sounds working together shape and create an experience. Some sounds only work when combined with others to form a unique layer, much stronger than the sum of it’s parts.

Sound design is a complex science that often takes years to understand fully. For many producers that ‘a-ha’ moment comes with the understanding that many sounds aren’t massive all by themselves, but rather a combination of several sounds carefully layered together.

For example, a punchy kick may have three layers (low, mids, hi-mids for transient shaping). A warm and full sounding pad may have harmonics created from a layer of richer oscillation in the hi-mids (using a square oscillator). This is the technical part of it but for someone not interested in sound design and is purely a listener, he/she will experience these sounds in an entirely different language, but he will get it though.

TRY: When listening to music, force yourself to identify layers in sounds.

With the concern that some sounds will not be heard equally at rest, we can start looking into how to create details with dimension and subtlety.
These details are as important as each of the featured sounds as they are needed to support the main element(s) of the song itself. Let’s see how to approach this:

  1. Decide what the core or backbone of your song is. If someone has to sing your song to someone else or attempt to explain what the song is about, what would that person say? In other words, the most memorable part of your song is the main idea. If you remove that, the song is not really there since most of the sounds are there to support that main idea.
  2. In the percussion sounds, identify what are the main elements that support the groove and the main idea. Usually, there’s the kick, a snare/clap, and a hat. Some tracks have multiple claps or additional  percussions here and there, but it’s important to decide what the main percussion sounds are.
  3. The other sounds will be EQed to create dimension. Only the use of EQ combined with volume changes will be enough here.

TRY: Next time you listen to a song, try to give attention to anything that is mixed low in the mix.


How to apply the distancing technique, on a very simple level, is to apply a low-pass filter/EQ on the sound. The more your filter up, the thinner the sound will feel and also the more pushed away it will sound. There’s no right or wrong here, but you’ll need to adjust the volume to your own taste and feel. I would suggest compressing your sounds to bring them together somewhat.

This is a regular cut that usually removes a lot of muddiness.


This cut would move sounds to a bit behind any of the featured sounds.


This place sounds far off


For subtle positioning.


The other trick would be to use reverb but that one is something to use with great care. Depending on your reverb unit, this technique can introduce muddiness which the previous trick won’t do. Like always experiment and find what you like in the process. You can also combine the EQ trick with the reverb use for better feel.

Let me know how it goes!


 SEE ALSO :  Dynamic Sound Layering and Design    

Templates As Seeds

As a producer, you’re likely trying to balance several tasks all at once while working on your music. If you’re spending time to look through four or five reverbs in search of the perfect sound, setting up buses and groups to pre-mix your tracks while you arrange it, or just feeling frozen looking at a blank project screen and finding it hard to get going, it’s no wonder you aren’t as productive as you’d like to be.

Good news, this post is all about setting yourself up to win before you begin. Begin to see your templates as seeds. 

Many DAWs can be setup to load a template as an initial starting point. Reason will propose a pre-made environment, and Studio One will propose if you’d like to setup a project for mixing to speed up your getting started time. Ableton Live doesn’t have that feature by default, but you can easily change that to open a custom startup project.
Even though most DAWs have this helpful feature, that wasn’t enough for me. But it felt like I could do better.

In one way this is a follow-up post to the previous Bonsai Technique that I shared a few weeks back. It was super popular, and many people sent in comments about how it really helped them develop tracks from little ideas. Now, I’d like to follow up with this idea as I realized that many people are missing out on the fun of using a template to get their projects started. Also, there are a few things we can add in that will also be valuable for your next productions. Let’s have a look at the techniques to get rolling fast.

I’m going to suggest something simple in essence, but it’s very effective to get new projects sounding great right from step one.

Start your next project using the last song used. I heard about this technique from Matthew Herbert’s manifesto, and it got me inspired. Herbert would pick up the mixing board where he left things off from the last session. Why is this a good idea?
Starting from the last mix would provide a faster workflow but also, the random EQs, compression, effects, would be set to something he would never have set up beforehand. I thought this concept was brilliant and began doing this myself. Very often I would start with the last project loaded but would make the next song right after the end of the previous one. The same configuration and settings for the kick, percussion etc… were the same, which often led me into directions I didn’t expect at all. This is a big advantage. 

Consider keeping the effects on each channel as is, but drop your new clips into existing channels at random. In some situations, I also would copy the arrangement of one song and paste it into another song’s arrangement view. Very strange results would come up, often leading to unexpected yet very usable sound design results. I often have one “mother” project which will be a safe place for me to develop and grow these ideas. Then I will copy some loops into another project’s arrangement view, and sometimes move the clips between channels to see which one fits the best. I even did the exercise of dropping a full arrangement into another project keeping it as intact as possible. From there I wouldn’t even listen to it before bouncing it out. I’d then listen to it weeks later and get blown away. I made a handful of tracks from my album Intra or White Raven this way.
Next, challenge yourself to keep your bus routing and groups intact. It’s great to have pre-made sends channels or busses that you can re-use quickly. Of course, an easy way would be to be to assemble a macro of the chain of effects you’ve used, but I like the idea of opening a template and have no idea what effects would be awaiting me. I will sometimes swap my most used effects with others I newly acquired or some I’ve forgotten about. It’s often nice to dig up older, legacy plugins that can bring up a particular grain to your sound.

Clear your finished project from the clips and save it as a template.

One exercise you can start applying today would be:

  1. Create a folder for your templates.
  2. Each time you finish a song, you do a “save as…” to that folder. You’ll then clean it from the clips in the Arranger view. I will often leave what I call ‘leftover’ sounds that weren’t used in the project. I’ll set these clips in the session view in a channel named “Leftovers.” Doing this allows you to re-purpose those sounds, which may be a perfect fit in your new project.
  3. Midi clips could be left there as well because it is usually interesting to have on hand some midi material you can quickly throw new sounds onto and see what it gets that sounds like.

Now, an extra tip, which is to make a template for the design of an EP/LP. As you know, it’s always great to have a common feel for an entire release, and one of the things I would recommend would be in the way you apply your effects.

  • Reverb. Either you pick a reverb from one specific company (ex. Altiverb) and use some presets to get started, or you try to remain in the same family of space such as Plates.
  • Delays. Using the same plugin but changing the delay speed.
  • Saturation. Try to pick one type and stick to it. I recommend applying this through a send channel where you have more control over how each sound is colored.
  • Compression/EQ. Some apply a distinct color and are more or less transparent. It can be a good idea to keep the same type of combination through your channels.

As always I want to hear your feedback on anything mentioned in this post. Feel free to share this post or leave a comment below and tell me how these creative, and time-saving techniques are working for you. 


SEE ALSO :  Pointers To Define Your Sound

An Interview with Techno Producer Stan Soul

This post is a Q&A with Dj, Producer, and label owner Stan Soul. Stan is based out of Tel Aviv, Israel, and has just put out an impressive 7th vinyl release as of late.

In this Q&A we find out where the energy to record 4-5 songs a week comes from, why vinyl is still important, how one contact he made opened the door to starting his own label, and what’s his favourite club to play at right now.

Hello Stan ~ I’m really excited to be speaking with you here, and I know many people will be looking forward to reading and learning more about you.

You’ve had a lot of success getting records signed, congrats!
Q. As an artist, where does your drive to produce music come from? Where is your choice of sounds and textures coming from?
A. I think that all music is going through people from the universe. So, in fact, we are just instruments in the hands of our world, and we are not in control during this process. Just a small part of it. All that I can say that I feel the music, since my childhood I hear new ideas in my head. Once I realized that all my life I can hear music in my head and I have to share it with people. To make music, you have to accumulate energy so nowadays my life is firmly oriented to save mental energy during the day and express it in a music session.

Q. Is there something within your tracks that is very personal, or unique within music right now?
A. Every track consists of things very personal because it’s totally based on my feelings in that current moment. I’m producing around 3-5 tracks per week and it’s always different because the universe is changing every minute with me.
Q. When you were a less experienced producer, (still dreaming of having releases signed), did you experience an ‘a-ha’ moment in your music making? If so can you describe that breakthrough?
A. Sure. It was very hard to understand what people were thinking about my stuff. I was very excited when I signed my first release and understood that some people did like it. I still enjoy the process more than the results. After some releases, I would like to play live sessions on my gigs.

I understand you’ve been really busy with Tevol, your vinyl label. I’d like to talk about that –
Q. Can you tell me what motivated you to get started with Tevol?
A. I’m always trying to make something that I want to play. So after experience with my digital label TEOL I realized that I want to create a vinyl label with dubby music oriented more towards dancefloors. After some research, my friend put me in touch with a contact from Memoria distribution. Since that time I’m very happy to be a part of Memoria’s family :).

Q. As a label what are you looking for in a track to sign/release, and what do you get excited about hearing?
A. I can’t explain what am I looking for because I never know. I just feel the music.

Q. How do you find artists & music you’d like to sign?
A. I just look around. Some music has come from my friend, some from my label mailbox. One track set for release I found within a forum related to techno music in a topic where people are releasing unfinished tracks. I just found a snippet, contacted guy and told him that I would like to release it on my label once he finishes it. It’s just fate, be in the right place at the right moment.

Q. How would you describe the feeling and vibe of a typical Tevol release?
A. I’m always trying to make release different. From the very deep hypnotic dub techno vibes to the full of energy minimalistic techno tracks. You can find something that you’d play on warm up and something that will exasperate people in the prime time of the party.

Q. Is the development and production for a record going to vinyl different than for digital? (aside from the actual pressing)
A. In fact there no differences. But sometimes I’m trying to make a track for vinyl a little bit longer because in that format I like “slow mixing” (when two tracks you are mixing are playing for 2-3 minutes). It means that the introduction part of the song should be longer because you can’t make a loop like in case with digital decks. I’m not releasing my music in digital anymore, so every track I’m producing is for vinyl 🙂

Q. Why is vinyl still important?
A. Vinyl is important because you can feel it. I can go deep into the process of mixing only with vinyl, and it sounds awesome as well 🙂

Moving along to the final set of questions, I believe that as an individual I am very influenced by my surroundings. Given this idea,
Q. How has being based in Israel shaped your musical tastes?
A. This is complicated. I repatriated to Israel from Ukraine two years ago and I’m still not feeling that I’m a perceptible part of the local scene. But it takes time, and now I’m fully concentrated on my label, production and always opened for any booking requests

Q. Is there anything great or unique about the Israel scene many might not know about?
A. The most valuable thing that has an effect on my production is the fantastic weather during the whole year and beautiful sea which I can see every day from my window.

Q. What is your favourite club to play out in?
A. In Israel, my favorite club is The Block. And Closer (Kyiv) If we are talking about worldwide it would be Closer.

Q. In general, do you experience music differently at home than playing out?
A. It alway different. Every gig for me is something new.

Q. Where do you see your music making in 5 years?
A. I can’t predict anything but I hope to continue producing music to be heard all over the world.

Q. Any final thoughts?

A. I just want to add that Pheek is a fantastic mixing and mastering engineer, and he’s been providing amazing service to make my music way more enjoyable and productive.

Thank you x10 for taking the time today Stan ~

Feel free to keep up to date with Stan by jumping over to the Tevol Facebook & Soundcloud page for more info and music.


Bouncing stems and mix

Recently I’ve been weighing the benefits of focusing on just one part of my production process exclusively, or, working on all the steps of a production simultaneously – arranging, mixing, pre-mastering, etc.. Very often producers ask me to explain a perfect workflow recipe and the truth is, there really isn’t a one size fits all answer.

But in theory, there are 2 main approaches I’ve been seeing in production to make a song.

  1. Classic way. Which involves taking one phase at a time but with the option to roll back to go fix something.
  2. Modern way. You go from one phase to the other in no particular order, as your needs change. You’ll mix as your arrange, change sounds of the percussion to match a melody, add saturation for aesthetics, etc.

One of Ableton’s feature that I find killer is the option to export all channels as separate stems. It really is great for so many reasons but also allows your to really divide the production from the mixdown, which you could do in another DAW.

There are many reasons why you’d like to do your mixdown into another DAW. One of the reason is, you’re basically blending, what I call, software grains. Think of the various apps on your smartphone that offer various filters for your images, where you can go from one to another, taking advantage of each strength. I would say it’s the same for DAWs.

  • Workflow. Each DAW has its own workflow, appearance, feel. Sometimes, just a change of platform is enough to, psychologically, feel your track in a different way. There are countless researches that have been done in between DAW, to which has the best sound, but in terms of summing, if you take a file with nothing on it and bounce it, they will all provide the exact same file. Where there will be a difference is on automation, interface and that alone can make you behave differently in a mix situation. There’s also all the macros and gizmos they all offer too.
  • Native plugins. Again, this might be a game changer. This of an any DAW, they will offer different plugins doing different things. Now, just for compression and EQ, it becomes a serious business. Mostly because there’s a big difference between what you see and hear, plus no one really does things the same way.

That last point is crucial here. You can take the same compressor concept (ex. FET compression), but it will sound different from one company to another. There are no real universal standards on how to approach compression or EQing. An EQ can show you a curve but the filter in the back might slightly be different to give a color, for instance.

So, when it comes to Ableton, I now export all channels as stems to do the mixdown. No more mixing as a arrange. I put a wall between the 2 phases. Some of the reasons are:

  • It liberates CPU usage. No surprises here. When you deal with a heavy load of VST’s and plugins it can often be a lot to manage. The act of bouncing out and mixing stems will force you to focus on only mix related plugins such as EQ and compression. No more delays, chorus and reverb adjustments. At this stage, you’ll focus on the volume levels alone.
  • It put’s an end to the endless adjustments you can make to every sound. You’ll have the option of correcting that little hihat detail that’s been bothering after hearing your track 100 times, but honestly, someone who has just heard your song for the first time will interpret that sound as part of the track, not as a mistake. It’s good to put an end to endless changes and adjustments and move on to finishing your production. Professionals keep their eye on the prize and get things done.
  • The audio summing seems to reveal imperfections. I’m not sure what’s happening here but sometimes, when you bounce the stems, things are just slightly different. I can’t pinpoint why and in theory, it’s not supposed to be but sometimes, it does sound slightly different. In fact, once you bounce it, that’s when you know exactly how it will be so it’s interesting to bounce all channels apart.
  • Ability to use other DAWs. As described earlier, this is the ultimate way to move from one platform to another. You’ll be to leverage the strength of each DAW.
    Build live sets or NI Stems. Having stems on hand can be useful to create live sets. Native Instruments offers a technology for creating a stems release to be played in Traktor, which is really cool, and super in demand by many of the world’s top dj’s.
  • Backup and remixing. Having stems is the ultimate way to have a real backup of your music. In 10 years time no one can predict what technology will be available, but having stems will prove useful as a way to be used with any new technology.

All an all, try it and see for yourself. Bouncing stems can only bring advantages to your workflow and I’d love to hear about it.

SEE ALSO : Use a main project for organizing yourself