Tag Archive for: effects

Pheek’s Guide To Making Dub Techno

I think making Dub Techno is one of the most requested blog posts I have been asked to do, and for years, I resisted it. I think there was some sort of shyness and perhaps, a lack of technical vocabulary on where to begin when teaching others how to make Dub Techno. But I think it’s time to take a chance and open up on all the ideas I compiled about my beloved Dub Techno direction.

This post won’t necessarily explain how to do the typical dub techno. While I’ll cover some of the most asked questions about it, I want to expand on the philosophy and aesthetic itself so you can take the best part of it and merge it into how you work.

Origins of Dub Techno

Before we get into how to make dub techno, it’s very important to me to honor the artists who were behind the genre and to talk about where the genre started. For this, there are some nice videos by Dub Monitor. There are these 2 videos that explain the origins of dub techno better than I could about how the genre started and how it developed.

Dub techno is a subgenre that emerged from the fusion of two influential musical styles: dub and techno. Dub music itself has its origins in Jamaica in the late 1960s, with pioneers like King Tubby and Lee “Scratch” Perry. Dub music is characterized by its heavy use of effects, echo, reverb, and the manipulation of existing tracks, often stripping away vocals to emphasize the rhythm and instrumental elements.


The Techno Connection: Techno, on the other hand, had its beginnings in Detroit in the early 1980s, with artists like Juan Atkins, Derrick May, and Kevin Saunderson. Techno is known for its repetitive beats, synthetic sounds, and a futuristic, often industrial, aesthetic.


The Emergence of Dub Techno: Dub techno began to take shape in the early 1990s when electronic musicians started experimenting with the fusion of dub’s spacious and echo-laden soundscapes with the rhythmic patterns and synthetic textures of techno, thus making dub techno. The result was a genre that retained the hypnotic beats of techno but incorporated the atmospheric and dub-infused elements.


Basic characteristics to consider while making dub techno: Dub techno is characterized by a few key elements:

  • Reverberating Soundscapes: Dub techno producers use extensive reverb and delay effects to create deep and immersive sonic environments. These effects give the music a sense of spaciousness and depth.
  • Minimalism: Similar to techno, dub techno often relies on minimalistic compositions with a focus on repetition. The use of minimal elements allows for a meditative and trance-inducing quality.
  • Subdued Rhythms: While techno can have a pounding and relentless rhythm, dub techno tends to have more subdued and laid-back beats. The rhythm is often more relaxed and groovy.
  • Incorporation of Dub Techniques: Dub techno incorporates dub’s signature techniques like echo, dropouts, and phase shifting to create a sense of movement and exploration within the music.


Notable Pioneers: Some of the early pioneers of dub techno include Basic Channel, a German duo consisting of Moritz von Oswald and Mark Ernestus, and their various aliases like Maurizio and Quadrant. These artists were instrumental in shaping the genre and creating its distinctive sound.


Global Influence: Dub techno’s influence quickly spread beyond Germany, with artists and labels from around the world embracing the genre. Labels like Chain Reaction and Echocord played a significant role in promoting the making of dub techno, and artists from countries like Sweden, Finland, and Japan contributed to its global appeal.


Obsessing on the “How-To” While Making Dub Techno

Over the last 25 years, I’ve come upon multiple and countless discussions online about how the genre is made. People would discuss what piece of equipment was used and be obsessed with recreating the original sound. While this is a state of mind that I totally get – because I also get obsessed about how certain sounds are made – I can’t help myself asking why would you want to redo the exact same results. In a way, it explains why the genre never died in the last decades. There are always people who keep making dub techno.

I think there are a few motivations to join the sound of dub techno. On one side I see it as a self-soothing experience and on the other, by passion, to join others who also make it.

But my take is that people are puzzled about how something that sounds so simple can actually be so mind-boggling to do.

The Main Aspects Of Making Dub Techno

I’d like to cover multiple techniques and strategies to infuse your music with the dub techno approach while also making sure we apply certain tweaks that can make your music have a similar aesthetic.

The first thing to explain is that there are 3 main categories to consider while making dub techno:

  1. Sound Design
  2. Modulation
  3. Colour.

Dub techno has its own touch and sound which will be explored below.

Dub Techno sound design

One of the main characteristics of dub techno comes from the pads and stabs that are fuzzy, melancholic, and enigmatic. In itself, those pads aren’t necessarily that complex to do. I found numerous tutorials on YouTube and have 3 of the ones I prefer. I find they’re well explained and show in similar ways, how to reproduce them.


How To Make Dub Techno Chords

As you see in those tutorials, the way the synth is configured, is rather simple  – it’s usually one chord that repeats, but it has specific modulation and color, as I explained earlier. Once you start experimenting with this pad, you’ll already be in business and have the basis for making dub techno.

But honestly, when I found out how to do it, I thought it would make more sense to be inspired by those techniques but to go a bit deeper into the sound design.

In my past dub albums Tones of Void, Intra, and White Raven, I basically used a bunch of synths but kept them very dark in tone (eg. lower notes around 1-3 octaves) with not too many harmonics (eg. filtered). Once you understand that any synths can do that, you won’t be limited to the classic sound of dub techno.

How to make dub techno melodies

When it comes to melody-making, there are multiple approaches. There’s the classic one note (yes, one note) from the old school dub techno (Basic Channel, Chain Reaction) and there is also a more structured approach (Pablo Bolivar, Yagya), almost pop-oriented dub techno. Both work but the harmonic nature of the melodies are often in a minor key, with the root key of D being often a popular choice.

How to make dub techno bass

While making dub techno, bass is often, also very simple, with it being than often than not a one-note thing. Simply using sine oscillators and pushing them forward in the mix will often be the aesthetic of dub.

Dub Techno synth options

As we saw in the 3 videos, dub can easily be created in any context with any soft synth. Over the years, I have tried and tested many of them. While the native plugins of Ableton can do the job, VCV has been my playground but it’s not for everyone even if it’s free and there are so many tutorials out there. Here are some of the soft synths people love.

  • Diva:  So many tracks I hear in mastering use Diva. It has a distinct sound but in a good way. It sounds warm, and lush, and is close to some hardware options. It’s pricy but you get that sound we love.
  • Pigments: Pigments is versatile, open, powerful, and extremely creative. There is a huge playground here with the option of a preset store within the synth itself.  You need to work a bit to get the dub sound but it sounds nice.
  • TAL-U-NO-LX Synth: Juno has been used over the years as a default synth for dub techno, mainly the chords. This synth option works well and is close to the real thing.
  • Go2: Cheap in price but with big results. Even the presets will give you some nice options to start with. I love this one.
  • Blue-III: Rob Papen again and this one is deep. Not for the beginner as you can easily get lost in it but the sounds you get are very impressive.
  • Prophet VS-V: Not many people know but it was said that the Prophet VS was what the early guys of Chain Reaction were using. When there was a VST version of it, we were all drooling. While it is very powerful and nice, it is not the easiest to program. But the sound is very impressive.
  • Prophet 5: This is a synth we all used for years in the early 2000s when we wanted the dub sound. It aged so well and it’s fun to use. You get tons of options for synths, pads, and stabs. Recommended and often on sale.
  • Orange Vocoder: This is not a synth per se, as it is of course, a vocoder but this was used by so many people as you can basically throw any sound in it and this plugin will turn it into a lush synth sound. Really powerful and a nice alternative to just synths.


Dub is a vibe and an aesthetic, not a bible. You take the aesthetic and apply it to any sound.

Once you pick your aesthetic, you can apply the concept to any synths you have.

What you need is to create and amplify your harmonics with saturation (tube and tape do great), then have a colored filter and sent to delay and reverb for cosmetics. This means that if you have any synth of yours, you can make it dirty with a saturation and then filter it. The reverb will then do the trick.

What will make a difference is to juggle with the most genres of saturation: distortion, amp and saturation itself. Using a combination of the 3 will bring really lovely colours but be careful not to overcook your sounds. Keep in mind that in mastering, it will be boosted so what sounds like a pleasant distortion can become overwhelming later on.

Some of my saturation go-tos are below.

Saturation plugins used in making dub techno

  • Surge XT: (FREE!) This is a collective of developers who managed to create a badass synth and free, high-quality, effects. Their Chow Tape is quite amazing but also all other distortion/saturation tools. A must-have and hey, it’s free.
  • RC-20: This one came in popular in the lofi hip-hop community as a de facto plugin to have. It adds lofi vibes but this is an element dub techno also has so the cross use is totally on point.
  • Reamp: The guys behind this are very solid and this one has a beautiful series of plugins which are all very solid. I like the colour this one has.
  • Saturn 2: Anything Fabfilter is a leader in its domain. Saturn is not an exception, as it is very good at what it does, which is to make anything too pretty, a bit uglier, dirtier.
  • PSP Saturator: PSP is one of my favorite company for their plugins. I love their EQs and compressor and this saturator does a great job on pads.
  • Satin: This is such a handy tool here. It is tape saturation/simulation, but also a tape delay which can create weird reverbs and wobbly signals. Once you start using it, you’ll be using it all the time.

Reverb plugins for dub techno

While Ableton’s reverbs option can do the job, I always rely on third-party VST for that part. It’s hard not to mention Valhalla plugins for this. The Supermassive is free and the Digital Reverb is sort of a perfect match for dub. If you have to pick, I would recommend experimenting with “plate” models and some use of a “hall” as well for sustained notes.

Whatever you do, to me, Dub Techno really starts with a heavy use of reverb, which has to be modulated, filtered, and distorted. Understanding how to use your reverb and combining it with a delay will ensure that you have a proper dub mood. If you pick the reverb properly, you almost could say that you have 50% of your job done. The rest are the sum of a lot of details but when you have your reverb done right, you’ll automatically feel you’re making dub.

Anyone who knows me has heard my affectionate passion for reverbs. I compiled some of my favorites for Dub Techno.


The saturation tools native to Ableton aren’t too bad but can be recognizable easily by an educated ear.

  • Lexicon 224: I’m a big fan of Lexicon. It has a character and tone that I love. Not sure what it is, but the grain and how it feels just does it for me.
  • Springs: Spring reverb is a type that makes sounds sent through it, sound liquid. This works well with percussive sounds and you’ll feel like some classic dub vibes.
  • Fabfilter Pro-R: This one is amazing for spaces. It is a powerful tool to shape grandiose halls and give tremendous space.
  • Adaptiverb: There’s different tools on that ones that makes it unique. It has a big array of presets that are tuned to a root key, which can create pads out of unusual sounds. Quite unique.
  • SP2016: I call this one a Cadillac of reverbs. It’s elegant, warm, very ear pleasant and very visual. I feel immersed when using it.
  • bx_rooms: Extremely versatile but the interface can be intimidating. It has lovely options for different room types.
  • Blackhole: This one is spooky, deep, powerful. It is a reverb that makes you go in space as it sounds pretty sci-fi, rich, and gigantic sometimes.


Now reverbs for dub are essential but you’ll need delays as well. You can either use long delays or short. There’s no right or wrong but the use of delays helps you take very simple sounds and create repetition, which transforms the straight-forward pattern into psychedelic equations. Delays, combined with reverb, create a thick background and will make any sound – which feel empty at first – fill with a velvety, dreamy carpet. I think for a lot of fans of the genre, it’s a quality they’re after.

Echo and Hybrid Reverb in Ableton. They can do a long run if you don’t want to break your piggy bank.

Additional plugins for making dub techno (delays, pitch modulators, etc).

  • Diffuse: These guys are dub lovers and this tool here is a go-to for reverb/delay as it’s an emulation of the famous Roland Space Echo which was in so many studios.
  • Modnetic: Same guys as above. This one is a combination of all your need in one place to turn a single, boring sound, into a dub tune.
  • Echorec: The guys at Pulsar are very competent at recreating hardware toys and they created a tape delay with self-oscilating, magnetic fields and all you wish for in a dirty delay.
  • Galaxy Tape Echo: This is UAD’s recreation of the Roland Space Echo and it is really well done.
  • Tal Dub-X: As the name implies, this is a station with all the options to turn a simple delay into a modulated one.
  • Echo Cat: Another beautiful emulation of a tape delay. But a really solid one.
  • PSP 42: Popularized by Richie Hawtin in the early 2000s, where he’d loop-delay sounds and pitch them up/down, the PSP42 was used abusively in all his sets for years. Rich was basically doing dub techniques in his own way.


Modulation in dub techno

If you just take any synth sounds and send it to your effect chains, you have done the first step but it won’t be complete until you make it move, react, and evolve into modulations. There is a lot to take in in this section because this is also one of the most discussed topics in my blog – I have covered it inside out already but you now know why, because Dub Techno is all about modulations. Once you dip your toe in those waters, you’ll become excited about it and apply it everywhere.

If you watched those tutorials on how they make the dub pads and chords, you’ll see that they use modulation on the filter. There is both use of an envelope and LFO to modulate the frequency of the filter but also its resonance. That’s just the tip of the iceberg to me. If there is a parameter on a plugin, I like to think that it shouldn’t remain static and have it move, even a little bit.

But of course, a lot of this can be handled by my favorite “Swiss army knife”, Shaperbox which is designed for modulation on all levels. A must-have.

When to use envelopes and LFOs when making dub techno

Well, if it’s a modulation that is reacting to an incoming signal such as when a sound comes in, I want the filter to react, then you’ll use an envelope. That kind of modulation is excellent for accentuating or attenuating sounds, creating a more organic feel to the processed sound.

If you want constant movement, LFOs are excellent for that. They just move to the tempo or not. They give the illusion that things are constantly on the go and help blur the lines of linear arrangements.

There’s one precious bundle that I love from Make Noiss that has so many little tools, perfect for modulation and midi signal processing. Not to forget my friends at Manifest Audio and their large array of max patches as well that are perfect for modulation but they also curated many racks for dub.

The 3 Amigos are here to turn a static idea into an animated figure.

Colours of Dub Techno

I know you might be confused by colour here as we discussed of saturation as a form of colour but this is the last touch. The colours here are from different sources else than saturation and also, very complementary. What I’m referring to are the effects of the chorus, phaser, flanger, tremolo, vibrato, auto-pan, harmonizer, wobbler, and also, one of the most important parts which is the hiss. Apart from that last one, all those effects are often heavily used in dub and it’s quite a nice touch to pick one or 2 on your sounds.

These guys are a lot of fun and sound pretty lovely.

Chorus, phaser, and vibrato

Chorus, phaser, and vibrato work really well with synths, pads, stabs, and chords. They give this engaging, trippy, stereo effect that quite often, makes a dull sound jump out of the mix. Keep an eye to make sure you don’t get phasing issues which would be an overuse of one of those effects. Phasing is quite common in dub and I often fix those issues in mastering. It’s better to control it when decorating your mix.

Flanger

Flanger gives this jet-sound feel to anything. It brings pfshhh sound to metallic or noisy sounds and can be quite psychedelic if used at a low level. I like it on hats and delays.

Tremolo

Tremolos are sort of a secret sauce that everyone underuses. It’s basically a slow or fast modulation of the amplitude of a sound. It is a superb tool for creating 3D feel where you feel sounds go away from you and come back. It turns anything linear into a lively, feeling motion. At a faster speed, it can even be used as a swing/velocity for percussion. Combine it with an auto-pan and you have head spinning spaced out moments.

The hiss part is quite important as well. The noise floor is something deep in the DNA of dub. There are multiple noise makers. You can dig the internet for noise sources, recordings or noise-making tools (RC-20). Satin has a nice hiss that you can use as well.

Conclusion

Making dub techno should be a playground of experimentation. It’s a genre that I approach with a very open mind and so do many other fans as well. While often people feel like they’re just repeating the clichés and perhaps nothing new comes out of it, then I’d say, dig deeper. There are some gems from people who push the boundaries of the genre.

Max For Live Gems For Ableton

(Updated June 23rd 2023)

I’ve been wanting to cover some of my favorite Max patches for a while. There are so many and sometimes, some are just meh and others, will be quite amazing. Since I’m basically hoarding digital tools for my studio, I thought I’d compile a list of some patches that feels like it’s hacking the production flow to the point where it’s like cheating.


Every now and then, I’ll be making music and whenever it feels too easy (it doesn’t happen enough though), I always the impression that it’s wrong. 


In coaching, I teach that it’s never a problem. My take on this is to harvest ideas when it feels too easy because you might have found a hack and if it sounds good, then it means you found a way to express yourself.


This is why I never have enough tools that ease my creativity but I don’t rely on them as a quick fix for something I can normally do. If there’s a shortcut to something that takes a long time, which provides the same results, I’ll always go with the shortcut. Decision fatigue is something that ruins many studio sessions, and the meter goes down whenever you need to fix something or run into a complicated workflow.


In terms of tools, I have a few categories and I’ll present them based on a need or problem.


I like to think of the different needs related to music coming from different spheres. 


Melodies: Sequencing, hook building, not harmonies, slicing/rearranging, generating.


Sounds: Design, harmonic/inharmonic, quantized, envelopes.


Effects: to be paired with sound sources so there can be variation and alteration.


Rhythms: generating, rearranging, unorthodox patterns, familiar patterns, ratcheting.


If you read my article about VCV and how the brain, the heart work, you’ll have one central source of sequences in one channel and then, you’ll have other channels that are the sounds who will receive the signal from. This is why I separate my sources and receivers. When you hunt for new ideas, you might have a nice melody but not the right sound or vice versa, so you want to be able to swap between them.


This is why I love VCV and modular because you can have built systems of melodies generating tools that send to multiple sound sources.


1- Sequencing : I want to create different rhythms or find patterns out of my usual flow


When it comes to sequencing, there are multiple ways to do it. You can use a note pattern from a midi clip if you want precise ideas. This is useful to lay the main idea of a song and to have direct control over the development of a pattern. But when it comes to generating ideas, I find that step sequencers that have random options, probabilities, phrase length adjustments to name a few, are super useful. It turns your machine into an idea maker and then you can cherry pick what suits your idea.


Drum sequencers that come top of the list for me are XO by XLN and Atlas. Both are quite similar but they offer in-context sample swapping, as well as sample organization, so it becomes really easy and fast to swap a sound to see what it would be like. Both offer different complementary ideas which is why I often use both but they’re not cheap.


Otherwise, if you want a quick fix, the Alexkid Instant Haus max patch is a free alternative. It will create some different rhythms for all your percussion instruments but you can use it to sequence notes or swap percussive for musical elements. Sadly there is no Max patch to hear percussions in context like Xo does. If you like that one, he also made other bundles that are pretty badass here, with more generating ideas for percussion.


I saw this patch here that is quite interesting. It is there to generate ideas so there are some nice potential. Also super powerful, comes Polyrhythm by Encoder audio, which is one of my favorite developers.


I also like Eucledean Pro because it uses the classic Euclidean approach to create beats.


Not long ago, a new max sequencer came out and it’s named Opal. It’s very influenced by Elektron machines. It’s really dope and can achieve so much for drums but also just for textures and even melodies. Powerful.


2 – Sequencing Melodies : Generate hooks, phrases and musical ideas


There are many ways to create a hook. You can use sampling (we’ll get there later), play melodies, extract melodies, combine sounds to make something catchy, record instruments or sounds… All those pretty much cover the main ways to find a hook. Depending on a specific genre, a technique might be used more frequently. 


For ambient and electronic music, in general, sequencing ideas/notes to a synth or sound source is quite popular. Basslines, pads, chords and melodies are often coming from the piano roll. But you could use a melodic sequencer to do so.


I’m obsessed with melody sequencers. They’re fun but they also feel like you have a partner which you can tap endless ideas from.


Here are some of my favorites:


Pattern Generator by Manifest audio. Solid for creating complex or simple melodies as well as can be used for drums.


Snake: Brilliant patch for quick sequences.


Ask and answer: Works for creating call and answer hooks.


Turing Machine: inspired by Allan Turing, this device spits out sequences randomly and then you can loop the parts you like.


Aisle: This complex generating tool finds original sequences and patterns based on repetition. I find that this is excellent for percussions and evolutive percussive melodies.


On the more experimental flavor, Dillon Bastian has been a hero. It’s hard to explain in a few words what they do but he’s basically creating patterns and sounds through a visual context. For instance, with Rhythmorphic, he uses visual maps that shape how the patterns happen and what notes are triggered. It’s a bit hard to explain but it’s something quite unique and you can shape some very unique patterns. This can be very organic sounding, sort of like a chime. Or you can also use it to trigger percussion.


3- Sounds: I want to have sounds that are new to me but still not too crazy (or not).


When it comes to making sounds, I often deal with 2 kinds of mindset. On one hand I often find myself wanting to emulate sounds from songs or artists that I really like. I will try to reverse engineer how it sounds and will noodle around a bunch of different presets, pick the one that is the closest and then try to tweak it to something close to the target. 


This is where “instruments” get handy. While you have a lot of options already with Ableton’s internal synths which are excellent, I compile a few ones here for you.


Chiral: Named holographic synth, it creates unreal sounds, based on multiple synthesis approaches. Hard to describe, these textures will sound very artificial, in a good way. Think of the ultimate synth for scifi score.


Iridescence: This is a delay unit that turns simple sounds into arpeggios. You can basically turn any sounds into a melody.


Grain Forest: The opposite of Chiral. It creates super organic sounds and environment. Bastian built an evolutive instruments with visuals of wind, seeds, trees that grow and die. It’s very relaxing and mesmerizing on its own.


poly-Plaits: The Plaits module is from Mutable Instruments and while this is an open source synth, it made its way to Max for live. It’s a synth with models. It sounds lovely.


Rings: Another take on Mutable instruments but this one is with the module of the same name. It’s a resonant synth with beautiful chime, bells sounds.


Copy Machine: This sampler takes a sample you pick and creates copies of it. The results are a bit mind boggling. Imagine you take a clap sample and turn it into a bunch of people who clap at the same time.


Fortrek: Inspired by the 4 tracker tapes of the 70’s and 80’s, this takes multiple recordings and scrubs through them. Really lovely for lofi feelings.

4 – Effects: Adding spices and colors


Never judge a boring sound as not useful because sometimes, adding the right effects can bring a whole amount of fun to it.


Granular Mirror Maze: A granulator that spits out super nice textures out of percussion or synths. Ideal for pads and backgrounds.


Maze: A looper, tape style with pitch. It is quite fun for creating off the grid ideas and have more of a musique concrète style.


Nube: a take on Clouds, an all time legendary modular effect that is a combination of delay, reverb and granulation.


Muse Concrète: This super advanced tool is not for everyone. It’s the ultimate tool to record and mangle sounds around. Big ups to my bro Offthesky for that one.


All effects from Encoder Audio are amazing.


I recently discovered the work of Robert K / Groov Mekanik and his vast collection of patches impressed me. Not only most of them are free and those who are for sale are at super low price, but the tools he has covers some needs that new and experienced producers want. I was appealed by the High Frequencies limiter that many artists should use as many often boost the highs too much. One patch I’d recommend getting right away is the Note Probability that is super useful for generative patches, adding flow and performances. It simply remove out some notes due to probability. Go have a look, there are some lovely tools in there.


But honestly, I think the most of what you have is by adding modulation to what you already have. This is why modulation options are useful. Here are some of my favorites:


Auto-Slider: Another brilliant essential tool from Offthesky. It records your movement and make turn it into a LFO or super long function signal.


Strange Mod: Dillon Bastian drops this amazing modulator that I use everywhere. Ideal for unusual random modulation.


Source: Inspired by the Buchla 266, it creates random signals.


All LFOs by Kentaro: Advanced and sophisticated, these can bring any modulation to the twilight zone…


I will update this page when I find new things so you might want to bookmark it. If you have suggestions, please share them!


How AI is Helping Musicians Break Free From Unoriginality


When it comes to creating music, there is a never-ending tension between the desire to innovate and the pressure to make money. Many musicians find themselves trapped in a cycle of producing unoriginal music that fits neatly into pre-existing categories, all in the name of pleasing their audiences and making a profit. But what if there was a way to break free from this cycle? 

We recently talked about slowing down to learn new skills, but let’s have a view on the the most techno-technology out there.

Enter artificial intelligence (AI), a tool that is increasingly being used by musicians to push the boundaries of what is possible in music production. As AI been bringing a lot of controversy in the artist community because it is a game changer in democratizing its access, I wanted to focus on the positive aspects.


Using AI to Generate Ideas We Wouldn’t Think Of


One of the reasons why musicians tend to produce unoriginal music is because they are constantly aware of the latest trends and what is popular among their audiences. In order to make money, they feel pressured to produce music that fits neatly into these trends, rather than exploring new territory. This results in a homogenization of music, where everything starts to sound the same. If you read this blog often you’ll know that we often refer to the “success trap” where one tries to repeat a success story and that leads to nothing.


AI, on the other hand, is not aware of these trends. It doesn’t have a preconceived notion of what is popular or what will sell. Instead, it is able to analyze vast amounts of data to identify patterns and connections that humans might not be able to see. This makes it a powerful tool for innovation in music production.


For example, AI can analyze existing music and identify common elements that could be used to create something new. It can also generate entirely new ideas that humans might not have thought of. By using AI, musicians can break free from the constraints of their own creativity and explore new territory that they might not have discovered otherwise.


AI Can Recycle Old Ideas In Innovative Ways


But AI is not just a tool for creating entirely new music. It can also be used to recycle existing ideas in innovative ways. For example, AI can take an existing melody and transpose it to a different key, or it can apply different rhythmic patterns to a familiar chord progression. By using AI in this way, musicians can create something that feels fresh and new, while still drawing on familiar elements that their audiences will recognize.


Of course, using AI in music production is not without its challenges. Some musicians worry that it will make their work feel less authentic, or that it will take away the human element that makes music so special. But the truth is that AI is just a tool, and like any tool, it can be used in a variety of ways. Musicians who embrace AI as a tool for innovation and exploration can use it to enhance their own creativity, rather than replacing it.


AI Tools For Making Electronic Music

  1. Amper Music: A platform that uses AI to generate original music tracks based on user inputs for genre, mood, and tempo.
  2. AIVA (Artificial Intelligence Virtual Artist): A composer and music generator that uses deep learning algorithms to create original pieces of music in different genres.
  3. Melodrive: A tool that uses AI to create personalized music for video games and other interactive media, adapting the music to the user’s behavior and emotions.
  4. Google Magenta: An open-source project that aims to advance the state of the art in machine learning for music and art generation, providing tools for creating and exploring new musical experiences.
  5. Amadeus Code: A tool that uses AI to help songwriters generate new musical ideas, providing suggestions for chord progressions and melodies based on user inputs.
  6. Humtap: A platform that uses AI to help users create original music by providing suggestions for chords, melodies, and lyrics based on their inputs.
  7. Emergent Drums: generate drum kits with a few clicks. Powerful!
  8. AI Kitchen: Still not public but this one looks promising. It is basically the Midjourney of audio. You enter prompts and the AI provides ideas.

How To Spot If A Tool Is Actually AI and Not Something Else:

It can be difficult to determine whether a music production tool that is described as AI-driven is really using AI, as the term “AI” is often used loosely and can mean different things in different contexts. I’ve noticed a number of plugins that say they use AI but aren’t really. However, here are some things to look for that may indicate that a tool is using AI:

  1. Machine learning algorithms: Many AI-driven music production tools use machine learning algorithms to analyze and generate music. If a tool claims to use AI, it is worth looking into what specific machine learning algorithms it is using, and how they are being applied.
  2. Training data: AI systems require large amounts of training data to learn from. If a music production tool claims to use AI, it is worth checking what training data it has been trained on, and whether it has been trained on a sufficiently diverse and representative set of data.
  3. Output variability: One hallmark of AI systems is that they can generate a wide range of outputs based on a given input. If a music production tool is able to generate a large number of unique tracks or variations based on user inputs, this may be a sign that it is using AI.
  4. Expert endorsements: If a music production tool is endorsed by experts in the field of AI or music production, this may be a sign that it is using legitimate AI techniques.
  5. Transparency: Finally, it’s important to look for transparency in how the tool is described and marketed. If a tool is vague about how it uses AI or makes unrealistic claims about what it can do, this may be a red flag.

Ultimately, the best way to determine whether a music production tool is really using AI is to do some research and ask questions. Look for reviews from reputable sources, ask the developers about their AI techniques, and talk to other users to get a sense of how the tool performs in practice.


Generative vs AI

Generative music is the ancestor of AI music. What we do in the modular realm is basically prehistoric cavemen stuff compared to the high tech approach of modelling systems. Modular is sort of relying on boolean logic and basic operations. I think it’s important to explore generative music to understand how machines are there to create material for you to use in your music. Generative music will provide you multiple outputs of ideas based on parameters of your choice. Generative music is something that is important to understand if you’re looking to break writer’s block.

One flaw I like from AI is its lack of understanding good or bad ideas.

It just does things it knows how to do.

You can then take clumsy takes to turn them into ideas of yours. A bit like one joke from a toddler can be used to make some funny stories in adult ways.

So, to all the musicians out there who feel trapped in a cycle of unoriginality: it’s time to reconsider your approach. By embracing AI as a tool for innovation, you can break free from the constraints of what is popular and explore new territory that you might not have discovered otherwise. Whether you are creating entirely new music or recycling existing ideas in innovative ways, AI can help you push the boundaries of what is possible in music production.


Producing Music With Minimal Gear

In this pandemic, it’s especially easy to get apathetic, and start looking for excuses not to create. “The clubs aren’t open,” “nobody is dancing,” “DJs can’t even play my stuff,” “I’m stuck with my current gear, and I can’t afford to get new gear, because the economy is bad.” 

All of these things are just excuses. 

The clubs aren’t open and nobody is dancing? Well, make the music now and release it when they are open. Spend the extra time to work on getting the marketing set up, or consider what labels you want to send it to. 

DJs not playing music? Well, that doesn’t mean they aren’t listening to it, and stashing away music that they like. If anything, they are more responsive than ever because they aren’t on a plane, going on four hours of sleep in two days. Spend some time building relationships with them, so they actually care about you when you send them your stuff.

You can’t afford to get new gear, because the economy is bad? Well, don’t fear, there is tons of free, or low cost gear out there that can accomplish exactly what you need, and even provide some constraints that allow for true originality to shine. Producing music with minimal gear is a great way to make music.

What Are Some Free, Or Inexpensive Tools?

There are dozens of different tools that you can use to produce music with minimal gear.Moog, Korg, Image-Line, and predictably, Apple, have all thrown their hat into this creative ring. Here are some of the better ones for producing music with minimal gear.


Android Tools For Producing Music With Minimal Gear

GStomper Studio

A great way to produce music with minimal gear is the GStomper Studio app. GStomper Studio is an app that installs on any Android device, downloadable from the app store. Built for performance, it contains a full featured sampler/sequencer, microphone recording, a multi OSC and PCM enabled synth, piano roll, drum pads, mixer, master channels, timing and measure functions, and multiple effects. You can upload your own samples, or buy some inexpensive ones in the store. Feeling especially creative? Plug in your favorite MIDI keyboard with a simple USB converter. It’s only $12.99 in the Google Play Store.

image of gstomer. This is a great tool for producing music with minimal gear

FL Studio Mobile

Coming in at a cool $15.99, FL Studio Mobile is the little brother to the full fledged desktop version. While it lacks the VST support, and dynamics of the desktop version, this app is a powerhouse. It has a sequencer, mixer, low latency audio engine, audio recording, built in synths, effects, and samplers. 

If you use the desktop version, FL Studio Mobile comes with the FL Studio Mobile plugin that allows you to swap between desktop and mobile functionality. Also works for iOS. 

This is an excellent way to produce music with minimal gear.  

iPhone Tools For Producing Music With Minimal Gear
GarageBand iOS

Free with all iOS apps, this cultural icon has been responsible for tons of hits, and is the undisputed champion of producing music with minimal gear. While it wasn’t the best when it first debuted on iOS in 2011, now it is a full functioning miniature DAW, with virtual pianos, percussion, microphone recording, loops, MIDI functionality, and way, way more. With the right adapter, you can even plug your guitar into it, and record in the park.


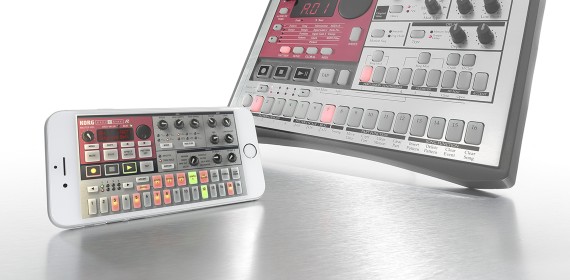
Korg iElectribe

The Korg iElectribe is the mobile version of the renowned Electribe hardware. Think this piece of gear isn’t capable of creating a full album? Think again. Daman Albaran created an entire Gorillaz album using an iPad, a guitar, and this piece of software. It’s only $9.99 in the App Store. If Daman Albaran is capable of producing music with minimal gear, then microhouse can certainly be done on it.

Image of Korg iElectribe. A perfect tool for producing music with minimal gear

DAWs For Producing Music With Minimal Gear


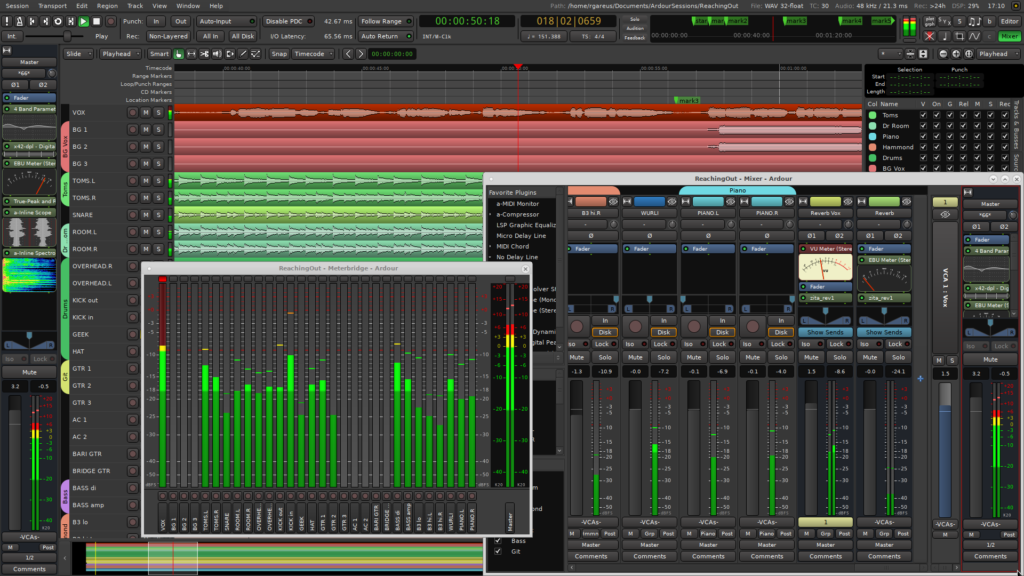
Ardour

Ardour is a full functioning, open source DAW that has been maintained by a dedicated team of decentralized developers. It has full VST support, and uses audio engines that are just as good as any other major DAW, allowing for 32-bit, floating point playback and rendering.

It has recording capabilities only limited to the hardware you use, and has full mixing, mastering, and editing capabilities. It’s totally free, and is available on Windows, Mac OS, Linux, and FreeBSD. The only caveat is that if you use the free version, you have to code all of it together, which takes skill.

However, for a small donation, or a monthly subscription, you can get its full functionality. How much you pay determines what you get, naturally. According to them, “If you choose to pay less than US$45, you will get the current version and updates (e.g. buy version 6.0, get access to 6.1, 6.2, etc. but not 7.0). If you choose to pay US$45 or more: get the current version, updates and the next major version, plus access to nightly (development) builds”.

This is a very inexpensive way of producing music with minimal gear.

a picture of the Ardour DAW. A great app for producing music with minimal gear.

Cakewalk by BandLab

Cakewalk by BandLab is a full functioning, free DAW, with analog console-style virtual mixer, VST plugin support, multi-touch support, Bluetooth MIDI, a suite of in the box plugins, and more.

The only cons are that it’s only available for Windows, and that you have to sign up for a free BandLab account. However, there are no annoying ads that come up with this registration, so that’s cool. Cakewalk by BandLab is a great way for producing music with minimal gear.


Chasing The Dragon Of Perfection

One thing that many artists have in common is the strive for perfection. A tweak here, a tweak there, all to get that sound, color, or note to fit in exactly how you imagine it in your head. This can lead to endless hours of analyzing one aspect over and over again, when chances are that the other listener is never going to notice, and it’s just getting in the way of actually finishing and moving onto the next stage. It’s this need for perfection that starts the musical journey for a  lot of people – they hear a style of music, and think, “I can add something to this to make it perfect,” and thus from that, comes many’s signature. 

This strive for perfection doesn’t only extend to the composition; it extends to the medium that artists use to create. Currently using Ableton 10, and feel stuck? Well, maybe when you finally get Ableton 11, it will reinspire you to make music again, by giving you access to all these new features. 

So you wait until you have the money saved up to get Ableton 11, and decide that you’re not going to do anything music wise until it comes out, lest you start something in Ableton 10 that you can’t fix in 11. Then, like many before you, you drop hundreds of dollars on that new version, and lo-and-behold, you’re still not making music. That’s because often it’s not about the equipment that you have, it’s about using it as an excuse to not do anything. Many times its more fruitful to be producing music with minimal gear, rather than upgrading your fancy DAW.


Where To Find Help

However, sometimes you really can’t do something that you want done, like a vocal, guitar riff, or live percussion. Luckily, there are a lot of places you can go to get reasonably priced studio musicians. 

Before we into what the resources are, a quick note on individuality in music, especially electronic music. Most likely due to the 90’s DIY attitude towards dance music, there is a permeating attitude that somehow if you don’t do everything in the track, it’s somehow cheating. 

No other genre of music thinks like this. Michael Jackson isn’t less brilliant because he had Quincy Jones. The Beatles aren’t any less enigmatic and sonically revolutionary because they had Phil Spector and George Martin. The Beach Boy’s Pet Sounds isn’t any less game changing of an album, because it’s made primarily by session musicians. However, in dance music, if there is outside help, somehow it’s cheating. This is kind of ridiculous. Electronic musicians are not more legitimate musicians than The Beatles, sorry. Many of these albums were created with antiquated gear, that equates to producing music with minimal gear nowadays. If they could do it then, you can certainly do it now.

SoundBetter

Soundbetter is a platform where musicians can hire people to do things that they don’t want to do, or aren’t capable of doing. Need someone to play bass on your new house track? SoundBetter has that covered. Mixing or mastering? There are engineers that work with most conceivable genres, for a reasonable price.

Fiverr

Lots of people know Fiverr, and for good reason. It’s an excellent repository of services, from graphic design, to session musicians. Many critically acclaimed musicians sell their services on Fiverr for a reasonable rate.

Pheek’s Mixing And Mastering

Shameless plug. Here you can get mixing and mastering services, as well as track finalization. If you specialize in underground electronic music, and want your track to sound pristine, or need someone to help put finishing touches on the composition, then this is a sure bet, for a good price.


Examples Of Music Made On Minimal Gear

If you’re just getting started, or are looking to change up your medium to find new inspiration, don’t let brand names, and expense, get in the way of creating something great. Some truly great works of art have been made on stock, dated, repurposed, or even free software.

Here are a few:

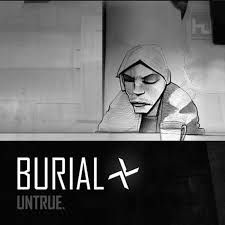
Burial – Untrue

burial's untrue is a perfect example of producing music with minimal gear. This is the cover of the album.

If you’re not a stranger to Pitchfork’s social media feed, you have probably noticed how they absolutely gush over this album, reposting their article, Why Burial’s Untrue Is The Most Important Electronic Album Of The Century So Far ad nauseum. What’s most fascinating about this article, is that it is made on SoundForge, which is not a traditional DAW by any means.

The version he used didn’t have VST support or even multitracks. It didn’t have neat timing, or BPM features, or anything that modern DAWs use. It was simply a medium for designing sound. Yet, he used it to create an impeccably modern, important album, using old YouTube, and video game samples.

It’s this constraint that made such a unique, airy sounding album that still receives near daily praise the world over.

Justice – Cross

Pretty much the flag bearers of the post-Daft Punk “French Touch” revolution, Justice exploded onto the airwaves with their 2008 album, Cross. A distorted amalgamation of punk rock, disco, soul, and stuttering samples that were modern, and loud. Even to this day, the production value of Cross, while bordering on EDM, doesn’t feel plastic, or overproduced. By any stretch of the imagination, this album was made in an excellent studio, on well tuned gear, and warm, analogue synths. 

Well, that would be wrong. While there is definitely some post production magic, the majority of Cross was made by two French dudes with GarageBand, and clever sampling.   

Justice’s  Xavier de Rosnay says, “A lot of people think it’s bullshit when we say we use GarageBand, but it’s actually an amazing tool.”

Jon Hopkins – Immunity

An image of Jon Hopkin's Immunity, which is an example of producing music with minimal gear.One of the most revered electronic albums of the last decade is Jon Hopkins’ blistering techno/neo-classical masterpiece, Immunity. While he now uses Ableton, at the time, he built this album in a Frankenstein combination of his MacBook running Logic for arrangement, with a parallel processed version of Windows 98 running a 1999 version of SoundForge to do his sound design. 
This album was nominated for a Mercury Prize, and is #37 on Pitchfork’s Greatest IDM Albums of All Time.

Steve Lacy (Kendrick Lamar / The INternet / GoldLink, etc)

Steve Lacy is known for making beats on an iPhone and iPod. He has his beats on Kendrick Lamar’s DAMN with the song PRIDE, co-executive produced The Internet’s Ego Death, and has done collaborations with many other well known artists. 

Yes, it may not be the type of music that many people who read this blog care for, but you can’t deny its impact. If you can make hip hop on an iPhone, you can make ambient techno on one too.

There are many, many more examples of this, in pretty much every genre imaginable. If anything it’s the constraints that give these pieces of art their depth. Never underestimate the power of limitations.


Hopefully this article provides you with some resources, and inspiration for making music with minimal resources. Whether that is using an antiquated, or repurposed piece of software, an Open Source DAW, or even your phone, there is no shortage of brilliant pieces of art that have been made by minimal, and unconventional methods. 

Just remember, in the information age, there is a litany of resources available to help you get from A to B. And even if you have all the gear in the world, sometimes it’s good to try something new, and restrictive. You never know what will come out of it. Plus, making things in unconventional ways is a great story to pitch to media outlets to promote your music, so there is that too.

Tips to add movement and life to your songs

One of the most popular topics in music production is with regards to making music feel “alive” by creating movement in music. While I already covered this topic in a past article, I’ll focus today on tools you can use and some techniques you can also apply to create movement.

First, let’s classify movement into categories:

  • Modulation (slow, fast)
  • Automation (micro, macro)
  • Chaos
  • Saturation

One of the thing that makes modular synths very popular is the possibility of controlling and modulating many parameters the way you want, but the other aspect that makes it exciting is the analog aspect. You’ve probably seen and heard multiple debates about the analog vs digital thing and perhaps, what’s funny is, many feel they know what this is about but yet, can’t really figure it out.

Take, for example, something we all know well: a clock that shows time.

An analog clock is one with needles that are moved by an internal mechanism, making them move smoothly in harmony while time goes by. There’s a very, very preciseness to it where you can see the tiny moment between seconds.

The digital or numeric clock jumps from second to second, minute to minute, with the numbers increasing: there are no smooth, slowly incrementing needle that moves between numbers; they just jump.

Sound is pretty much the same in a way. Once it’s digitized, the computer analyzes the information using sample and bit rates for precision. The flow isn’t the same, but you need a really precise system and ear to spot the difference. Some people do but it’s very rare. This is why, in theory, there’s a difference between digital files and vinyl records.

One eye opener for me was that when I was shopping for modulars at the local store, I was talking with the store’s specialist who was passionate about sound. “The one thing I don’t like about samples is, the sound is frozen and dead”, he said. With modular synths, because there’s often an analog component, the sound, on a microscopic level, is never the same twice.

This is why using samples and playing with digital tools on your DAW, needs a bit of magic to bring it all to life.

Modulation

By modulation, we’re referring to tools that move parameters for you, based on how you have configured them. The two main modulators you can use are:

  • LFOs: As in Low Frequency Oscillators. These will emit a frequency in a given shape (ex. sine, triangular, square, etc.), and a certain speed. They can be synced to your song’s tempo or not. LFOs are often included in synths but you can also find once instances in the Max for live patches.
  • Envelopes: Envelopes react to incoming signal and then will be shaped in how you want. Compressors, as we discussed recently, kinda work with an envelop principle.

There are multiple aspects of a sound you can modulate. While there are numerous tools out there to help you with that, it’s good to know that there are a few things you can do within your DAW. The main things you can modulate are:

  • Amplitude (gain, volume): Leaving the level of a sound to the same position for a whole track is very static. While there’s nothing wrong with that, it’s means that the sound is lacking dynamics.
  • Stereo position (panning): Sounds can move from left to right if you automate the panning or use a autopanner.
  • Distance (far, close): This is a great thing to automate. You can make sounds go further away by high passing, filtering to higher frequencies. Combined with the volume, it really push the sound away.
  • Depth (reverb): Adding reverb is a great way to add space and if you modulate, it makes things very alive.
  • Sound’s length (ADSR, gating): If you listen to drummers, they’ll hit their percussion so that the length constantly changes. This can be done by modulating a sampler’s ADSR envelope.
  • Filtering: A filter’s frequency and resonance changing position as the song changes offers a very ear pleasing effect.

Some effects that are modulating tools you already know are chorus, flanger, autopan, phaser, and reverb. They all play with the panning and also depth. Adding more than 2-3 instances in a song can cause issues so this is why it’s good to approach each channels individually.

My suggestion: Have one LFO and one envelope on every channel and map them to something: EQ, filter, panning, gain, etc.

Some amazing modulators that offer really good all in one options that you might really enjoy (as I do for quick fix on a boring stem):

QuatroMod

LFO Tool by XFER Records

ShaperBox by Cableguys – My go to to really bring sound to life.

Movement by Output  – This one is stellar and really can make things feel messy if pushed too far but the potential is bonkers. You instantly turn anything into a living texture that is never boring.

AUtomation

Automation is what you draw in your DAW that allows you to make a quick-moving or long-evolving effect. You might already know this but you’d be surprised to know that it is too often, under used. How can you know this though?

I have my own set of rules and here are some:

  • Each channel must at least have one long, evolving movement. I’m allergic to straight lines and will sometimes slightly shift points to have them have smallest slant. My go: amplitude, EQ or filters.
  • In a drop down list of each potential parameters, I want to have at least 3 things moving.
  • Each channels, must have at least 3 quick, unique, fast change.
  • Include at least 3-5 recorded live tweaks. I like to take a midi controller and map certain parameters and then play with the knobs, faders. I record the movements and then I can edit them wherever I want in the song. This human touch really makes something special.

While working with automation, one thing I love is to use Max for live patches that create variations, record them as automation and then edit them. It’s like having an assistant. There are great options to chose from but my favorites would be:

Chaos

By “chaos” I mean using random generators. They would fit under the umbrella of modulators but I like to put them in their own world. There are multiple uses of generators. You can take any LFO and switch them to a signal that is random to make sure there’s always a variable that changes. This is particularly useful with amplitude, filtering. It really adds life. You can also use the random module in the MIDI tools to add some life. Same with the use of humanizer on a midi channel. Both will make sure the notes are changing a little, all the time.

Saturation

If we think of the earlier example of how analog gear is constantly moving, using a saturator is a good way to bend perception. We previously discussed saturators in an earlier post but we didn’t talk of a super useful tool named Channel strip which often has an analog feel included. It remains transparent but it does something to the signal that is moving it away from a sterile digital feel.

My favorite channel strips would be:

The Virtual Mix rack by Slate Digital. Raw power.

McDSP Analog channel

Slam Pro


SEE ALSO : Getting feedback on your music

Tips and recommendations for compression (Pt. 1)

After two important posts on EQs, it’s time to start discussing how to use compression, as these two work so well hand-in-hand, and I’ll offer my own recommendations on some of the best compression VST plugins. Your own selection of VSTs should always start with a few of these two categories:

For EQs:

  1. One Parametric EQ for surgical needs.
  2. One Shelving EQ for toning.
  3. One analog based EQ for coloring.

For compression, there are also several choices and it’s easy to get lost, so one of the things I find important to start with is to explain the different families of compressors (more suitable to relate them to as models).

FET

This type of compressor is one of the most popular out there. It’s known for its aggression and for its use of adding tons of punch to sounds, mixes, with a lot of attitude. The FET compressor, which means Field Effect Transistor, appeared later in the history of compressors, when they switched the tubes for to a model that helped make sounds warmer and richer; it became an instant favorite in studios. The 1176 is one compressor that became one of the most popular models in studios.

Use: Amazing punch on percussion and add life on textures, pads.

Recommended plugins:

FET Compressor (Softube)

FETpressor (PSP)

Black Limiting 76 (IkMultimedia)

Opto

This type is pretty much the opposite of the FET (although there are people who will argue about this). The Opto model is smooth and super warm. Not idea for percussion but I do use it in parallel (see techniques below), which can give beef to a kick, for instance. The way this model works is very interesting. It’s basically a lamp that reacts to the incoming sound and will light up depending of the incoming signal. I’m not the best at explaining this, but that pretty much sums it up,  and this makes the Opto compressor not the most aggressive, as it offers smoothness.

Use: Ideal for pads, synths, textures and I would recommend you experiment it with percussion, but in parallel mode.

Notable suggestions for VST:

Bx_Opto (Brainworx)

Opto compressor (IKMultimedia)

Renaissance Compressor by Waves also offers an Opto mode.

VariMu

VariMu is like the prince of compressors because it has finesse and elegance. Manley popularized the VariMu with their famous version of it. It is a cousin of the Opto in the way it works, and is also very smooth. Often used in mastering, it works like a charm to handle punch problems or to keep coherence in a mix that needs general glue to it. It’s not the best to create punch and this is why, but when used in pair with another compressor, it can really create beautiful results.

Use: On your mix or on a group. It will glue it all together in the most luscious way.

Suggestions of plugins:

The Manley Compressor from UAD

MJUC by Klanghelm

DynaMU by IKMultimedia

VCA

This type of compressor is also very popular just like the FET. I’d say that most generic compressors are often based on that model. Since it’s based on voltage control, this compressor is a surgical type of tool. It is really effective to produce snappiness to percussion but it can also be used to control harsh transients.

Use: Smack those kicks with it and control the transients of hats with another setting.

My favorites:

TDR Kotelnikov

U-He Presswerk

API 2500 (There are a few imitations from UAD and Waves, so check it out)

Techniques

You may have the best plugins but if you don’t know how to use them, you’ll miss the full potential of these amazing tools. I’d say that if you don’t, please know that a large number of producers out there, even experienced ones, struggle to fully understand them. So while you will find so many tutorials out there, I’d like to explain you my simple vision.

But first, let me explain what compression does. It takes the incoming sound and monitors the loudest peak and checks if it is louder than a certain point: the threshold. If that’s the case, it will push down the signal above the threshold, down. I like to picture it as when you sit in a bath, where the water rise as you sit in it. The way a compressor “pushes down” the audio will be controlled by the attack (how fast it reacts), release (for how long) and ratio (how much).

I’d like to compare a compressor to an oven and the incoming music as the dough. The compressor doesn’t work like, let’s say a reverb where if you put it on a sound, you’ll automatically hear what’s being altered. How compressor VSTs work are really, to me, like a oven. You need to bring in the sound, cook it, then push it out.

So, use these parameters when dealing with compression:

  1. Incoming signal. You’ll need to raise the volume of the incoming signal to make sure it meets or is above the threshold. If the signal is too low, it won’t be processed.
  2. Threshold. Lower it down if needed. You’ll see that most compressors have a “GR” for gain reduction meter. This will start to pump as the signal meets the threshold. If nothing happens, lower down the threshold and or boost the incoming signal.
  3. Attack/release. A fast attack will make the pumping start react quickly while a slow one will be less aggressive. You can then adjust the release to control for how long the pumping will last.
  4. Ratio. This is how much will be pushed down. For instance, a 2:1 ratio means that for 2dB over the threshold, it will be turned down by 1dB over the threshold. Eg. 8:1 is a more aggressive result.
  5. Make-up gain/Output. Your output signal will be turned down in the process so you can use the make-up gain to adjust the processed signal to match or be louder than the incoming signal.

So yeah, it sounds weird on paper, but compression is about lowering the volume to make things louder.

Regarding my analogy with the bread, you need to make sure it bakes (gets compressed) before pushing it out.

Now, the techniques you can use compression for:

  1. Limiting. This is the most known use of a compressor. It is a way of making sure the sound never goes above a certain level. Ideal on a master bus to avoid clipping. You can use it to a certain extent on busses to maximize the volume. But make sure it’s not too much as it can then distort in mastering.
  2. Side-chain, ducking. Popular in electronic music, this makes the compression work based on an incoming signal. I’ll get back to this in a future post.
  3. Parallel compression. To do this, you need to put the compression in an AUX/Send bus and then send whatever needs compression to it. This ensure the original signal is mixed with the compressed one, adding power, loudness, precision.
  4. Serial compression. To be used with care, but has very powerful results. This is about putting two (or more) compressors back to back. One can be in parallel (thanks to a wet/dry) and the second one, not. This makes sounds really powerful, punchy, fat. Ideal on sounds that are wimpy and pale.

That’s it for the basics of compression! I’ll discuss the art of sound design using compression and EQs next.


SEE ALSO : Tips for compression: The Multi-band compressor (Pt. 2)

Transient Shaping

In this blog, I’ve already discussed many ways of playing with your track to create new textures and variations and how to keep your sounds interesting. I’d like to discuss another way of colouring your music: transient shaping; something that can completely change the way a track sounds and feels, depending how you shape your sounds.

To experiment with transients, we will need to play with certain features of Ableton Live which can be very powerful. Alternatively, you could also invest in a type of plugin that is in the category of “Transient Shapers”; there are many out there but some of my favorites are the MTransient by Melda Production and Transient Shaper by Softubes. Both offer quality results at a decent price.

Firstly, if you’re not familiar with transients, they usually consist of the beginning of a sound/sample. If you’re familiar with the Attack-Decay-Sustain-Release (ADSR) envelope of the synthesizers, the attack would be generally manipulating the transient. Sometimes its fast and strong, or other times, it’s slow and smooth. For a kick that punches, you want it to be pronounced and snappy. If you’re after that specific feel, then the transient shaper will really be interesting for you. A plugin will allow you to make the transient more apparent or make it quieter; generally you will also be able to control the sustain of the transient. Sometimes you might want your transient to snap but the rest of the kick to feel quieter; a transient shaper plugin will be able to do that with 2 knobs. I have multiple versions of these types of tools and use them daily – it’s quite captivating what you can do if you exaggerate the attack of sounds which don’t have any transient at all.

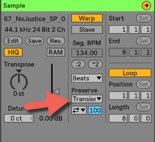
In Ableton Live, you can also have fun with a feature integrated in the sample’s detail view. Let’s have a look at how you can manipulate it and how you can have fun with it…

First take a loop sample, and duplicate it in another channel.

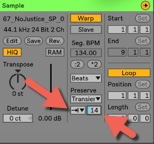
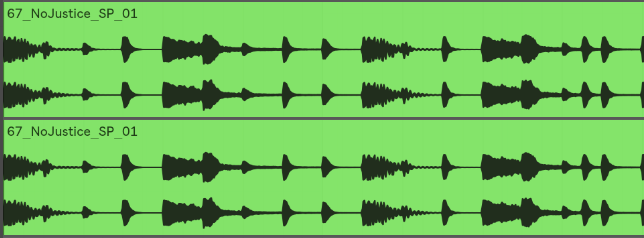
The on the duplicated loop, make sure you set up your details like this. Now turn down the percentage of the transient.

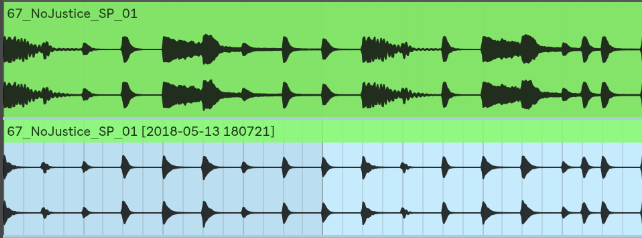
You’ll notice that as you lower down this box, only the transient will remain and the rest of each sounds will disappear. You’re basically trimming each sound to keep just the beginning of it, which is the transient. The new channel can be leveled up and layered with the other: you’ll now notice the transient is louder and you now have certain punch added if there was not enough originally.

If you flatten or consolidate, you’ll get a new view:

See the difference and what we removed? By layering the beginning, you’re giving more punch.

Tip: try it with a kick loop or a hihat loop.

Now your fun really has just begun!

Here are a few suggestions to try for pushing your sound design even further:

  1. Control/lower the transients of the original loop with a compressor. If you set a compressor with a fast attack, it will control the transient. Play with the release to really tame it down.
  2. Add a reverb or any effect on the transient channel alone. This is really cool because the effect can either affect the beginning or the end of the sounds. I like to put reverb only on the sustain while leaving the transient dry, which gives more precision to your percussion instead of having them lost in a pool of reverb.
  3. EQ the transients to keep only the high end for sharp precision or just the mids for more oomph.
  4. Side-chain the transient with the original sound. Experiment with this one and you’ll achieve some fun results!
  5. Compress both channels by grouping them.

Feel free to share your thoughts about transient shaping!

Pointers To Define Your Sound

The majority of artists I work with during mastering and finishing your tracks, talk about their desire to define their own sound. It’s important to them because as a music lover many times you’ll hear a just a few seconds of a song and think that’s got to be _____ band, or producer. To achieve this ‘signature style’ there will usually be a particular production style or a sound palate one will use in a way entirely his or her own that is instantly recognizable.
Case in point – there is much talk and celebration of Burial’s album “Untrue” which is now considered to be one of the most influential albums of the last decade.

Why is this album so celebrated?
For starters, the ghostly atmospheres, foley recordings and sound effects of London at night, conjure an atmosphere of a dark, eerie space. The heavy, downtempo vibe of the music is an invitation for listeners to go to their own dark places and reflect on that. Even the titles of his tracks, “loner”, “U Hurt Me”, tap into a feeling of emotional damage, which many people can really connect with. In short, the heavy sound and persona behind the record are instantly Burial.

Taking note of the various elements artists can use to create a sound all their own, let’s analyze some of the fundamentals of what will be influencing your sound.

  • Tonality: this is hugely important as most artists will generally embrace a ‘vibe’ or ‘mood’ in their music such as happy, upbeat, or angry, melancholy. Do you often work in a similar scale or key? Are your melodies basic and straight forward, or do you write complex chord progressions?
  • Genre: picking a genre to work in is perhaps one of the most obvious choices in creating ‘your’ sound, and defining your identity as an artist. Are you embracing an existing one or will you try to fit between two? This can be a hit or miss and to do something original is taking a risk but the reward can be massive.
  • Samples: Are you using samples? Synthesis? Modular? The Orb for example, loved to use samples from specific movies (the 80’s like Flash) and Boards of Canada were famous for recording their synth parts to old tapes and resampling that back into the session. Consider the possibilities of your sound source.
  • Rhythms: Are you more 4 to the floor? Breakbeat influenced? Jazz? Hip-hop? Latin rooted? Take note of where you’re most comfortable and what is your go-to groove.
  • Technicalities: This is where I can help you most and have been helping clients with on their way to creating ‘their sound’.
  • Mistake. Are you going for something slightly sloppy or very tight and quantized? Try to see what mistakes can bring to your music and if something wrong can develop something interesting. Don’t be afraid to try something you might never do as a starting point to your next track. 

The tools and effects you use can also have a major impact on your sound. I’ve covered this before but it’s important to refresh your mind when considering your choice of effects.

Reverb, Delay. You might pick one plugin to work with all the time for consistency. Reverb – maybe you always go for a plate or perhaps you prefer to use huge spaces and long tails. Are you going to use dub delays or short ones to go for a Haas effect?

Compression. Do you want your sound to be compressed or not? This is something think about. Find a compressor that can be your swiss army knife for all occasions, and stick to using that.

The process of defining your sound is much like a designer developing the branding elements for a client.

While not essential but certainly helpful, a designer will tell you which set of colours, fonts, images, and direction to use within all your work.

What I usually do with my clients to create more of a signature sound is take a collection of references and sounds they connect with and then work on a way to replicate similar sounds and ideas. The pad from here, the percussion and swing from there, kicks made this way, hats always that way… and so on. You cherry pick all your preferred sounds from different sources (eg. why not go for a style that is entirely alien to you like afrobeat if you’re into techno?) and make a collection. I can find which synth is excellent at creating that sound, and while playing with it, you’ll often discover so many new sounds you are drawn to that sound original, fresh, and inspiring.

The truth is that trying to define your sound will not come overnight. It’s a process that will be different for everyone, and you truly cannot speed through this and feel right about it because there is no fast track to originality.

That being said, in all honesty, working with someone who has the production and musical experience to guide you in the areas that best represent you is huge and can be a game changer in defining your sound.

As always let me know if you have any suggestions or questions about this post and leave a comment below and tell me what projects you are working on right now.

JP


SEE ALSO : Beats and Melodies

Creating Beauty Out of Ugly Sounds

This post is inspired by one of the most useful experiences I’ve ever had for my personal development as a producer. I’ve made it into an exercise that you can try.

Back in the early 2000s, when Montreal’s MUTEK festival was just getting started, our community of electronic music producers was blooming. People were spending as much of their time developing concepts as finishing tracks. I remember one sunny summer day, when Tim Hecker and I were sitting outside of my friend Mitchell Akiyama’s home, and we were discussing sounds. We had this interesting debate about what made some sounds “ugly,” and what the word meant for us. We felt that maybe it was cultural, or maybe it was producers using sounds the wrong way. At one point, we got to talking about how the guys of Porter Ricks recycled ugly rave sounds into what they do best, a kind of deep, mysterious techno.

https://www.youtube.com/watch?v=Wu9SEr8ST7c

A new concept was born: how to transform ugliness into beauty. Suddenly, the art of recycling meant that anything was possible, no matter the sources.

Tim worked on some of his albums using granular synthesis. He used sources like Van Halen or other weird heavy metal sounds. He even used burps for one installation…

Mitch and I went in to the studio. We loaded some rave samples from CDs and started playing around with them. By the end of the session we had 2 IDM-oriented songs that lacked any hint of a rave sound.

It was a great experience. I’d throw out some ideas, which Mitch would then apply to what he was doing to the best of his understanding. The directives I gave were descriptive rather than technical, and there was a lot of room for interpretation. It often wasn’t what I had in mind, but whatever emerged would be great as it was.

The only references we worked with were ugly sounds and some general, non-technical ideas.

The thing is that producers will often come to the studio with their minds already full of preconceived ideas and expectations on what’s nice or not. This doesn’t leave much room for mistakes, discoveries, oddities, or for your subconscious to express itself spontaneously.

So what is the exercise?

  1. When you’re picking sounds for your track, just go for the worst, ugliest sounds you can find on your hard drive or in your presets.
  2. From those sounds, discover how you can transform them. You can use filters, pitch shifting, EQ, and any other effect that might help. Reverb, even a little, can add a dramatic feel to a sound. So try to play with these 4 elements, plus resample yourself while doing so. You will then be able to play again with the new modified sounds. Each time you experiment tweaking the sound and record it, we call that “a round.”  To create a new, beautiful sound, you will need to re-process your sounds into 2 to 4 rounds.
  3. Detach yourself from any preconceived notions or expectations you have about where the track can or should go. Just try to explore and see where it takes you. You can take a look at my recent post on experimental music too.

Another thing that can be done is to use randomizing options to see what kind of crazy results emerge.

And be sure to have fun!


EDIT: Bjork seems to share the same idea.

SEE ALSO : Create Your Own Concept Album

Create Your Own Concept Album

I was recently discussing a concept album I did in 2015 entitled Tones Of Voidand I was asked about my views on what makes an album unified. It’s an important question if you want to create a concept album: how does one come up with a theme, or create their own style?

Let’s start with a basic understanding of a genre and its origins, say techno for example (since it’s the one I know the most). If you watch documentaries about some of techno’s pioneers, like Juan Atkins, Richie Hawtin or others, they’ll often talk about how when they began as music producers, they just made music with whatever they had or could get their hands on. In our current era, with its overwhelming abundance of plugins, sound banks, presets, hardware and the like, many people follow sites like Synthtopia to keep up with all of the latest toys. But in 1987, they weren’t as common or affordable.

Some notable mentions:

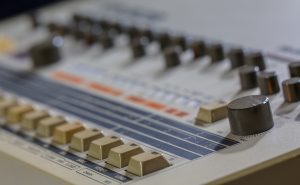
The famous TR-909

The famous TR-909

  • The acid sound was defined by the notorious tb-303, which wasn’t even invented for that purpose.
  • House and techno relied heavily on tr-909 and tr-808.
  • Early electro at the start of the 80s used tr-606 and tr-707.

These weren’t really deliberate choices or statements. They simply came from what was available.


Step 1: Build your sound bank

First, select a bank of sounds for your concept albumKnowing that sounds define a direction, a good way to start is to select a bank of sounds that will be used for your concept album. Try to be hard on yourself here, and remember that less is more. It will sound cruel as hell, but the fact is that a more restrained selection will prevent you from getting stressed searching for new sounds, and it will help you focus on production.

A good example of sounds that fit within a concept or genre would be dub techno. You will hear the first 5 seconds and immediately know the exact genre, sounds, and pretty much what the rest of the track might be like. Labels like Basic Channel or Chain Reaction (personal favourites) have built an entire catalogue from their sounds, and left a precious legacy that strongly influenced hundreds of later artists and labels who followed their ideology.

TRY THIS: Pick about 10 sounds, and create yourself a drum rack in Ableton that will be used over and over.


Step 2: Pick your effects

On my Tones Of Void album, what made each track similar was the use of a macro template on several sounds. This stimulated so much creativity and productivity for me that the whole album was recorded in a 3-day span while on vacation in Florida. It was such bliss that I even had to stop myself from making twice as many tracks! You have no idea how exciting it is to open a new project, drag and drop your favourite macro, and then just play sounds through it to see what will happen.

Romanian techno is a great example of a specific sound style

Image courtesy from Nightclubber.ro

For another great example of a specific music style, we can point to the emergence of the popular Romanian techno, lead by the dudes of Arpiar. One of the characteristics of this genre is the intense use of reverb effects. It sounds very puzzling at first, because some tracks feel completely hollow, like you’re standing inside a huge reverberation room. But it creates a very pleasurable feeling.

TRY THIS: Get a collection of random effects and group them into a macro. This will allow you to unify your sound design with an overall aesthetic. If you own Max for Live, I’d say to drop some LFOs in there or get new ones, and assign them to some parameters. This will be your swiss army knife for sound design.

TRY THIS TOO: Matthew Herbert had a really interesting approach regarding the use of effects. He would start a new session using a board, but wouldn’t initialize the board for the next song. That would sort of pre-determine the sound levels and effect assignments for certain sounds, which would automatically create new ideas. You can do this by using the most recently used session to start a new one, while leaving the effects on certain channels to see what it does. Happy accidents will happen!


Step 3: Design your song structure

Having a similar structure from song to song is another thing that can help unify your concept album. Think of how important song structure is in pop music, or in EDM today, with its famous drop that you just know has to happen at one point or another. In most dance music tracks, the breakdown and relief sections play an important role for crowd response on the dancefloor. If you want to create your own concept, explore the use of a similar song structure throughout the album.

TRY THIS: Just like in the previous step, opening the last project and just swapping samples in the arranger section can be a good way to explore this. You can even leave automations on and see what happens.


With these 3 steps, you can easily create a series of new tracks that could be the beginning of a concept album. But the first thing is always to finish the tracks you’re already working on, and if you are lacking inspiration, you can apply these steps to help give your current projects a new direction.

SEE ALSO Creating Beauty Out of Ugly Sounds

Simple Sound Design Tips

I’ve been giving some classes since the beginning of the year, and I noticed certain questions around sound design that kept coming up while I’d be sharing other tips. I thought I’d share them with everyone so it can benefit more than one person out there.

Recently I was in a café, and I had a little exchange with the barista about what I do. “I’d consider myself a sound designer, though technically I’m an audio producer,” I told him while adding some sugar to my tea. “Dude, that makes no sense to me… Are you a DJ?” he asked back.

Sound design should be seen as carving matter into sculpture.That’s the thing, right? The DJ is the one that people see in public doing all the work and making people dance. But behind the scenes, there are the people who gave the tracks he/she plays their magic aura.

“I’m the DJ’s best friend, his best kept secret,”

was my only answer, with an enigmatic grin. I sort of prefer leaving some mystery around what I do. Even if I shared a few tips, there would always be so much more to say. Plus, the more you know, the more you realize how little you know.

So here are a few tips.

Use Ableton’s Live’s session view as your mad scientist’s lab.

The most common mistake I see from clients, either when I do mixing or help them with their unfinished tracks, is that they use the arrangement view to make their sound design.

The session view, while mainly used to jam, rehearse and perform, is perfect to make a loop and then mangle it until it becomes something completely new.

Tip: Ableton Live's session view is best for sound design. Don't use the arrangement view!TRY: Loop a 1-bar percussion sample and then add a bunch of effects on the same channel. Record yourself for a brief moment while you play with knobs. You may also record your actions to be able to see what you did later. You can then go and edit your actions as automations in the arrangement mode, which will give you cutting-edge precision.

TIP: Go into the resampled session of yourself playing, and then isolate some interesting sounds. Copy the clip with the interesting sounds below the original (master) clip. Now you’ll have variations of the first one.

Bring your designed sounds into your mix.

Looking at your session view now, you should have the original sound clips of the main elements of your track, but you should also have many variations. Swap certain clips of your mix with the clip variations. This will greatly help.

TRY: When you do your sound design, make sure you have your original song playing in the background. This will allow you to improvise on top of it, while maintaining the feeling of the main concept.

TIP: Evolving sounds in a song is a great way to keep your track feeling alive and human.

Your kick drum should be the last sound you design.

Tip: Your kick drum should be the last sound you designThis one is super important, and I hear a lot of people messing this part up. Your kick should not be the first sound to be designed in your track. People often select their percussions and build their track on top of it. This is a mistake, as your original percussion can be swapped for other percussive elements later on as you keep adding new sounds to the song.

TIP: Once your track is pretty much done, see if you can go and change that kick for a new one. Your jaw will drop once you hear how much changing a kick can dramatically change your track’s direction. Why? Because the kick is there to unify the whole concept. But when you start a new track, you have no idea where it might end up, and so the kick selected at first won’t be appropriate anymore.

SEE ALSO Dynamic Sound Layering and Design