Sound Design and Arrangements Series Pt. 3: Repetition
This post is part of a series: Part 1 | Part 2 | Part 3
This post focuses on how I approach repetition in my music, as well as how I perceive it when working on clients’ music. While this is a very obvious topic for electronic music oriented towards dance, where patterns repeat, I understand that as an artist, it can be a very personal topic. Each genre has a way of approaching repetition, and if you’ve been browsing this blog, you will recognize some concepts previously covered that I’d encourage you to look into in more detail. I’d like to approach repetition in music by reviewing your workflow to avoid wasting time on things that can be automated.
Tempo
Using tempo to deliver a message is a very delicate subject. Often before I played live in a venue, I would spend some time on the dancefloor and analyze the mood and the dancers’ needs. I’d check out what speed a DJ’s set was, how fast he’s mix in and out, and the reaction of the crowd. It has always surprised me how playing at 122 BPM vs 123 BPM can shift the mood; I really can’t explain why. But when I’d make a song, I’d keep in mind that DJs could speed it up or slow it down—an important factor affecting energy. I find that increments of 5 make a huge change in the density of the sound in the club. If you slow down very complex patterns, the sounds have room between themselves which also gives the listeners to perceive the sound differently.
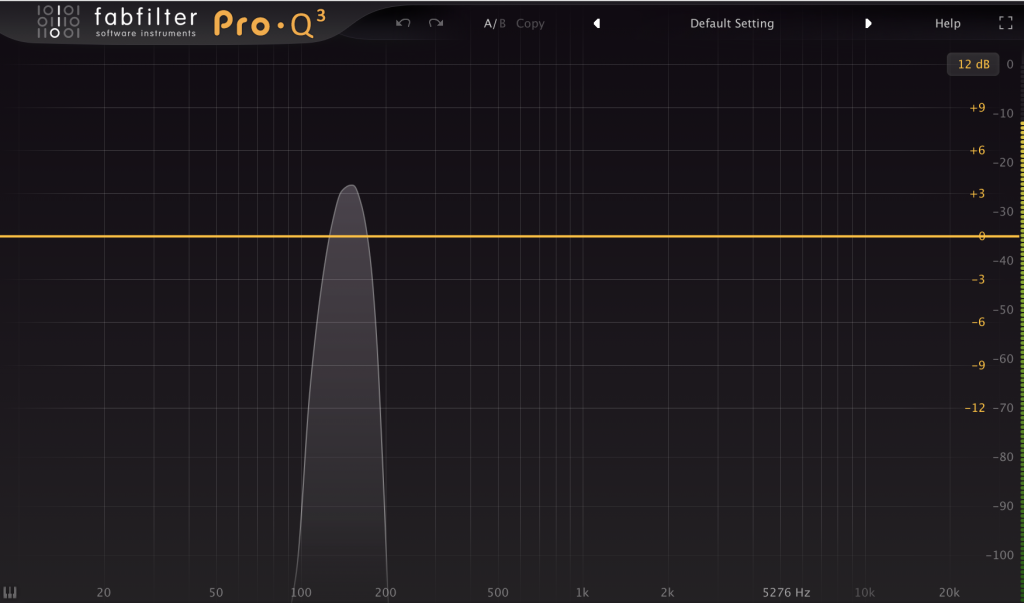
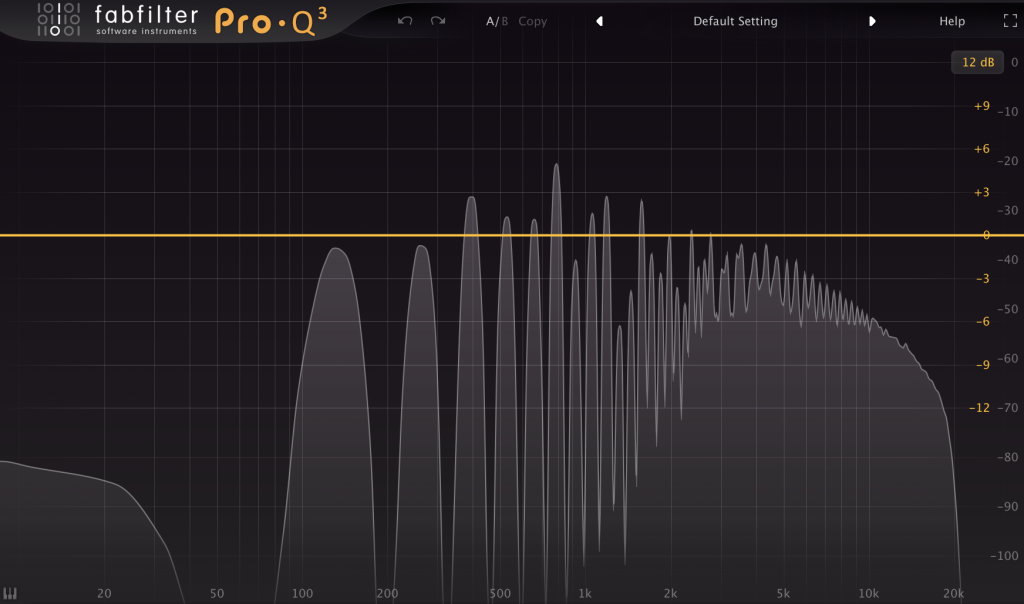
Whatever tempo you’ll be using, I highly recommend that you look into using gating for your short percussion or use an envelope maker like Shaperbox 2 to really shape the space between your sounds and have some “white space” between each of them. If you go for a dense atmosphere, I would recommend that you use very fast release compression and make use of parallel compression as well to make sure you’re not over crowding your song.
Sound Repetition
Once we find something we love, we tend to want to repeat it for the entire length of a song. This is, of course, a bit much for someone who listens to it. People expect change—for sounds to have variants and to be sucked in with perhaps something unexpected from the sound. Also, John Cage would disagree and suggest that an idea could be repeated for 10 minutes and the listener would be liking it, but I honestly haven’t heard many songs (through experience or work) that kept me that interested for that long.
The question is, how frequently can an idea be repeated?
It depends of a lot of factors, and while I don’t claim to know the truth, there are techniques to keep in mind. I’d like to teach you how to learn the best way for your music. Let me explain some of my own personal rules—my “reality check” for the validity of a song and the questions around repetition.
First impressions never fail: This is really important. 99% of people I work with start losing perspective and trust in their song’s potential by doing extended sessions on production. This means, when you first open a project you worked on, what hits you at first is what you should fix in that session. Once this is done, save it under another name and then close it. If you can space your sessions out by a few days or weeks (best option), then you can check your first impression of the song again and see if there’s something new clashing.
Hunting for problems will haunt you: There’s always something to fix in your song. Even when you think it’s done, there will always be something. At one point, you have to let go an embrace imperfection. Many people fall into the mindset of searching for problems because they think they missed something. Chances are, they’ll be fixing unnecessary things. What you actually think you’re missing will be details that are technically out of your current knowledge. Usually I do what I call a “stupid check” on my music which is to verify levels, phase issues, clipping and resonances. The rest is detail tweaking that I do in one session only. After that, I pass it to a friend to have his impression. Usually, this will do it.
Listen with your eyes closed: Are you able to listen to all of your song with your eyes closed upon first listen? If yes, your repetition is working, otherwise, fix, then move on.
Generating Supportive Content and Variations
In music production mode, if you want to be efficient and creative, you need to have a lot of different options. So let’s say that your motif/hook is a synth pattern you’ve made, what I would suggest is to have multiple variations of that.
In this video, Tom showcases a way of working that is really similar to how I work (and how many other people work). It’s something that is a bit long to do but once you switch to create mode, it becomes really fun and efficient. The only thing is, I personally find that he’s not using repetition enough, and while this is super useful for making short, slower songs that have a pop drive like in the video, it is not great for building tension. Too much change is entertaining, but you really have to flex your creative muscles to keep it engaging. I would rather have a loop playing to the point where the listener goes from “it should change now” to “I want this to change now.” So perhaps there will be a change after 3-4 bars in your loop. This is up to you to explore.
How do you create variations?
There’s no fast way or shortcut, creating good variations takes time and patience. It also take a few sound design sessions to come up with interesting results. To do this, randomizing effects is pretty much the best starting point and then you tweak to taste.
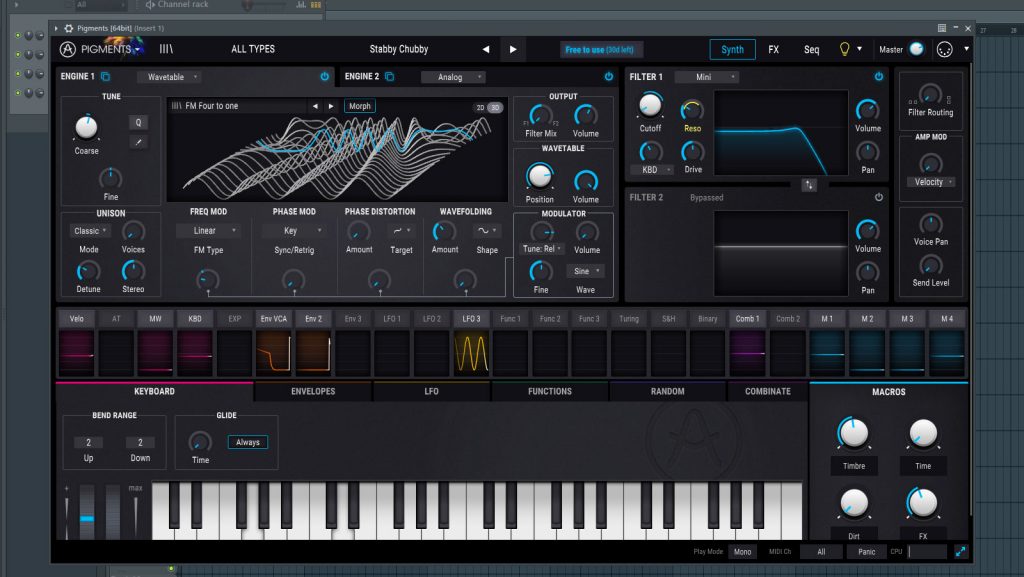
- MIDI Tools – The best way to start editing, is to start by tweaking your MIDI signal with different options. The MIDI tools included in Ableton at first are really useful. Dropping an arpeggio, note length change, or random notes and chords are pretty amazing to just change a simple 2-note melody into something with substance. One plugin that came out recently I’ve been very impressed with is Scaler 2. I like how deep it goes with all the different scales, artist presets (useful for a non-academic musician like me) and all the different ways to take melodies and have templates ready to be tweaked for your song. One way to commit to what you have is to resample everything like Tom did in his video. Eventually, I like to scrap the MIDI channel because otherwise I’ll keep going with new ideas and they’ll probably never be used. If you resample everything, you have your sound frozen in time, you can cut and arrange it to fit in the song at the moment it fits best.
- Audio Mangling – Once you have your MIDI idea bounced, it’s time to play with it for even more ideas. There are two kind of ideas you can use to approach your movement: fast tweaks or slow. When it comes to fast event, like a filter sweeping or reverb send, I used to do it all by hand; it would take ages. The fastest way out there is to take a muti-effect plugin and then randomize everything, while resampling it. The one that I found to be the most useful for that is Looperator by Sugar Bytes. Internally you can have random ideas generated, quick adjusting, wet/dry control and easily go from very wild to mellow. It’s possible to make fast effect tweaks (common to EDM or dubstep) but slower too. Combine this with the Texture plugin to add layers of content to anything. For instance, instead of simply having a background noise, you melt it into some omnipresence in the song so it can react to it, making your constant noise alive and reactive. The background is a good way to make anything repetitive, feel less repetitive because the ears detect it as something changing but it constantly moves its focus from foreground to background.
- Editing – This is the most painful step for me but luckily I found a way to make it more interesting thanks to the Serato Sampler. This amazing tool allows, like the Ableton sampler, to slice and map, and rearrange. You can combine it with a sequencer like Riffer or Rozzler (Free Max patch) to create new combinations. Why Serato instead of the stock plugin? Well, it’s just easy—I just want to “snap and go”, if you know what I mean, and this demands no adjustments.
Editing is really where it you can differentiate veteran from rookie producers. My suggestion to new comers would be a simple list of different ideas.
- Decide on internal rules: Some people like to have precise rules that are set early in the song and then that will be respected through the song. I do it because it helps me understand the song’s idea. If you change too much, it may fall in the realm of “experimental” and maybe this isn’t what you had in mind. Every now and then, when booked for track finalization, people have a problem with the last third or quarter of their song. They lose focus and try to extrapolate or create new ideas. If you create enough material in the beginning, you’re going to make the last stretch easier. But when people are lost, I usually listen to the first minute of the song and go “let’s see what you had in mind at first” as a way to wrap it up around that logic. Basic rules can be created by deciding on a pattern and a series of effects that happen, more or less, at the same time, or a sequence of elements or sections. Pop has very precise rules for sections, while techno “rules” are more related to the selection of sounds and the patterns created.
- Process, process, process: If I have one channel of claps or a different sound, I want to have variations of it, from subtle to extreme. Why? Because even simple ones are going to make a difference. It’s what makes a real human drummer feel captivating (if he or she is good!), because their playing slightly changes each time, even when playing a loop. Looperator is a good tool but you could also use the stock plugins and just use the presets to start with and resample, move knobs as you process and you can get some nice effects already.
- Duplicate everything: Each channel should have duplicates where you can drop all your wet takes. You can put them all on mute and test unmuting to see how it goes.
- MIDI controllers for the win: Map everything that you want to tweak and then record the movements of yourself playing. Usually will give you a bit of of a human feel compared to something created by a mouse click. You want to break that habit.
- Use your eyes: I find that working with the clips visually and making patterns is a good way to see if you are using your internal rules and see if you use too many sounds.
Now, after all this, how do we know if a song’s repetition is good enough, and how do we know if it’s linear?
Validating with a reference is quick way to check, but if you take breaks and distance your sessions, that would be effective too. But the internal rules are, to me, what makes this work properly. I think the biggest challenge people face is that in spending too much time on a track they get bored and want to push things, add layers, change the rules and what perhaps felt fresh at first will be changed to a point where you’re not using the repetition principle to its full potential. The best example of someone being a master of repetition is Steve Reich and his masterpiece Music for 18 Musicians. There’s nothing more captivating of how one can create so much by playing with repetition.
Some effects in here would be reproduced with delays, phasers, the delay on the channel and such. You can also use the humanize patch to add a bit of delay randomly. I would strongly encourage you to listen to this a few times to fill yourself up with inspiration.