Tips to add movement and life to your songs

One of the most popular topics in music production is with regards to making music feel “alive” by creating movement in music. While I already covered this topic in a past article, I’ll focus today on tools you can use and some techniques you can also apply to create movement.

First, let’s classify movement into categories:

  • Modulation (slow, fast)
  • Automation (micro, macro)
  • Chaos
  • Saturation

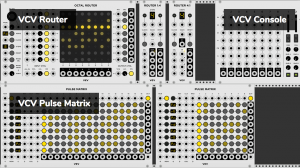
One of the thing that makes modular synths very popular is the possibility of controlling and modulating many parameters the way you want, but the other aspect that makes it exciting is the analog aspect. You’ve probably seen and heard multiple debates about the analog vs digital thing and perhaps, what’s funny is, many feel they know what this is about but yet, can’t really figure it out.

Take, for example, something we all know well: a clock that shows time.

An analog clock is one with needles that are moved by an internal mechanism, making them move smoothly in harmony while time goes by. There’s a very, very preciseness to it where you can see the tiny moment between seconds.

The digital or numeric clock jumps from second to second, minute to minute, with the numbers increasing: there are no smooth, slowly incrementing needle that moves between numbers; they just jump.

Sound is pretty much the same in a way. Once it’s digitized, the computer analyzes the information using sample and bit rates for precision. The flow isn’t the same, but you need a really precise system and ear to spot the difference. Some people do but it’s very rare. This is why, in theory, there’s a difference between digital files and vinyl records.

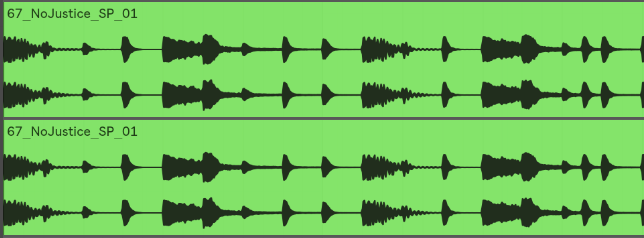
One eye opener for me was that when I was shopping for modulars at the local store, I was talking with the store’s specialist who was passionate about sound. “The one thing I don’t like about samples is, the sound is frozen and dead”, he said. With modular synths, because there’s often an analog component, the sound, on a microscopic level, is never the same twice.

This is why using samples and playing with digital tools on your DAW, needs a bit of magic to bring it all to life.

Modulation

By modulation, we’re referring to tools that move parameters for you, based on how you have configured them. The two main modulators you can use are:

  • LFOs: As in Low Frequency Oscillators. These will emit a frequency in a given shape (ex. sine, triangular, square, etc.), and a certain speed. They can be synced to your song’s tempo or not. LFOs are often included in synths but you can also find once instances in the Max for live patches.
  • Envelopes: Envelopes react to incoming signal and then will be shaped in how you want. Compressors, as we discussed recently, kinda work with an envelop principle.

There are multiple aspects of a sound you can modulate. While there are numerous tools out there to help you with that, it’s good to know that there are a few things you can do within your DAW. The main things you can modulate are:

  • Amplitude (gain, volume): Leaving the level of a sound to the same position for a whole track is very static. While there’s nothing wrong with that, it’s means that the sound is lacking dynamics.
  • Stereo position (panning): Sounds can move from left to right if you automate the panning or use a autopanner.
  • Distance (far, close): This is a great thing to automate. You can make sounds go further away by high passing, filtering to higher frequencies. Combined with the volume, it really push the sound away.
  • Depth (reverb): Adding reverb is a great way to add space and if you modulate, it makes things very alive.
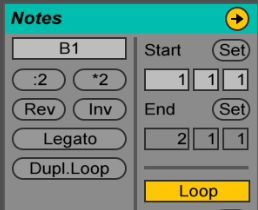
  • Sound’s length (ADSR, gating): If you listen to drummers, they’ll hit their percussion so that the length constantly changes. This can be done by modulating a sampler’s ADSR envelope.
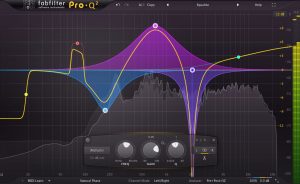
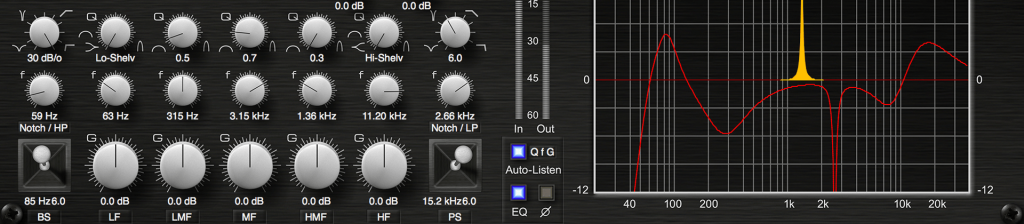
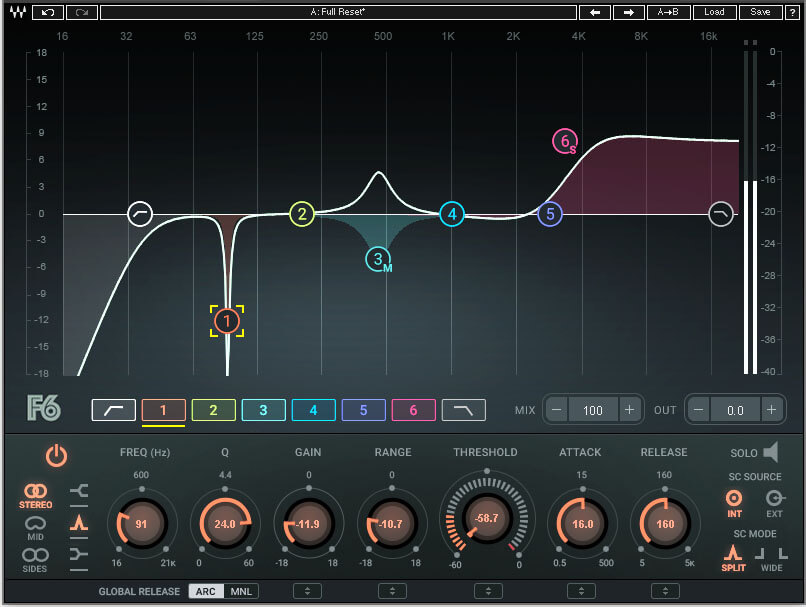
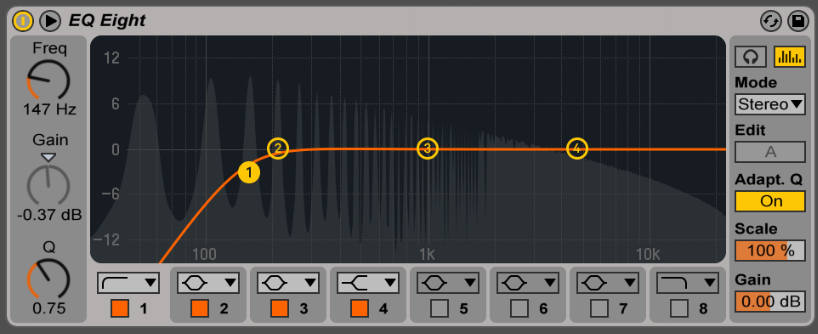
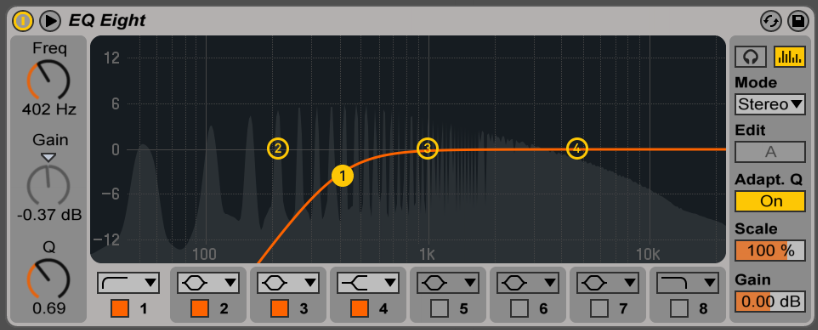
  • Filtering: A filter’s frequency and resonance changing position as the song changes offers a very ear pleasing effect.

Some effects that are modulating tools you already know are chorus, flanger, autopan, phaser, and reverb. They all play with the panning and also depth. Adding more than 2-3 instances in a song can cause issues so this is why it’s good to approach each channels individually.

My suggestion: Have one LFO and one envelope on every channel and map them to something: EQ, filter, panning, gain, etc.

Some amazing modulators that offer really good all in one options that you might really enjoy (as I do for quick fix on a boring stem):

QuatroMod

LFO Tool by XFER Records

ShaperBox by Cableguys – My go to to really bring sound to life.

Movement by Output  – This one is stellar and really can make things feel messy if pushed too far but the potential is bonkers. You instantly turn anything into a living texture that is never boring.

AUtomation

Automation is what you draw in your DAW that allows you to make a quick-moving or long-evolving effect. You might already know this but you’d be surprised to know that it is too often, under used. How can you know this though?

I have my own set of rules and here are some:

  • Each channel must at least have one long, evolving movement. I’m allergic to straight lines and will sometimes slightly shift points to have them have smallest slant. My go: amplitude, EQ or filters.
  • In a drop down list of each potential parameters, I want to have at least 3 things moving.
  • Each channels, must have at least 3 quick, unique, fast change.
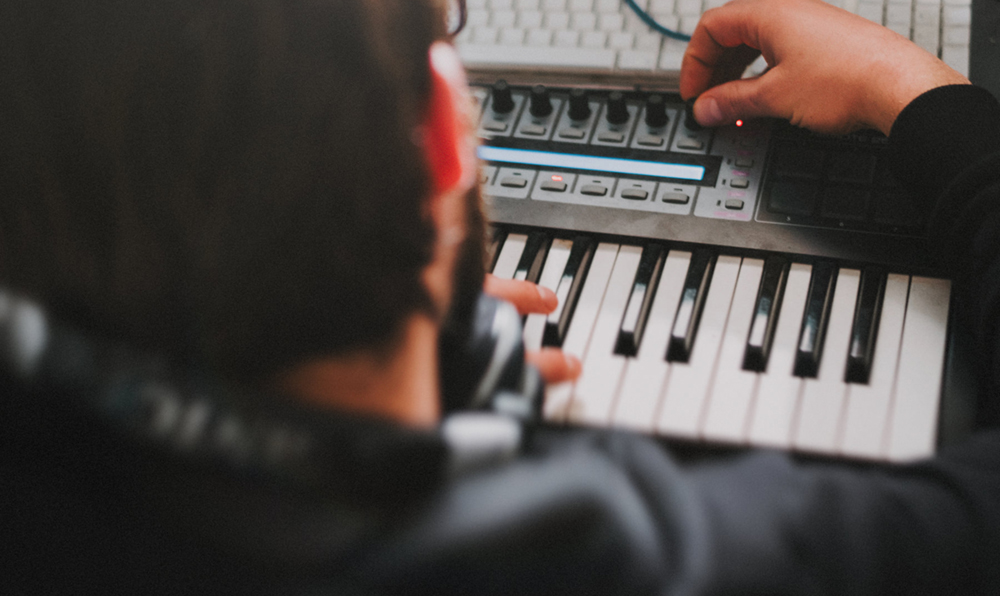
  • Include at least 3-5 recorded live tweaks. I like to take a midi controller and map certain parameters and then play with the knobs, faders. I record the movements and then I can edit them wherever I want in the song. This human touch really makes something special.

While working with automation, one thing I love is to use Max for live patches that create variations, record them as automation and then edit them. It’s like having an assistant. There are great options to chose from but my favorites would be:

Chaos

By “chaos” I mean using random generators. They would fit under the umbrella of modulators but I like to put them in their own world. There are multiple uses of generators. You can take any LFO and switch them to a signal that is random to make sure there’s always a variable that changes. This is particularly useful with amplitude, filtering. It really adds life. You can also use the random module in the MIDI tools to add some life. Same with the use of humanizer on a midi channel. Both will make sure the notes are changing a little, all the time.

Saturation

If we think of the earlier example of how analog gear is constantly moving, using a saturator is a good way to bend perception. We previously discussed saturators in an earlier post but we didn’t talk of a super useful tool named Channel strip which often has an analog feel included. It remains transparent but it does something to the signal that is moving it away from a sterile digital feel.

My favorite channel strips would be:

The Virtual Mix rack by Slate Digital. Raw power.

McDSP Analog channel

Slam Pro


SEE ALSO : Getting feedback on your music

Saturation Tips and Hacks

After presenting some of my favorite EQs and compressors, it would be silly not to also talk about audio saturation which is complementary tool. There’s not a single project I’ve done in the last 10 years where I haven’t used saturation in one way or another; same with mastering. I often compare it to putting some words in bold in a text, where that effect will do the same thing in a mix: making parts stand out in a way the brain can’t totally understand at first.

What is saturation exactly?

Saturation is essentially a form of soft distortion that gives certain texture to sounds. The simplest way to explain it is to think of how analog processing changes sound; it brings a certain noise it, sometimes very subtly or not. You may use it give warmth or character to the signal being processed, which gives a more aggressive crunch if you exaggerate it. Types of saturation that are most common:

  • Tape emulation: Similar to what was popular in the disco days when they’re send their mixes to a reel to reel, to provide a certain thickness.
  • Tubes: Common in compressors and certain EQs using lamps, they are the absolute reference to warm up synths.
  • Transistor and retro: To emulate an old school feel.
  • Preamp: Often related to guitars and the world of microphones, preamps can be used on anything. They’ve been a tool of excellence for decades to give personality to sound by engineers.
  • Distortion: Pure distortion isn’t always pleasing and appropriate but if you control it properly, it will give beautiful textures and beefiness.

There are multiple situations where you could benefit from saturation in your mixing or sound design in order to alter the character of your sounds.

Pads & synths.

There’s nothing more exciting than rich tones, melodies, and very warm pads. More than often, I see people recording soft synths with no processing whatsoever; they’re really missing out on giving depth to the backbone of their songs. You can for instance simply pass them through a preamp, but my tool of choice for these is absolutely tape emulation (a personal favorite of mine in case you didn’t already know).

How: Start by pushing the saturation to a very high point and make sure it’s more than noticeable. Then adjust the wet/dry to a very low level where you can hear the incoming signal feeling almost clean but have the saturation be mixed in there. I usually find the sweet spot by going “oh, here I can totally notice the saturation” and then lower it by a few notches.

Tool: I’d suggest the Tape from Softubes or RC-20 Retro Color. Both are fantastic to shape your sound with shimmering textures.

One thing I really love is to use multiband saturation to get the most out of your melodies. This way, you can address the lower mids in a way while you bring out harmonics in the higher part of the sound. This can be done with tools such as Ozone 8, Neutron 2, and Melda’s PolySaturator.

Bass

Who doesn’t like a dirty, funky bassline? Low end with grit will always bring some excitement to a mix – especially in a club – this is something we’ve heard so many times in hip hop for instance. A very clean sine bass typically from an 808 has a certain warmth, but if you pass it through tape or tubes, it will give a lot of oomph. If you want to try it, I suggest you even try two instances of saturation to see where that goes. It depends of how much you want it distorted. The wet/dry will have to be applied to taste here. The producers of dubstep brought the game here to a new level.

How: Just experiment. Try to go overboard. Really.

Tool: SoundToys’ Little Radiator does marvel on basses as well as its cousin the Decapitator. For something more subtle but still robust, try the Steven Slate Virtual Preamp Collection.

Percussion

Saturation on percussion will automatically bring an old school feel from breaks that were really popular in the 90’s. The take on that, with Hip Hop (again), was to export the audio to VHS tapes or even tape cassette. The result is pretty badass. Experimenting outside of software is really fun, and I would encourage you to give it a try. One thing I like from doing this is to saturate only the tail and not the transients so that you beef up the overall signal.

How: Duplicate the channel you want to saturate and put saturation on the second one. Using MAX’s envelope follower, map it to the wet/dry of the saturator/exciter. Set the envelope to be flipped so that when a transient is detected, it will duck the knob making sure transient isn’t affected. Melda’s Polysaturator provides that option internally.

Tip: Add reverb and put the saturation after to get really fluffy crispiness.

Tools: Reels by AudioThing, Satin by U-He and Polysaturator once more.

Vocals

There’s nothing more beautiful than vocals that are lush and full. Treating vocals alone is an art in which I could get lost. I don’t want to get into that too much, but I’d like to invite you a bit of everything to see which one suits you best. Some prefer the tubes but other swear by the tapes. This is where Ozone can be a game changer, especially that you can do multi band processing as well as M/S.

Tip: Apply anything and everything from what’s explained above but start by doubling your vocals which will already do great things.

SEE ALSO : Tips to add movement and life to your songs


The EQ and compression combo (Pt. 3)

After going into details with regards to EQ and compression, in this post I’ll cover some practical tips on how they work well together. I’ll try to also clarify why many engineers will tell you that all you need is these two tools to accomplish most of the work in mixing and mastering.

Here are a couple terms and ideas that have to do with this topic:

  1. There are no rules for how to use EQs or compressors. You’ll read many different views online, and some people will affirm loud and clear that their point of view is right, but after 20 years of trial and error, I still feel that I’ve accomplished a lot of great things when I knew less than now. Relying on your ears is really important. Some of the most innovative trends involve people who have no idea what they’re doing else than following their gut feeling.
  2. Substractive correction. It involves only cutting the junk out.
  3. Coloring correctives. This usually means that you’ll boost frequencies. Sometimes, cutting might necessary.

To start with, I’d point out that in mastering or mixing, one of the most common chain would look like this:

[Corrective EQ]  –  [Compression]  –  [Color EQ]

There’s precise logic behind this. Basically, you want to take the rogue frequencies out first, compress and readjust the good ones with the compression, and finally adjust the tone or highlight details with a coloring EQ. My personal preference for better results would be that whenever I cut, I do it with a pretty narrow Q (resonance) on the EQ. A great starting point is to start with 2 or 3 and then adjust. Don’t hesitate to use visual reference of the FFT that is often included in the EQ’s display, especially if this technique is new to you. Then, I’d cut about 3dB at first, up to 5. You see how this changes your sound by bypassing the EQ and comparing.

When it then comes to compression, there are a few different things you could do here. For instance, if you go with an aggressive setup, then you’ll beef up what you have “open” by cutting away the bad frequencies. I’d suggest starting with a more exaggerated approach to see what will pop as annoying. It might not be possible to hear what’s wrong if you don’t push the sound to its limit.

Once you see and hear issues more clearly, you can cut again, then you roll the compression into parallel mode to have some of the incoming dry signal mixed with the compression.

If you haven’t explored the side-chain frequencies, this is an option where you can decide that your compressor won’t apply anything starting at the target (ex, anything under 100hz). With this, you might want to filter only a part of your song with the EQ and then compress to accentuate the part you want to put to front.

The last process in the chain is the color EQ. You can take any EQ you like but ideally, I’d go for either an analog emulation or a shelving EQ. Those will provide a nice enhancement to complement what the compressor has been doing. For coloring, you can explore. One way to approach it is to completely exaggerate one band to see how it sounds, and then roll down. This is not only very interesting for sound design, but also for mixing more subtly annoying details. It can help build body for a sound that feels week too.

Examples of where to start – EQ and Compression

A pad that that lacks body and roundness. In this case, it’s most likely that a resonance is poking through too loudly and that good frequencies are hidden behind it. You could start by checking if there is one peak on the spectrum and with your corrective EQ, with a not so wide Q (ex. 1.5 to 3), try to bring that peak down pretty severely with a cut of 5-6dB. Get the threshold of your compressor to meet the highest peak and then adjust the output to be the same as the input. With the shelving EQ, bring the mids up but 2-3dB.

A kick that lacks bottom. This might be related to the mids of the kick that are too loud. You could lower them by 4-5dB, then compress with a ratio of 8:1. The shelving EQ should then bring the lows under 100hz up by 4db. If that doesn’t do, cheat by using the corrective EQ to notch up a bell curve at 50hz.

Percussion that are harsh. This is usually because one frequency is resonating around 4 to 8khz. It’s hard to say but try to cut by 8dB and scan around to see if there’s at any point, something more comfortable. Bypass to double check and then adjust your cut so that you can make the resonance almost there. Compress with a fast attack to control the transient and glue them. The shelving EQ could be used to lift the highs.

EQ suggestion: The TDR SlickEQ GE will do a great job for correcting.

Compression: The new SphereComp is super lovely and affordable. I tested it in sound design and it does really nice gluing.

Shelving EQ: I tried the demo of EVE-AT1 and I think you’d like it just like I did. The price is incredibly good for what it offers!

SEE ALSO : Saturation Tips and Hacks

Tips for compression: The Multi-band compressor (Pt. 2)

Continuing with more compression tips, I’d like to discuss of my all time favorite tool for anything and everything: the multi-band compressor. For many, this beast is a bit of a difficult tool to tame, but I’d like to break it down for you so you can include it in any of your routine and needs. In order to continue, I hope you’ve first read the first post about compression, and also the two posts about how to use EQs.

Compression guidelines

Common Use-Cases for Compression

Controlling harshness. Using a compressor, you can set the attack to be fast and the release to also be pretty fast. This makes the whole action of the compressor fast, controlling any aggressive sounds and taming them. If the attack is too fast however, it can distort, so you need to juggle with the settings to find your sweet spot.

To add punch. This is the opposite of harshness. You’ll want the attack to be slow and the release to be fast. The compressor won’t jump on the transient immediately but will instead create some snappiness. The ratio should be around 5:1 or even higher to achieve this effect in most situations.

To add thickness. Using your compressor in parallel mode, you can set it to about 50% wet/dry, then compress with a medium attack and a medium-fast release. I’d make sure the ratio is as high as possible too. If your compressor doesn’t have a parallel option, then you can use the compressor in a AUX/Send bus.

To glue together a mix. Very similar to thickness and punch, you’ll want to add this to multiple channels and busses at once. Again, parallel compression, slow attack, high ratio. That should do it. Experiment with exaggerated effects and then tone it down.

To sum it up, a fast attack makes the compressor react quickly, which means it is there to control something. A slow attack is to enhance the beginning of the sound. The ratio is how much of that effect you want in action, and the release is for how long.

Multiband action

The multi-band compressor works exactly as the use-cases explained above, but with a multi-band compressor, we can set a range of frequencies to be affected. Therefore, you can set thickness in the mids, control the high-mids for harshness, and enhance the high’s transients with a single compressor, but with different settings for each section.

The multi-band compressor has an additional feature: the use of crossovers that set points for where each section starts and ends. A crossover is simply a frequency you set. For instance, Ableton’s 3-band multi band will have 2 of crossover frequencies. You set the lower crossover which will set where the low end ends in the mids (ex. 200hz) and the other crossover will be where the mids end and the highs start (ex. 6khz).

My perspective on multi-band compressors is that I use them like a shelving EQ where I control each section’s aesthetics in a different way. You can then shape the tone of a sound or mix, or extract minute details. Ideal for finishing touches, multi-band compression can also be used to bring forward parts of your sounds in the most effective way.

Now, here are some situations where the effects of multi-band compression can be useful:

  • Wimpy percussion: If your percussion needs presence, thickness and power, set your crossovers so you can control what’s happening between 200hz and 800, then up to 3khz. Beef up the first section with slow attack and high ratio and aim to add punch up there (refer to the notes above regarding how to do this).
  • Pale pad: Again, say a weak pad needs presence, beefiness between 250 and 600 hz. I’d also compress between 4 and 8khz to add some shimmering, which is like adding thickness. You could even lower your section to hit all the way down to 90hz to get some analog feel.
  • Crazy swirl: Sometimes transitional effects are great but can be not appropriate for your song. I like to control the highs over 7khz in a way were they don’t hit aggressively but will have the mids over 1khz enter smoothly. This is a way to control the harshness and presence; often very useful to create wobble, rubbery movement.
  • Dull mix: A dull mix usually needs brightness which can be created by stimulating the highs and mid highs. This can be a combination of adding thickness or stimulating the transients. I’d say try sharp sections around 4khz to 8, then another one until 11khz and even compress above that with a 3rd section to create what we call pixie dust.
  • Stellar reverb: A multi band with a reverb is pack of fun for me! I like to beef up the mids above 300hz and also create thickness between 2khz to 6. You can then control the levels to decide on the tone of the space you’re creating for your song.
  • Deep kick design: Compress a section under 50hz and then another until 120, plus a last one that goes all the way to 500hz. I can guarantee you that if you have the lower sub purring, then you can also add a bit of punch around the mids to have a super deep, but punchy kick.

When it comes to my favorite multi-band compressors, here are some of them:

Neutron 2 (Izotope)

General tool for mixing that makes pretty much the best all around assistant to deal with numerous problems. Transient shaper, exciters, gate, compressors and all of them are in multi-band mode. You can’t get better than that.

Drawmer 1973 (Softubes)

The Drawmer compressor is amazing for creating ambient so imagine if you can set it in multi band mode, then you get awe dropping moments.

Fabfilter Pro-MB (Fabfilter)

Elegant, precise and transparent would be the best way to describe this one. Really useful for the finishing touch of your mixdown.


SEE ALSO : The EQ and compression combo (Pt. 3)

Tips on how to pick your EQs and use them (Pt. I)

People often ask me about my opinions on what the best audio plugins are, and there are no doubts that investing in quality EQs and compressors is one of the most important things you can do for both sound design or mixing. You can do pretty amazing things just with EQ and compression, but of course you need to understand your tools to make the best of them. In this post I propose some exercises and tips, as well as covering the main tools I have gathered through the last years and my thoughts on the best EQ plugins.

Types of Equalizers

There are many types of EQs and I believe some are more important than others. It took me a while to understand how to fully use them all and how to select the right one for specific situations. This subject is actually so vast and complex, I could make a series of multiple posts and I wouldn’t get through it. I’ll try to avoid being too technical and will explain them in simple terms so anyone can understand.

The way I approach EQs are based on different actions:

  • Corrective. Sometimes a sound will have part of it that will feel aggressive and annoying. I will do corrective by spotting where where it looks like it’s an issue and then cut. Corrective cuts are usually not too narrow (Ex. Q of 3)
  • Surgical. A resonance in a sound makes your ears hurt and that will need a very narrow cut. (Q of 6-8+).
  • Tonal adjustments. An EQ can be used to make tonal changes such as deciding if you want your track more beefy or more light by either boosting lows or highs.
  • Coloring. Some EQs aren’t transparent and will have a musical touch to the changes it makes. This will add some personality.
  • Valley cuts. The opposite of surgical, where the Q will be make the curve really wide. It makes very subtle changes, somewhat tonal, a bit colored and sometimes a bit corrective. Try it at different points on a sound and see it change without being able to really know what’s happening.

TIP: The human ear will hear a noticeable difference if you cut 3-4dB minimum. If you cut 6dB, it will be quite obvious.

The main types of EQ plugin categories are:

  • Graphic/Fixed Frequencies. Influenced by older models and the first EQ, the frequencies you’d have access to are fixed and won’t be changed. In many of those models, the frequencies are based per octaves but certain companies will have their own way of deciding which ones are used.
  • Parametric. One EQ that is very popular is the Q2 by Fabfilter which allows you to drop a point anywhere and then be able to shape how narrow you want to cut or boost.
  • Shelving/Band. This is a part of the spectrum that will be affected. For example, on DJ mixers, the 3-4 EQ buttons are basically shelves of frequencies that are altered.
  • Dynamic. This one is advanced. You can “order” a point of your EQ to react depending of certain conditions. For example, if you have a recording of a drum, you can order the highs to lower down by 3-4dB if the cymbals hit too loud. Very practical!

TIP: If you love the sound of analog, you might want to dig in Universal Audio’s suite that does emulation of classic pieces of gear. The fidelity of replication is absolutely mind boggling!

Now let’s make some associations regarding which EQ does what:

  • Surgical and valley cuts are mostly done with parametric EQs. This type of EQ will allow you to precisely identify the rogue frequencies and then cut or boost, in the way you want.
  • Corrective EQ can also be done with parametric but with graphical ones too. Sometimes a correction needs precision but sometimes, it can just be a way to realign the curve of the sound which a graphical EQ can do easily.
  • Tonal adjustments. This is done with shelving and band EQ.
  • Coloring. This is basically fixed frequencies, but if you look for analog emulation or EQs that provide a type of saturation, then you’ll also get some coloring and personality.

My favorite EQ plugins

Here are my thoughts on the best EQ plugins  that are precious tools to have in your arsenal. I’ve also included low budget EQs alternatives that are similar.

1. Fabfilter ProQ2 (Surgical, Valley cuts, Corrective, Tonal)

This plugin seems to have found it’s way in many producer’s tool kit mostly because it can pretty much do it all. From complex curves, mastering touch-ups to shelving tones and copying the frequency of a sound to apply it to another… the ways you can use this beast are so numerous that you’ll have to watch a bunch of tutorials to get all the hidden things it can do.

Budget Alternative: TDR Nova GE by Tokyo Dawn

2. Electra by Kush Audio (Shelving EQ, analog replica)

Not so known by the masses but this EQ is an absolute wonder to have on hand. I use it in every single mixes I do and the results are always amazing. A bit of a learning curve to understand as the GUI is a bit weird but even if you’re not sure of what you’re doing, it shapes the sound in a way that makes it pop out and warms it too.

Budget Alternative: RetroQ by PSP

3. BX_Hybrid V2 by Brainworx (Corrective, shelving)

I don’t think there’s any plugin that can do what this can do in terms of results. Not as versatile as the ProQ2 but where this one stands out is for how buttery it cuts in the sound, smoothing things out. When I have people studying mixing with me, I would always require them to buy this one as the very first EQ to have and use.

Budget Alternative: Voxengo Prime EQ

4. Passive EQ by Native Instruments (Shelving, correction, color)

This emulation of the famous Manley Massive-Passive EQ is a bomb EQ. I love to place it on a bus of all my melodic content and then smoothly shape it into something that magically turns organic and warm. It requires a bit of exploration but when you get your hands around it, you’ll always want to use it. I find it quite powerful for sound design as a way to warm up the lows.

5. F6 Floating band dynamic EQ by Waves.

I’m not a big fan of Waves as well as their aggressive tactics for selling but this plugin is a really useful one to have. As described above, with a dynamic EQ, you can tame some frequencies that are randomly happening. The problem with a static EQ is, you’ll be cutting permanently a frequency so if what you’re trying to cut isn’t always there, you might cut something that doesn’t need adjustment. This is why you can have more control with a dynamic EQ. This one is also really easy to use if you’re familiar with the concept and the fact that you can use it in MS makes it really versatile. Not as easy and fancy looking as Fabfilter’s but it does more, in other ways. Wait for the price to fall but you might get it fro either 29$ to 49$ if you’re patient enough.

In the next post, I will go more in detail with my favorite plugins and will also explain certain ways, in details, for how to get the most of them.


SEE ALSO :

The best EQ plugins and various EQ’ing tips (Pt. II) 

How To Reinvent Your Sound

If you’re finding that all your tracks are starting to sound too similar, there are a number of ways you can reinvent your sound. A while back, I wrote an article about how sometimes we feel that our music always ends up sounding the same. I did a test with friends and asked them to import their last 10 tracks into Ableton Live to compare each of the tracks’ wave forms. Visually, this immediately reveals if their track structures are the same. For instance, some people always introduce the hi-hats after 4 bars and will pause the kick just before. Others will put a first break after 2 minutes, then another one pretty much at the same place every time. We have habits and preferences in music; it’s possible to end up going down the same road with each track.

If you take music production seriously, you’ll want to pay extra attention to how you present your art. If you always stick with the same routines and habits, you might have difficulty keeping things interesting, especially if multiple labels want to work with you. Let’s discuss a few important points improve your sound, without losing the sound signature you might have already developed.

Know yourself first

You can’t change or reinvent yourself if you aren’t aware of your routines. What do you want to change or upgrade in your sound? Sometimes you know easily, but other times it’s important to answer this question. There are two major ways you can answer this question, but first you’ll need to gather all the tracks you’ve made in the last months and listen to them (or have a friend listen to them which can be better as there will be no bias) to determine what commonalities they share.

Another way, which is what I do, is to open your last bunch of project files and look at the arrangements. There will be something you might be doing regularly that needs to change. Once you know, the best thing to do is to start taking notes in the project itself by putting markers where you tend to do a specific thing. Put as many markers as possible then delete the content and make that new project your starting template for your future projects.

Are you always using the same kick? The same samples? The same synth? Reverb? If you’re always using the main effects that are included in your DAW, don’t forget that thousands of other people are also using those effects, and perhaps it’s time for an upgrade to new VSTs. Some are very affordable too. What’s very interesting is how sometimes we don’t realize we use the same samples. If you use analog gear, this might end up becoming an issue unless you add a bit of color or personality to your sounds somehow. Machines are often limited to what they can do and will depend on outside help.

For instance, if you always use the same type of kick or clap, perhaps you can start layering it with something else.

TIP: This is the longest part of the process but it will pay off – use friends to collect intensive feedback or our Facebook group.

Seek inspiration

This is the fun part and it demands a bit of an open mind. I would encourage you to do these things:

  • Who are your main inspirations in music? which artists do you like? Try to find out what/who inspire them. Perhaps it’s an unknown artist or something completely different. For instance, Bruno Pronsato is an ex-rock drummer and that has been a big influence on him. Pretty often you’ll find that some artists do get inspiration very different from the type of music they themselves make.
  • Try to listen to randomly selected music. This can be from the radio that you swipe around or from Spotify. There’s also a plugin VST named Radio that is pretty cool for that. It allows you to stream the radio directly in your DAW, and record it – an endless source of ideas. It also offers random channels to listen to.
  • Go back to oldies. If you lack ideas, try exploring different eras such as the 80s, 70s, etc. You can also dive in the vast world of jazz, hip hop, folk, world music, or indie rock to name a few. Create yourself a playlist and note down some ideas you like and see in them.

The most important question to ask when you listen to other music is to ask yourself what made that song famous. Is it the quality of the voice of the singer? Some innovating technique? Some use of effect? Every song has a story and it can be very insightful to understand what it is.

TIP: If you lack ideas, dive into electro-acoustics, Musique Concrète or Free Jazz. It’s not for the faint of heart but it’s full of ground-breaking ideas.

Think Modular

Reaktor by Native Instruments

I don’t mean modular synths here – when I say “think modular“, I mean that it’s time to become a crafting master in Ableton. Here are a few tool suggestions that can help you improve:

  • Reaktor. Reaktor is a monster. If you’re not already into it, check out Native Instruments’ demo to try it. It will be intimidating at first but it pays off, creatively speaking. There’s a huge community exchanging patches made with it and the blocks series is a good alternative and introduction to modular synths. The cool part is finding free tools that can be tied together and rebuilt into an instruments of your own. Many artists like to build one patch which becomes the tool in their next 5-10 tracks, then it evolves into something else. The strength of Reaktor is that it can be used as a synth or as effects.
  • MXXX.

    MXXX By Melda Production

    MXXX is for effects. It is very, very powerful as you can create complex chain of effects into one space, then automate multiple at once. I’m pretty addicted to this tool for sound design but also for mixing where I can fix some issues.

  • Reason. Reason (a DAW) has a more visual approach and sounds incredibly amazing. There’s something very playful about it by plunging virtual cables in the UI. The last version is simply outstanding and won awards in 2017. Link it to Ableton to combine forces. Ableton can send notes to Reason and you rewire the sound back into your project.
  • Bitwig. I find this DAW is very advanced and if you’re new to music production, it will be a challenge to learn. Since it’s very similar to Ableton, the transition is pretty fluid. I find the way the plugins work together is extremely creative and easy, without killing CPU. You can add randomizers and LFOs to pretty much anything and for that alone, it’s worth using. I often come to Bitwig for advanced sound design.
  • Goodheartz. Goodheartz is a collection of super nice plugins. There are many modular options but I like these because of their high quality and the fact that they don’t push CPU too hard.
  • Modular by Softubes. This plugin is the most impressive take on real modular synths out there. You have software equivalent of real hardware, a bit like Universal Audio’s version of hardware mixing tools.
  • VCV.

    VCV Rack (credit: VCV website)

    VCV is all the new hype – a free, open source environment and also an interpretation of hardware components. It does have a learning curve but the results are fun and it will certainly get you out of your comfort zone.

TIP: Abuse demos and trials! Try everything, record all your sessions and use them as wave files in a project. The plugins that are the most exciting should be considered to be added to your shopping list.

Collaborate

Collaboration is the most important in order to help you break from your habits. If you can find someone who lives close by that you can visit to produce in someone’s studio, hang out, listen to music and talk production, it will bring you a lot of fresh ideas. Don’t limit yourself to people who make the same music as you. It can be a guitar player or a singer. Sometimes if you can try to work on a new song with someone else, it will work your creative mind and force it to explore techniques you might have never been exposed to. Collaborating online is also very refreshing. Find people on Soundcloud and see if you can befriend them to eventually work with them, or remix them. It can be someone in a field that is totally out of your “normal”.

SEE ALSO : Where to Get Fresh New Ideas for Tracks

Transient Shaping

In this blog, I’ve already discussed many ways of playing with your track to create new textures and variations and how to keep your sounds interesting. I’d like to discuss another way of colouring your music: transient shaping; something that can completely change the way a track sounds and feels, depending how you shape your sounds.

To experiment with transients, we will need to play with certain features of Ableton Live which can be very powerful. Alternatively, you could also invest in a type of plugin that is in the category of “Transient Shapers”; there are many out there but some of my favorites are the MTransient by Melda Production and Transient Shaper by Softubes. Both offer quality results at a decent price.

Firstly, if you’re not familiar with transients, they usually consist of the beginning of a sound/sample. If you’re familiar with the Attack-Decay-Sustain-Release (ADSR) envelope of the synthesizers, the attack would be generally manipulating the transient. Sometimes its fast and strong, or other times, it’s slow and smooth. For a kick that punches, you want it to be pronounced and snappy. If you’re after that specific feel, then the transient shaper will really be interesting for you. A plugin will allow you to make the transient more apparent or make it quieter; generally you will also be able to control the sustain of the transient. Sometimes you might want your transient to snap but the rest of the kick to feel quieter; a transient shaper plugin will be able to do that with 2 knobs. I have multiple versions of these types of tools and use them daily – it’s quite captivating what you can do if you exaggerate the attack of sounds which don’t have any transient at all.

In Ableton Live, you can also have fun with a feature integrated in the sample’s detail view. Let’s have a look at how you can manipulate it and how you can have fun with it…

First take a loop sample, and duplicate it in another channel.

The on the duplicated loop, make sure you set up your details like this. Now turn down the percentage of the transient.

You’ll notice that as you lower down this box, only the transient will remain and the rest of each sounds will disappear. You’re basically trimming each sound to keep just the beginning of it, which is the transient. The new channel can be leveled up and layered with the other: you’ll now notice the transient is louder and you now have certain punch added if there was not enough originally.

If you flatten or consolidate, you’ll get a new view:

See the difference and what we removed? By layering the beginning, you’re giving more punch.

Tip: try it with a kick loop or a hihat loop.

Now your fun really has just begun!

Here are a few suggestions to try for pushing your sound design even further:

  1. Control/lower the transients of the original loop with a compressor. If you set a compressor with a fast attack, it will control the transient. Play with the release to really tame it down.
  2. Add a reverb or any effect on the transient channel alone. This is really cool because the effect can either affect the beginning or the end of the sounds. I like to put reverb only on the sustain while leaving the transient dry, which gives more precision to your percussion instead of having them lost in a pool of reverb.
  3. EQ the transients to keep only the high end for sharp precision or just the mids for more oomph.
  4. Side-chain the transient with the original sound. Experiment with this one and you’ll achieve some fun results!
  5. Compress both channels by grouping them.

Feel free to share your thoughts about transient shaping!

Music production techniques: Non-Linear Production

It’s been a while since I promised a post about one of a number of music production techniques I use: non linear music production. The very first album I did using this technique and really sticking to rules of it was Intra; and then I recently went deep in to produce multiple EPs in the same vein of non linear production, which were made between end of December 2017 until March 2018. While Intra was an album of 23 songs made over nine months, my last experiment produced 19 tracks over 3 months. I think I’m getting better at it, mostly because it’s becoming clearer in my mind.

Out of the 19 recent tracks, I kept 8 for this album – which you can hear above – I named Returning Home; a statement about home being a state of mind and not necessary a physical place. I’ve been making techno/dance music since 1998, and after diving into more electronic soundscapes, experiments, and ambient music, it just felt good to return to my roots. A funny thing also – I tried working with some other labels to find it a new spot as I wanted to keep my label Archipel for more down-tempo stuff, but I kept getting refusals or complicated compromises. I’m too stubborn to change things and since this album was made based on a very solid concept, I didn’t want to go back and change what felt good.

But back to the non linear production technique. I’ll cover how the process went, from the beginning of where I started from scratch until the end.

I know some people who are like, “but I don’t need a technique as I just do music.” Sure, that is not for you then. But this technique can bring benefit if you’re looking to expand your production. It surely contributed to make me more prolific through time.

Non-linear music production – A concept

This concept (which has been around for decades according to some research I did), encourages the producer to explore working on multiple songs at once, in a non-linear way.

This means that:

  1. You aren’t working on a song’s beginning first to bring it to its end, before starting a new one.
  2. Each track is approached individually for its needs but you also work globally. Keep in mind that what you did in the previous track should differ on the next.
  3. The technique is about repeating the same phases/rounds until you get a solid core. Then there’s the finalization to get ready for mixing.

It’s called “non-linear” because you constantly circle up in a series of rounds, on multiple tracks, all at once.

Note: A non-written rule also implies that working on a track should be done in short periods such as 20-30 min at a time on a song, then stop, save and move on. Why? Because it keeps you fresh.

For many people I explained this to at first, it felt unsettling and confusing. There’s some kind of embedded belief in people that when you go make music, you should find your idea, absolutely stick to it, and build it into a song; beginning at start and bringing it to an end. I usually see people’s projects having a few blocks right at the beginning of the track and then they get lost.

The number one thing I hear all the time: “I can make a great loop but don’t know what next.”

I’ve written a post in the past about this. However the non-linear technique is really aimed at making the loop issue something of the past, because it’s all about transforming small ideas into bigger concepts.

But where does it start? How do you begin?

Before diving into producing, let me explain the rounds of the non-linear music production technique, as this is what it’s all about:

  1. Content creation, generating ideas.
  2. Filtering ideas into a concept.
  3. Building a core loop.
  4. Template structure.
  5. Arrangements.

When you decide to create your project, the first thing you should do is decide on your project type. Is it an EP (3-4 songs) or LP (5-10 tracks)? Perhaps you just want to make a bunch of tracks; I personally believe that we should never make just one track at a time. If you have no precise project, invent one, such as “I’ll make 5 tracks for fun and want them to be mainly techno.” Once this has been decided, you’re ready for content creation. I usually spend a considerable amount of time in content creation and idea generation.

You can also start from unfinished tracks that you want to apply the idea to. The idea is to work on multiple projects in parallel. I usually it works best if you have at least five on the go, but there’s no limit of course. To newcomers, start small though to see if working this way works for you. The technique is about to bring your track from a simple idea to a finalized but unmixed, song. The mixing is not part of this. I find the mix down works better if you don’t do early, it but perhaps it can. Don’t hesitate to build a reference folder where you put songs that inspire you.

Content creation, generating ideas

From all the years of listening to music, running labels, doing mastering and DJing, I’ve come up with a theory: a solid song is – in general – a single, solid idea, supported with two others. The main idea can be a loop, a motif or even a sound. I remember Hans Zimmer describing a motif by saying it has to have an emotional impact on you, that it reappears in your mind later on. He was saying that the Batman motif he did was a simple two notes, but very powerful. You’ll play them and you’ll automatically think of Batman. The two other ideas are necessary because a song usually needs a development and a “surprise.” That said, in this production technique, you need to create fresh ideas. Lots of them.

I made a very long post about how to come up with new ideas but I’ll sum how I did mine:

  • Recycling older ideas: I have countless samples that I’ve used or never touched. I like to process them into new sounds.
  • Recording radio or other spaces with a microphone: When I’m in a creative mood, I’ll spend a lot of time recording sounds around me from that period of my life. I’ll leave the recorder somewhere for an hour to see what comes up.
  • Try demos: I love getting demos and try to see what I can come up with it by sampling them. Some have limited time or others are in days. It forces you to resample the hell out of the work and get something. Sometimes I end up buying it of course.
  • Pure sound design: Layering sounds from different takes is a great way to generate rich sounds. I do this a lot but its time consuming.
  • Jamming with the sounds: When I have plenty, I’ll generally put the sounds in a sampler and jam them with a midi controller or PUSH. I’ll record everything I do into a project.

A project that has many ideas will be recorded with the date of the day for the jam. It might turn out that I have a few hours of material which means there’s hypothetically 3-4 ideas in there.

The definition of done (DoD) of this phase is when you have a project with 3-4 ideas ready to go. I usually do one session per track needed for the project.

Filtering ideas into a concept

This phase is one that you need to do outside of jamming. Why? Because when you jam, you’re in your creative state (right brain) and have tons of ideas but your judgement is off. You can’t be a judge then. You need to feel free and explore without boundaries. This second phase is about going into a more analytical side where you will be curating your crop.

  1. Go through all recordings you’ve made and loop part of it. The question is, can you listen to a loop and feel inspired? If yes, you have something to hold on to.
  2. Use different size loops like 1, 2, 4 bars. Compile different ideas.
  3. Use the session view to make scenes of loops you like.
  4. Try to see if certain loops, once layered, make unexpected motifs.
  5. (optional) Add a kick & hihat to give you an idea of the groove and adjust the timing of the loop.

The definition of done (DoD) of this phase is when you have a few scenes in your session view that feel solid.

*Note that you may go back to create more ideas (Round 1) to complement what you have. You may also create a pool for all ideas of all sessions and then make ideas from that. No rules here, only possibilities.

Building a core loop

At this point, you should have X number of projects (based on your project definition you decided on at the beginning, i.e. EP, LP, whatever), each with material that has been organized into 2-3 ideas. Now comes the moment to put it all together.

The loop you’ll build here is the middle part of your song so it should have all the bells and whistles.

  1. Add a foundation. The fundamental part of your song is the low end and the bass. From the main idea, add a bass that either supports or responds to the idea. Adjust it so it’s in key.
  2. Add percussion. Complementary to the bass, you may add kick, percussion, or anything complementary of what will create the groove. I usually start right away to decide what groove template I’ll use on this core part.
  3. Add melodic touches if needed. Decide how long your melody will be and how it progresses (if it does).
  4. Create a background and space if desired. This is usually the reverb and textures. However, this can also come later on.

The definition of done (DoD) of this phase is that you have a main loop that you can place in the arrangement window, right in the heart of your song (which means you need to know roughly how long it has to be). A good loop is one that is centered around your motif where if you solo that part, it would be what someone would talk about to describe your song.

In the process of working through the core loop, you might need to go back to create more content or you may import some from other sessions.

Template structure

Now that you have the core part of the song, it’s easier to build out the remaining structure. In the arrangement view, create three sections: a beginning, middle and end. You will now lay out your structure to have an idea of what you can do with your core idea.

  1. Copy the elements from beginning to end  that will be present the whole time through the track.
  2. Work backwards by deconstructing the timeline of what comes in first and so, until you get to the middle part.
  3. Do the same process until the end. You may repeat some elements.

The definition of done (DoD) of this phase requires that you have a temporary structure from beginning to end. It might take you a while, I encourage you to do sprints of 30 minutes at a time. The problem with working too long on this phase is that you lose perspective regarding the strength of your song. I usually want some sort of structure to come out of this phase, but I may go back and forth with the other phases until I am happy with it.

Arrangements

This is the final phase. You might need to come back to it as everyone has different needs that will arise in this process. Arranging – in simple terms – is creating the story-line of your song, but also between songs for your project! How do your tracks relate to each other? I have songs that have brothers and sisters, while some are from a completely different family.

After working on the arrangement of song, the last thing I do is export what I’ve done so far. When I switch to another track, I import the last session in the arrangement to see what I did and compare. I adjust the arrangements so all my tracks don’t have the same structure; beginning, breaks, and punches. I adjust them so they can be fun for DJs to mix too.

Arranging is a massive topic that I will detail in a future post and is involved in most music production techniques – but this explanation is a full conceptualization of how I work. Hopefully it helps you somehow too!


SEE ALSO :   Non-Linear Music Production 

Good quality microphones for iPhone

One of my favorite things about making music is to combine recordings of random things I find or field recordings to include in my music – a great, simple way to do that is with an iPhone microphone. Since this is a topic I often cover in this blog, I thought I’d go over some iPhone microphones I’ve had the chance to use, test, or have seen friends use.

Why use an iPhone microphone?

iPhone microphones (or any phone microphones) are ideal for portability as well as for using them when you have quick moment of inspiration to seize a moment. I believe smartphone microphones are an essential any electronic musician should have. Not only can you record a weird conversation you’re hearing in a cafe, but you can also record a moment of a track that sounds amazing at an event (although the quality won’t be great…at least it’s a way to remember something you liked). The idea is to create material you can use as sample or references. Recording sounds in and out of the studio is always a great source of inspiration.

Here are some microphones for smartphones:

Zoom iQ7 iOS Lightning X/Y Microphone (Amazon)

Zoom has been a top choice for many for a long time. If you don’t have the handheld recorder you can get this microphone with lightning connector. It’s probably one of the best out there hands-down, not only because of the great quality of the audio but also for the app that comes with the microphone. The app makes it way easier than the handheld recorder as not only do you get quick access to different parts of the configuration, but you can even send it to your Dropbox.

I recommend this one as my first pick.

Movo PM10 Deluxe Lavalier

Lavalier microphones are usually used to pick up someone’s voice, so you’ll see it on people on TV or people on stage when they do conferences. They have pros and cons, but the one thing I like about them is they also have their own sound profile. The guy I work with for my jazz project uses one for his saxophone and while at first I was a bit skeptical, the end results were beyond what I was expecting. This Movo does something really cool if you wear it subtlety and record yourself or play some instruments. It’s a bit annoying to install but if you’re creative, it can be pretty fun to try unusual ways to pick up sounds.

Cs-10em Binaural Microphones and Earphones

This one is amazing but it doesn’t work with a smartphone because these pods are also microphones for binaural recording. This means that you get a stereo microphone at the level of your ears, recording the world around you. What this does is, if you pass the recording to a friend who wears headphones, he will hear it exactly how you did when you wore the pods. So lets say you recorded yourself in a coffee shop and some people were talking in the back, the listener will also hear it in the back. For positioning and field recordings, this toy is a dream. The only downside is you need something like a handheld microphone with an entry or pair it with the iQ6.

Rode IXYL Condenser

Rode makes amazing condensers and the quality of their products is always outstanding. The only reason I don’t suggest this one at first is the price. It won’t fit everyone’s budget and can be overwhelming if you use it only occasionally. But if you think you really want to get into field recording, go with this. I’ve tried this model but don’t own one because I can’t have them all …but it’s certainly in my wishlist!

IK Multimedia iRig Mic Studio

This one is last on the list but could also be first. While the microphone is totally fine and you get something lovely for the price, what makes the iRig really cool is the number of things they offer, from other toys for picking up sounds to great apps that can help you make music on your iPad. They’ve been around for quite a while now and know what they’re doing.

SEE ALSO :   Home studio essentials: Starter kits for electronic music production 

Checklist to see if my song is finished

Lately I’ve been working on a live set, and I realized that I have a personal checklist I use to see if I covered everything to help me decide if a particular song is finished; from little details to bigger things, sometimes it’s easy to overlook important factors. Just like with traveling, you want to make sure everything is ready before stepping out of your project.

This checklist outlined in this article is what I personally use before shifting to the mixing phase. In a past article, I explained the importance of exporting the stems out of your project once the production is done. This frees up CPU usage, lightens up your projct, gives you the option to backup or collaborate, or possibly to do some mixing into another DAW to get different textures. But mostly it’s a way to tell yourself “Ok, time to move on.”

Do you need to cross-check everything in this list to declare your song finished? No, not at all. Below is just a cheat sheet to help you have a better idea of everything that could potentially be covered (and I’m sure I’m missing one or two things here).

Below are what I believe to be the major categories of the “song is finished” checklist in terms of production (mixing is another phase altogether that comes afterwards):

  1. The Hook

The hook is where everything begins and ends, so ask yourself these simple questions to get started:

  • What is the main hook of your song? Remember, the hook is what someone would sing or recall to someone else to explain what the song is about. Your song might not have a main hook, which is okay, but a hook is one of the most important factors to help make a song memorable and timeless.
  • What elements supports the hook? A good hook is often not enough. Supporting it with complementary sounds or little blurbs of secondary melody is very helpful.
  • Are you aiming at a pop structure or more of a repeating mantra? There is also a grey area which combines both of these structures. But whatever your pick is, it helps to have a clear answer to this question in your head.

2. Sound design

Sound design is actually the most important section to me and this is usually where I spend the most time. I have sub-categories here that I will cover.

  • What is the direction and purpose of this song? Is it mainly for DJs or at-home or headphone listening? Vinyl or Spotify? Chill, dancefloor or experimental? This is something that can sometimes be good to keep in mind until the very end.
  • What song or artist would be a similar reference to your track? A reference track can be added in the project itself in a channel. See my past post on how to use a reference track.
  • What is the ratio of organic vs synthetic elements? This is something I sort of think about in the beginning but I am usually also open to revising at the end.
  • What is the main key for my song? This is not always essential, especially if you make atonal music. But it’s a good idea to be aware of a general tuning of bass, kick and melodies.
  • Kick drum: Is the kick in tune with the melody? Is it side-chained with other conflicting sounds? I recommend trying to have a different kick from whatever previous track you were working on. The kick is the last sound to be designed as it is there to support and complement the entire project.
  • Snare/clap: Often equally important to the kick, I usually alternate between more of a clap sound vs. a traditional snare and I also try to have multiple layers. In electronic music, the percussion sound that will go on the 2nd and 4th beat should vary otherwise it sounds a bit monotonous. I personally to try to offer different sound options here for when I play my songs live or DJ them.
  • Bass: Is it in key? Is it side-chained?
  • Melody: This one is a bit difficult but as explained in my non-linear production technique, I like to go back and forth with the track to see if the melody has an impact; if it feels good over time. Finding melody is hard enough, but to make a melody that stands the test of time is an art in itself.
  • Atmosphere: Is there a background to this track? What is in the background vs foreground? I like to use busses for creating atmosphere.
  • Recording: Have I used field recordings for this to add another layer of atmosphere or sound?
  • Textures: Are the textures clear and audible? Or is the song meant to be more subtle?
  • What’s the ratio of repeating sounds vs ever-changing? Some people like to always have the same clap through out the song while in Hip Hop for example, producers often like movement and change. Is this a rule you want to follow? If so, on what sounds?

3. Groove

My “groove” section is a bit less detailed, but is very important, especially if the song is more percussive and dancefloor-oriented.

  • Is the groove borrowed from a song or from a groove template? Or is it custom?
  • What is the time signature? Is it global or different for different parts?
  • Is there a global groove applied or is this song using multiple grooves depending on the part?
  • Export all percussion loops to MIDI to tweak the groove.
  • What is repetitive and what not? Find the healthy balance of sounds being repeated through the song and others that change over 1-2-3-4 bars.
  • Is there sidechain between channels to create subtle or obvious pumping? This can make a difference.
  • What are the sounds that are modulated? This is one of the most important thing to do if you want your song to have a more organic feel rather than synthetic. It’s one thing to select all organic samples but the way you program them will be critical for a general feel. In general, the human ear is very sensitive to movement, even if the music is played in the background; you’ll be surprised of what people notice, and what they don’t.

4. FX/Sends

Using sends is crucial for giving the track a unified feel. One of the most common mistake I see from new producers is to use multiple reverb effects everywhere in the project instead of mainly using one as a send. I usually use multiple sends to create elaborated and sophisticated 3D effects for percussion and melodies. One of the most important point I always remind myself is to use them with care, towards the end of the production phase.

  • Is this song more dry or wet in terms of effects? How much room have you left for reverb?
  • What type of reverb do I want for this track? long or short?
  • What is going to have a 3D effect? What makes the song 3D is the amount of sounds you put right up front vs the ones you put in the background. A healthy combination of both will have a better effect.
  • Use one delay for the project! Which time signature does it have?

5. Structure/Arrangements

I previously referred to song structure as Lego building blocks in a previous post. Blocks are often constructed in the same way; this is why using a reference track can help break out storytelling ideas. I always recommend dropping Markers in the arrangements this way: One at the beginning, one at the end, and one in the middle. Markers will give you perspective, help you see if your general storytelling is balanced, and help you determine if things are properly organized.

From the middle marker, I would drop one additional marker between the very beginning and the middle markers, and then do the same thing in the second half. Your song should have four distinct sections. Sections one and four are intro and outro; the middle part is where your song develops and mostly exists.

  • Does your song have intro/outro? Does the action start immediately or slowly develop?
  • How much space have you left for the DJ to mix the track, if you’re making DJ-friendly music?
  • Are your melodic elements evolving properly through each section?
  • Does your song have at least one anchor point of interest per section? All the sections of your track should be interesting.
  • Does the song have any surprises about two-thirds through its duration ? I always recommend considering this to make your song even more interesting.

These sections cover the main points that I usually think about when determining if a song is finished or not. If I don’t like the answers I come up with to some of these questions, I usually go back and work on the track even more!


SEE ALSO : Is My Song Good? 

Sound design: create the sounds you imagine inside your head

You might never really be able to make the sounds that you envision in your mind 100% accurately using sound design, but I can offer you some advice to build on a good starting point to make something close to it. Just like in painting and cinema, often our imagination will play tricks on us; you might imagine what you think could be “the best idea ever” but once you actually get down to working on it, you quickly realize that there’s a world of difference between your imagination and the final output.

So, is there a way to use sound design to transpose those ideas into something practical?

Yes, absolutely.

Sounds have a structure, shape, and form, and when you “hear” something in your mind, you have to translate this idea into a precise description which will enable you to get you started on actually creating it.

To get a good start in the sound design process, ask yourself the following question:

Can you explain your idea verbally?

The first step is to analyze the physical characteristics of the sound. Keep in mind that sound has multiple axes and characteristics:

  • Time: A sound can be short, long or somewhere in the middle. The temporal aspect of a sound is basically its duration.
  • Envelope: The ADSR (Attack, Decay, Sustain, and Release) envelop trick is what I’m referring to here. Foe example, does your sound start out loud and then fade away, or maybe it does the opposite?
  • Frequency Spectrum: Is the pitch of the sound high or low?
  • Harmonic or inharmonic: Does your sound have tonality or is it more noise based?
  • Position: Is your sound static or panned on a side? Is it moving?

Secondly, you need to identify a source material for your sound and decide how it will be shaped:

  • In a previous post, I talked about layering sounds. One great way to get started is to try to find already existing sounds, and layer them in a way to get to something close to what you have in mind. For instance, layering a tom, a clap and a snap–when glued together–will form a rounded sound that extends up into the highs. When combining your sounds and layers, I recommend using a good compressor of the Opto or Vari-MU type; they are musical and create a great feel to your sound. Check out Native Instrument’s Vari Comp or KUSH’s Novatron that came in strong in 2017 as one of the best tool on the market for a reasonable price.
  • If you’re more into synthesis, you can do something like experiment with a subtractive approach by using multiple Oscillators with a good filter. I usually use Ableton’s Operator but this year U-He’s Repro 5 has been really nice for me in terms of sound design; lovely, creamy sounds. I like to have my low end and mids set to sine and then will shape harmonics set to square or triangle. Experiment endlessly!
  • Another interesting option would be to use field recordings. You might think this approach is a bit odd, but you can even try to make the sound with your mouth, or try to find objects to hit; you’ll always end up with an interesting sound. You’ll also be surprised by how much you can do with recording your own voice. For a great, affordable field recorder, check out any of the field recorders by Zoom, they even make one that can plug into your iPhone, which is quite handy.

Sound design - Native Instruments' Vari Comp

Native Instruments’ Vari Comp


And lastly, once you’ve established your source material, you can then dive into carving your sound:

Time: there are a few things you can do to manipulate the time and duration of your sounds. Pitch-shifting something to slow it down or speed it up is fun. Granular synthesis is always an option as well; one of many options being the Mangle VST. I also enjoy having a dark reverb with a tail to stretch the length of a sound. Any reverb can do a good job here but you can easily experiment with free options found on KVR.

Sound design - The Mangle granular synthesizer

The Mangle granular synthesizer

Envelope: If you have a big chunk of sound that you want to shape, there are again multiple options to shape it. If you’re using Ableton, the easiest way would be to use Ableton’s envelope inside the clip, and draw out the envelope of the volume or gain. There are also a few volume envelope tools out there; one you can look into that I like is Volume Shaper by Cable Guys; really powerful and fun.

  • TIP: If you want a really fast transient on your envelope, try using a Transient shaper. Transient shapers can also help with sustain.
  • TIP2: A VCA compressor with a slow attack can also give you great results.

Frequency Spectrum: As I mentioned, personally I like to experiment with a pitch shifter, but I also experiment with a 3-band EQ and a compressor; mostly a FET one which is a bit more aggressive (I recommend to learn more about different compressor types if you’re unfamiliar with them all). This way you can control specific parts of your sound and manipulate which parts you want to have more emphasis. This is definitely not the only way you can do this; there are so many other creative ways to use an EQ alone (such as the UAD Cambridge),  but I like to combine multiple effects and then play with them as I am searching for the right sound.

Harmonics: Harmonics can often be manipulated with saturation and/or distortion. If you’re looking for a good distortion tool, you can check out the Scream VST by Citonic which offers tons of options. Otherwise, the Saturation Knob by Softubes is a great tool for a range of subtle to drastic changes. I suggest playing with filters as well; they can enhance some part of your sounds, especially if you use them in parallel (through a send/bus track).

Position: Try out any panner. There are multiple panning plugins on the market, but I’d be careful to make sure you aren’t making your sound spin too much in the design phase; you don’t know what the position of your other sounds will be yet and you might end up undoing everything later anyways. Beef up the sound with a chorus or a doubler to manipulate the sound’s position even more, but as I mentioned, try not to go too crazy with the panning when creating just a single sound.

These are just a few sound design techniques and ideas to get you started in creating and designing the sound you imagine inside your head. Have fun!


Bonus: A good way to come up with unexpected design ideas is to use randomization. Here’s an amazing tutorial by my buddy offthesky.


SEE ALSO :  Creating Beauty Out of Ugly Sounds 

Dynamic Sound Layering and Design

Sound layering can be a very complex or very simple technique in music creation and production depending on your goals. In a past post, I gave some really basic sound design tips; I have a lot of readers who are just starting out with mixing and producing, so it made sense to start with something less intense. This second post about sound design, however, will focus on something a little bit more advanced but still very simple: sound layering. It’s actually surprising to me to see so many people who ignore techniques that allow them to get the most out of layering, so I thought I’d write about it.

First off, I would like to discuss Ableton’s groups. Many people use them as the equivalent of busses, where all the grouped sounds will all be treated in a specific ways and yes, that approach works really well indeed. However, I prefer using a solo channel as a bus instead and use groups for sound design or classification. A good example is for kicks or claps, which are usually a combination of up to 3 different samples or sound sources (ex. 2 samples, 1 synth, etc.). Basically, since each sound is a collection of multiple samples, then I could say that they will work best as a group.

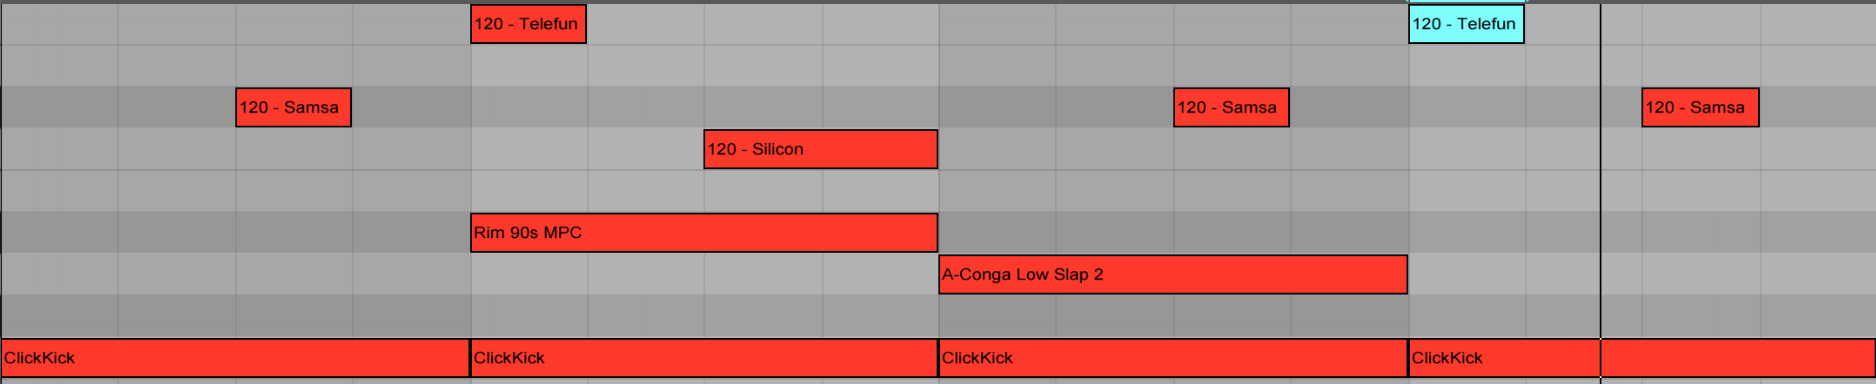
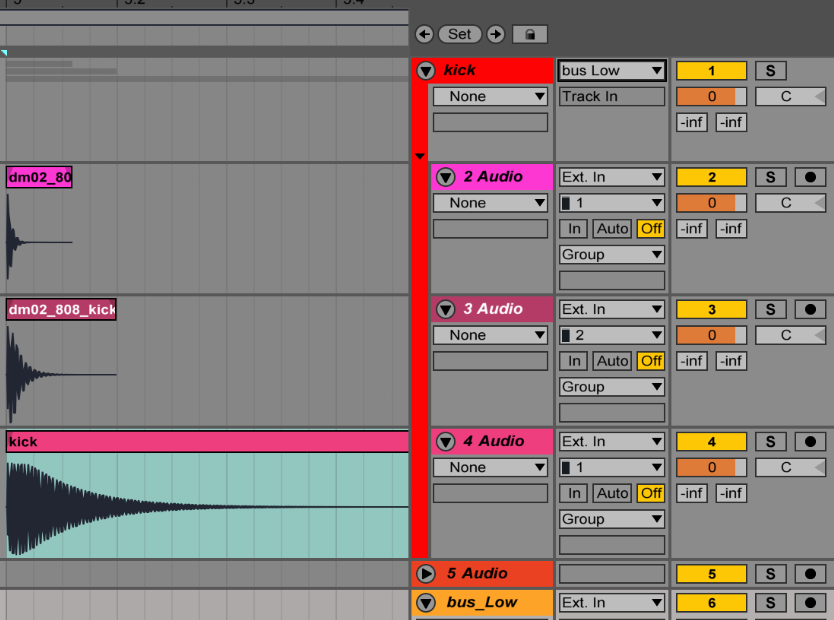
Visually it looks better and is easier to manage, and additionally you can also put effects on the group to glue all the sounds together – generally you’ll need a compressor and one or two EQs for a relatively uniform group. Once I’ve done that, I usually like to have an additional bus for all sounds (eg. groups) that will glue everything else together.

A second point to keep in mind, is that there’s always multiple ways to do sound design. Keep in mind that what I show you here is simply how I do it but there are other people who use different techniques; I try to keep it simple. Two methods Ableton will describe here that I like are the arranger and the drum rack.

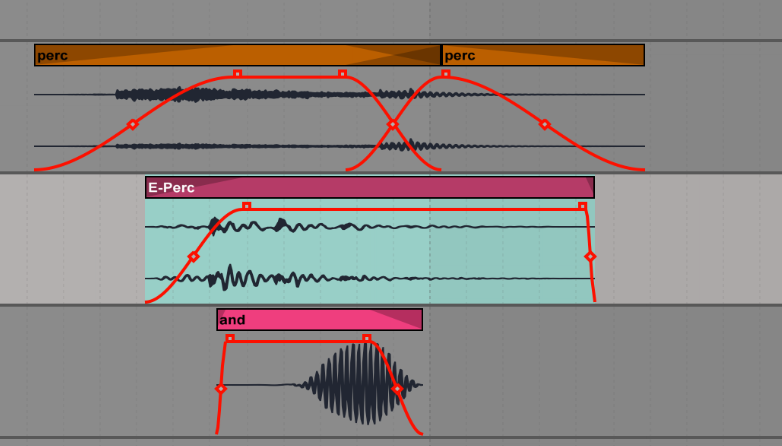
If you work in the arranger, you drop sounds in the channel and it’s an easy way to see the layers. I like turning off the grid to do this so it feels a bit more natural.

You can adjust the volume for each layer and tweak the EQ to get part of the spectrum of one sound, and the complementary part of another.

You can do the same with the attack and release; there are so many options. I really recommend using the faders too for more control. So basically, volume, EQ are your best friends here. Brainworx has an amazing filter I recommend, it’s super solid for sound design.

If you prefer, you could also mainly use the Drum Rack to do the same thing. Load up the same samples in the pads of the tool and then sequence them by MIDI instead of putting them in the arranger. Some people dislike working this way because they can’t easily see the frequency shape of the audio file. But the advantage of this approach is that you get to have access to more options to manipulate your sounds, like the extra controls in Ableton’s Sampler window.

What I think is best in the end is to combine both the sound arrangement layering, with the an extra channel of Sampler use so you can work on constant movements. The main thing you want from your sound design, is a feeling of liveliness and emotion. The sampler has LFOs you can assign to filters, panning, or volume, which is a subtle touch that creates a nice layer of movement and liveliness. In the same way, I’d even add a synth of your choice to give richness to the sound with oscillators working to reinforce the fundamentals with a discrete tone; more complex sound layering.

Finally, on the group of the sound itself, I would add nothing but an EQ and compressor to “glue” everything together, but you could also use reverb to broaden your stereo image. These techniques should help you improve your sound design skills!

SEE ALSO : Sound design: create the sounds you imagine inside your head 

Background vs forefront to create dimension

Nearly every week I have a similar conversation with my clients. In good faith, and to save both my clients and myself time I’m writing this post to help answer the questions many producers keep wondering. The question of background vs. forefront to create dimension.

My clients often send me projects with a lot of sounds going on, which if you know me and my label well enough is something I’m a big fan of. That being said, there is a way to work with a song made up of lot’s of sounds without things becoming a bit too much.

During the production of your song, how many times have you listened to it all the way through? Twenty, thirty times? More? As songwriters, we need to consider the listening perspective of our audience, who will likely never hear all the nuances and details that we do. Perhaps if they’re big fans, they’ll listen to our track ten times. With that number of listens, the impression you get from a very busy song is very similar to looking at a very busy picture – You’ll discover different ideas on each view, but the whole image will be taken for what it is. What will sound like a mistake to you will likely be perceived otherwise by the casual listener.

When we use many different sounds together in an arrangement, it can be impossible to hear them all equally. As producers, we care for the work we’ve put into our sound design and often make the mistake (myself included) of trying to give every sound (big and small) the same amount of emphasis in hopes that nothing will be missed.

Even during active listening, both simple and complex music will often have subtle details we may not hear at first.

The important thing to understand is this – many sounds working together shape and create an experience. Some sounds only work when combined with others to form a unique layer, much stronger than the sum of it’s parts.

Sound design is a complex science that often takes years to understand fully. For many producers that ‘a-ha’ moment comes with the understanding that many sounds aren’t massive all by themselves, but rather a combination of several sounds carefully layered together.

For example, a punchy kick may have three layers (low, mids, hi-mids for transient shaping). A warm and full sounding pad may have harmonics created from a layer of richer oscillation in the hi-mids (using a square oscillator). This is the technical part of it but for someone not interested in sound design and is purely a listener, he/she will experience these sounds in an entirely different language, but he will get it though.

TRY: When listening to music, force yourself to identify layers in sounds.

With the concern that some sounds will not be heard equally at rest, we can start looking into how to create details with dimension and subtlety.
These details are as important as each of the featured sounds as they are needed to support the main element(s) of the song itself. Let’s see how to approach this:

  1. Decide what the core or backbone of your song is. If someone has to sing your song to someone else or attempt to explain what the song is about, what would that person say? In other words, the most memorable part of your song is the main idea. If you remove that, the song is not really there since most of the sounds are there to support that main idea.
  2. In the percussion sounds, identify what are the main elements that support the groove and the main idea. Usually, there’s the kick, a snare/clap, and a hat. Some tracks have multiple claps or additional  percussions here and there, but it’s important to decide what the main percussion sounds are.
  3. The other sounds will be EQed to create dimension. Only the use of EQ combined with volume changes will be enough here.

TRY: Next time you listen to a song, try to give attention to anything that is mixed low in the mix.


How to apply the distancing technique, on a very simple level, is to apply a low-pass filter/EQ on the sound. The more your filter up, the thinner the sound will feel and also the more pushed away it will sound. There’s no right or wrong here, but you’ll need to adjust the volume to your own taste and feel. I would suggest compressing your sounds to bring them together somewhat.

This is a regular cut that usually removes a lot of muddiness.


This cut would move sounds to a bit behind any of the featured sounds.


This place sounds far off


For subtle positioning.


The other trick would be to use reverb but that one is something to use with great care. Depending on your reverb unit, this technique can introduce muddiness which the previous trick won’t do. Like always experiment and find what you like in the process. You can also combine the EQ trick with the reverb use for better feel.

Let me know how it goes!


 SEE ALSO :  Dynamic Sound Layering and Design    

Templates As Seeds

As a producer, you’re likely trying to balance several tasks all at once while working on your music. If you’re spending time to look through four or five reverbs in search of the perfect sound, setting up buses and groups to pre-mix your tracks while you arrange it, or just feeling frozen looking at a blank project screen and finding it hard to get going, it’s no wonder you aren’t as productive as you’d like to be.

Good news, this post is all about setting yourself up to win before you begin. Begin to see your templates as seeds. 

Many DAWs can be setup to load a template as an initial starting point. Reason will propose a pre-made environment, and Studio One will propose if you’d like to setup a project for mixing to speed up your getting started time. Ableton Live doesn’t have that feature by default, but you can easily change that to open a custom startup project.

Even though most DAWs have this helpful feature, that wasn’t enough for me. But it felt like I could do better.

In one way this is a follow-up post to the previous Bonsai Technique that I shared a few weeks back. It was super popular, and many people sent in comments about how it really helped them develop tracks from little ideas. Now, I’d like to follow up with this idea as I realized that many people are missing out on the fun of using a template to get their projects started. Also, there are a few things we can add in that will also be valuable for your next productions. Let’s have a look at the techniques to get rolling fast.

I’m going to suggest something simple in essence, but it’s very effective to get new projects sounding great right from step one.

Start your next project using the last song used. I heard about this technique from Matthew Herbert’s manifesto, and it got me inspired. Herbert would pick up the mixing board where he left things off from the last session. Why is this a good idea?
Starting from the last mix would provide a faster workflow but also, the random EQs, compression, effects, would be set to something he would never have set up beforehand. I thought this concept was brilliant and began doing this myself. Very often I would start with the last project loaded but would make the next song right after the end of the previous one. The same configuration and settings for the kick, percussion etc… were the same, which often led me into directions I didn’t expect at all. This is a big advantage. 

Consider keeping the effects on each channel as is, but drop your new clips into existing channels at random. In some situations, I also would copy the arrangement of one song and paste it into another song’s arrangement view. Very strange results would come up, often leading to unexpected yet very usable sound design results. I often have one “mother” project which will be a safe place for me to develop and grow these ideas. Then I will copy some loops into another project’s arrangement view, and sometimes move the clips between channels to see which one fits the best. I even did the exercise of dropping a full arrangement into another project keeping it as intact as possible. From there I wouldn’t even listen to it before bouncing it out. I’d then listen to it weeks later and get blown away. I made a handful of tracks from my album Intra or White Raven this way.
Next, challenge yourself to keep your bus routing and groups intact. It’s great to have pre-made sends channels or busses that you can re-use quickly. Of course, an easy way would be to be to assemble a macro of the chain of effects you’ve used, but I like the idea of opening a template and have no idea what effects would be awaiting me. I will sometimes swap my most used effects with others I newly acquired or some I’ve forgotten about. It’s often nice to dig up older, legacy plugins that can bring up a particular grain to your sound.

Clear your finished project from the clips and save it as a template.

One exercise you can start applying today would be:

  1. Create a folder for your templates.
  2. Each time you finish a song, you do a “save as…” to that folder. You’ll then clean it from the clips in the Arranger view. I will often leave what I call ‘leftover’ sounds that weren’t used in the project. I’ll set these clips in the session view in a channel named “Leftovers.” Doing this allows you to re-purpose those sounds, which may be a perfect fit in your new project.
  3. Midi clips could be left there as well because it is usually interesting to have on hand some midi material you can quickly throw new sounds onto and see what it gets that sounds like.

Now, an extra tip, which is to make a template for the design of an EP/LP. As you know, it’s always great to have a common feel for an entire release, and one of the things I would recommend would be in the way you apply your effects.

  • Reverb. Either you pick a reverb from one specific company (ex. Altiverb) and use some presets to get started, or you try to remain in the same family of space such as Plates.
  • Delays. Using the same plugin but changing the delay speed.
  • Saturation. Try to pick one type and stick to it. I recommend applying this through a send channel where you have more control over how each sound is colored.
  • Compression/EQ. Some apply a distinct color and are more or less transparent. It can be a good idea to keep the same type of combination through your channels.

As always I want to hear your feedback on anything mentioned in this post. Feel free to share this post or leave a comment below and tell me how these creative, and time-saving techniques are working for you. 


SEE ALSO :  Pointers To Define Your Sound

Beats and Melodies

One aspect of using the Non-Linear Music Production technique that I want to share with you involves two simple, and easy to follow tips with big benefits – we’re going to focus on just beats or melodies – this going to upgrade your productivity in the studio and it’s extremely effective in reducing writer’s block.  

Statistics show that in February the number of people known to be stuck facing writer’s block is often on the rise. We can blame long cold winters for being partly to blame, yet there’s also a few things that can lead to this, such as:

  • Fatigue. A lack of warm sunlight and an increase of time spent indoors.
  • Overworking. If you’ve fallen into a routine of day job, followed by study, then music production at the end of a long day, or as the last part of a long day, you might fall in the trap of overdoing it, and becoming unproductive.
  • Lack of distance. Writer’s block is often a sign of creative burn out and is a clear sign you need distance from what you’re working on. If you’ve over exposed yourself to the same kind of creative work, you might need to dip into something new to get refreshed, which is what this blog post is all about.

To make your best beats and melodies, give yourself the freedom to produce in a deconstructed way. Break the mould.

Part of the problem of falling into a slump comes in believing that to make music, you need to begin writing your song in a linear way, which is starting from the very beginning, working up to the middle, and following through until the end of the track. Perhaps, before approaching your next track with that mindset, consider embracing a different way to think about your time in the studio.

Setting yourself little goals are simple and bring back the fun in making music.

One of the ways to get your track really grooving early is to work on one element of your track only. Get started making just the beat, or melody. The task of concentrating on just one element of your production will take off a big part of the pressure in trying to finish something bigger. Another benefit to working and focusing on one element at a time is that doing so lends itself to experimentation, play, and an appreciation to those sounds on their own. You can even roll back one step before  approaching this and practice on sound design alone if you feel like making beats or melodies isn’t working for you right now.

Do you often sit in front of your computer and imagine yourself putting that loop into it’s final song-form, and think abo ut everything you need to do to get there? This can often be discouraging, and prevent you from making great music.There’s some debate on what should be done first when starting a production. Some artists admit they can’t do a beat if they don’t have a melody or vice versa. My personal view on that is quite simple, if you can only make music in a certain method, it’s time for you to break that to avoid falling into dependencies, which can hurt your music making progress.

To make your next session super productive let’s do a bit of preparation – there’s so much you can outsource from these next few steps. 

  1. Make a folder with today’s date.
  2. You’ll be saving your project in there as well as anything related.
  3. Get yourself a timer. I highly suggest that you limit your time on only ONE task. Focusing on only ONE element of your track will speed up your productivity, and make sure your aren’t spending time on less important details.

Making beats. With the premise that we’re using Ableton here, there’s no good or bad way to make beats. But I invite you to explore a mixture of midi use vs simple audio assembling in the arranger.

Let’s see a few important points you can apply to make these beats:

  • Sample selection. At this moment having the perfect sample is not important. I’ve seen students of mine loosing tremendous time looking for a kick while it’s actually the last thing you should be deciding. Tip: Use a simple 808 kick to start with, and swap it later.ableton live, step sequencing, patterns, beatsStep sequencing: Change the grid going from 1/4 for the main beats to fiddle to details with a 1/32. Tip:
  • Ableton Live, duplicate loopLenght: Duplicate and double up your 1 bar loop to 4, then start removing, adding so that each bar is unique. This takes away the boredom of repetition.
  • Groove: Explore grooves as you go. Try something new as importing the groove from a track you like and apply it to one sample of your beat.


Making melodies. This one might be tricky especially if, like me, you have no musical background whatsoever. It could help that you read the basics about music and know at least what are chords, harmonies and scales for instance. This is useful because Ableton will give you tools that can take away your lack of knowledge to turn it into something that makes, avoiding possible awkwardness. My take on melodies is, there’s no rules here and if you can get a midi keyboard, just start tapping randomly to hear notes of the synth you picked, then see if there’s a possible, semi-logical order you can organize that randomness into.

  • Synth selection: This exercise will make sense the more you do it. If you’ve never done this before, I strongly encourage you to try every single synth presets you can have on the ones you have. A preset is a starting point, it’s not the end result so play a few notes that start noodling around the knobs to shape whatever bothers you into something else. Don’t aim at something, improvise with what you have.
  • Melody: One simple tip that has been proven extremely useful is to record every single moment of my session. So, in one channel, make sure to have a resampling to record all the madness, ugliness, mistakes and glory but also, try to record your moves with midi recording. The recording of the sounds is more important than trying to make a solid hook out of a few notes.
  • Ableton’s melody extraction: Very useful on beatless music. Try it with some ambient and see what you get. From classical music as well, it can be surprisingly inspiring.
  • Pitch down a melody to make a bass. Always surprisingly full of new sounds.


How to use all your new sounds?

Later on, after a few weeks, you’ll end up with folders, filled with ideas. Some will be beats, some melodies. Make sure that whenever you finish a session, you export what you had in one or multiple files. You can bounce an idea you love or you can export the entire session.

Where it gets really fun is to open a blank Ableton project and import all the renders, making a channel for beats, the other for melodies. Then you can find unusual match between one and another. Make sure everything is rightfully labeled so you can reopen certain projects to go tweak a sound if needed.

How to write melodies and beats in Ableton Live tutorial.

Creating beats and melodies tutorial with Ableton Live.

Next time you turn on your DAW try working on only a beat or a melody, experiment with your patterns and notes, and take the time to closely listen to the sounds you’re creating. Save. Render. Import. Jam.

If you’re looking for ways to produce a ton of fresh sounds and grooves in a way that is fun and efficient, try working on just one element of your track (beats or melodies). And, if you find starting your tracks from writing in the same formula, try using a non-linear technique to get your tracks moving along faster.

The takeaway is this – these two techniques will upgrade your productivity in the studio, help you make more music, and are really effective in reducing writer’s block. 

I want to hear what exciting sounds you’ve come up with focusing on just beats or melodies. Keep up to date and share your progress with me online.

JP.

SEE ALSO :  Making and breaking genres in your music 

Reverb Tips to Boost Your Creativity

This isn’t just another article explaining what reverb is and what it does. If you dig a bit, you’ll find all the technical facts and information you need out there already. So instead, I’ll focus here on the little tips and tricks I use daily that you can try right away. And I’ll invite you to reflect on what reverb can do for you and your music.

Why?

Because reverb’s primary role is to add depth to a song.

I’m talking in the technical sense, but also in the way its 3D-like effect can give your song a soul. No kiddin’. Have you ever watched a movie where one of the characters is lost in thought or reliving a moment? Very often, the voice will be drowned in reverb to evoke an internal feeling, something deep and subconscious.

There could be a correlation between the reverb effect and the womb, perhaps, where it emulates the way a fetus hears the world, as if under water. Whatever the reason, the sound of reverb in our culture pretty much always conveys something hidden or profound, and using it in your music can change things dramatically.

Pros. Adds mysticism, warmth, and smoothness to percussion and melodies. Reverb can round out transients and stretch the release of sounds, which can also add dimension and that wet feeling you hear sometimes in songs.

Cons. Some people prefer a dry aesthetic in their music, which can also work very well. If the music is played in a warehouse or other large venue, adding reverb could make it sound more imprecise or confusing, perhaps removing a certain punch. This is why reverb should be used with care if you’re interested in producing dance-friendly music.

There are different types of reverbs, and each one has different uses. Here are some explorative avenues for you to try. They’re suggestions to get you started, but you could end up taking them in a completely different direction. I always encourage people to test out a few things, and most especially, to try whatever is contraindicated or not advised. This is the best way to figure out for yourself why it’s not recommended, but you might also find that you can pull something out of it.

My favourite tips are:

  • Convolution exploration. Convolution plugins extract the reverb from a song so you can apply the resulting image to other sounds. In theory, a good image is a white noise spread in a room, so that its impulse can be analyzed. You don’t have to respect this though. You can basically drop any short or long sample to see how the plugin will analyze its impulse. You can extract a sound from an old pop song, movies, your iPhone, or anything else you can think of. You can even drop a pad with no reverb and see what it does. Sometimes it gives you weird results. Same if you use a percussive loop, since it has a rhythmic impulse.
  • Panning reverb. Using multiple send channels or busses, you can combine multiple reverbs to create your own personal desired space. Pan one to the right and another to the left. Adjust the pre-delay and decay, and maybe change one to a hall and the other to a plate. See what happens.
  • Reverb EQing. Abbey Road made this popular with their trademark sound, which added an EQ before a reverb. Generations later, reverb plugins now often come with their own integrated EQ. One tip to increase precision is to cut off anything coming in the reverb for percussion and pads as it tames any edgy or problematic frequencies.
  • Adding subtle automation. A reverb that constantly moves will feel alive. You can use automation on the decay and pre-delay. These two usually add a lot of space. They will give the weird impression of being in a room that’s shrinking or expanding, as if you’re moving around it with the walls getting closer and further away. Used well, it can be very psychedelic.
  • Astronaut in spaceMultiband reverb. If you know how to split your signal’s in-frequency ranges, you could use a deeper reverb for your mids and a longer one for the highs. That can also be done with send channels, again where one filters out highs and the other filters out mids. This one is particularly effective with percussions, and it can add a really nice shimmering effect to them.
  • Resampling reverbs for convolution. Send a clap in your reverb experiment and resample it. That sample can then be dropped in the convolution. This will usually reshape the sound, giving you more freedom than managing multiple reverb plugins at once (unless you have a good controller).
  • Gates and envelopes. These are a lot of fun on a reverb, as they can create weird reactions. Imagine a strong impulse that drops abruptly, or one that shapes in a off-rhythmic. They can add a nice texture to pads.
  • Infinite reverbs. There are a few reverbs that have this feature. If so, you can send any sound you like through them and it can become a pad or smooth synth. If you resample it yourself, it can be dropped into a sampler where you can play notes from it.
  • Reverb + Chorus = killer combo. Just try it, no questions.

As a gift, I made these two convolution images for you to use in your music. Should work very well in dub techno as well.

I hope this helps. Please share any ideas or tips you come up with!


SEE ALSO : Intuition for decisions in music production

Creating Beauty Out of Ugly Sounds

This post is inspired by one of the most useful experiences I’ve ever had for my personal development as a producer. I’ve made it into an exercise that you can try.

Back in the early 2000s, when Montreal’s MUTEK festival was just getting started, our community of electronic music producers was blooming. People were spending as much of their time developing concepts as finishing tracks. I remember one sunny summer day, when Tim Hecker and I were sitting outside of my friend Mitchell Akiyama’s home, and we were discussing sounds. We had this interesting debate about what made some sounds “ugly,” and what the word meant for us. We felt that maybe it was cultural, or maybe it was producers using sounds the wrong way. At one point, we got to talking about how the guys of Porter Ricks recycled ugly rave sounds into what they do best, a kind of deep, mysterious techno.

https://www.youtube.com/watch?v=Wu9SEr8ST7c

A new concept was born: how to transform ugliness into beauty. Suddenly, the art of recycling meant that anything was possible, no matter the sources.

Tim worked on some of his albums using granular synthesis. He used sources like Van Halen or other weird heavy metal sounds. He even used burps for one installation…

Mitch and I went in to the studio. We loaded some rave samples from CDs and started playing around with them. By the end of the session we had 2 IDM-oriented songs that lacked any hint of a rave sound.

It was a great experience. I’d throw out some ideas, which Mitch would then apply to what he was doing to the best of his understanding. The directives I gave were descriptive rather than technical, and there was a lot of room for interpretation. It often wasn’t what I had in mind, but whatever emerged would be great as it was.

The only references we worked with were ugly sounds and some general, non-technical ideas.

The thing is that producers will often come to the studio with their minds already full of preconceived ideas and expectations on what’s nice or not. This doesn’t leave much room for mistakes, discoveries, oddities, or for your subconscious to express itself spontaneously.

So what is the exercise?

  1. When you’re picking sounds for your track, just go for the worst, ugliest sounds you can find on your hard drive or in your presets.
  2. From those sounds, discover how you can transform them. You can use filters, pitch shifting, EQ, and any other effect that might help. Reverb, even a little, can add a dramatic feel to a sound. So try to play with these 4 elements, plus resample yourself while doing so. You will then be able to play again with the new modified sounds. Each time you experiment tweaking the sound and record it, we call that “a round.”  To create a new, beautiful sound, you will need to re-process your sounds into 2 to 4 rounds.
  3. Detach yourself from any preconceived notions or expectations you have about where the track can or should go. Just try to explore and see where it takes you. You can take a look at my recent post on experimental music too.

Another thing that can be done is to use randomizing options to see what kind of crazy results emerge.

And be sure to have fun!


EDIT: Bjork seems to share the same idea.

SEE ALSO : Create Your Own Concept Album