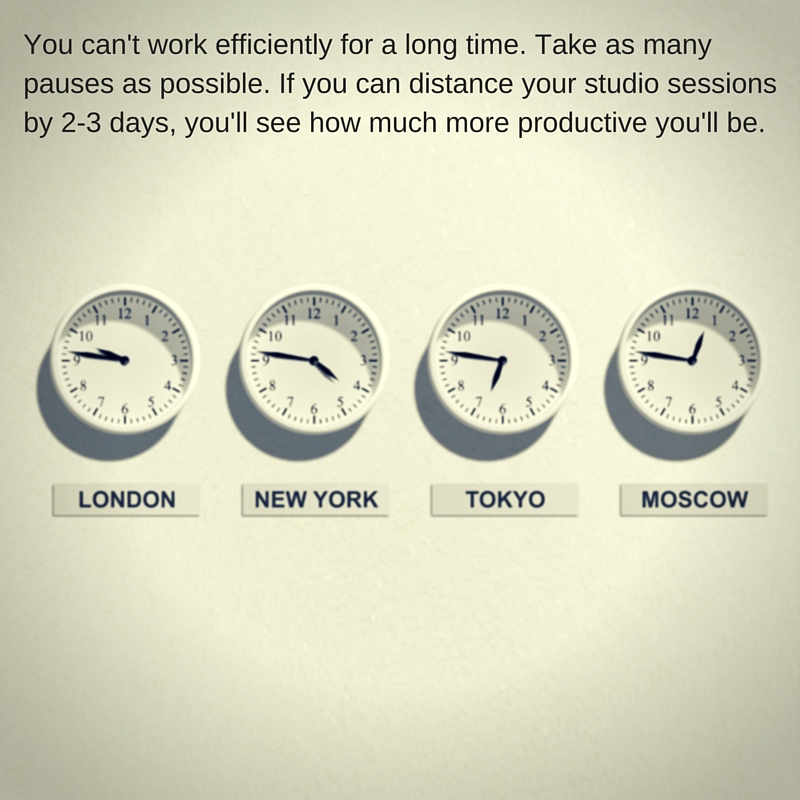
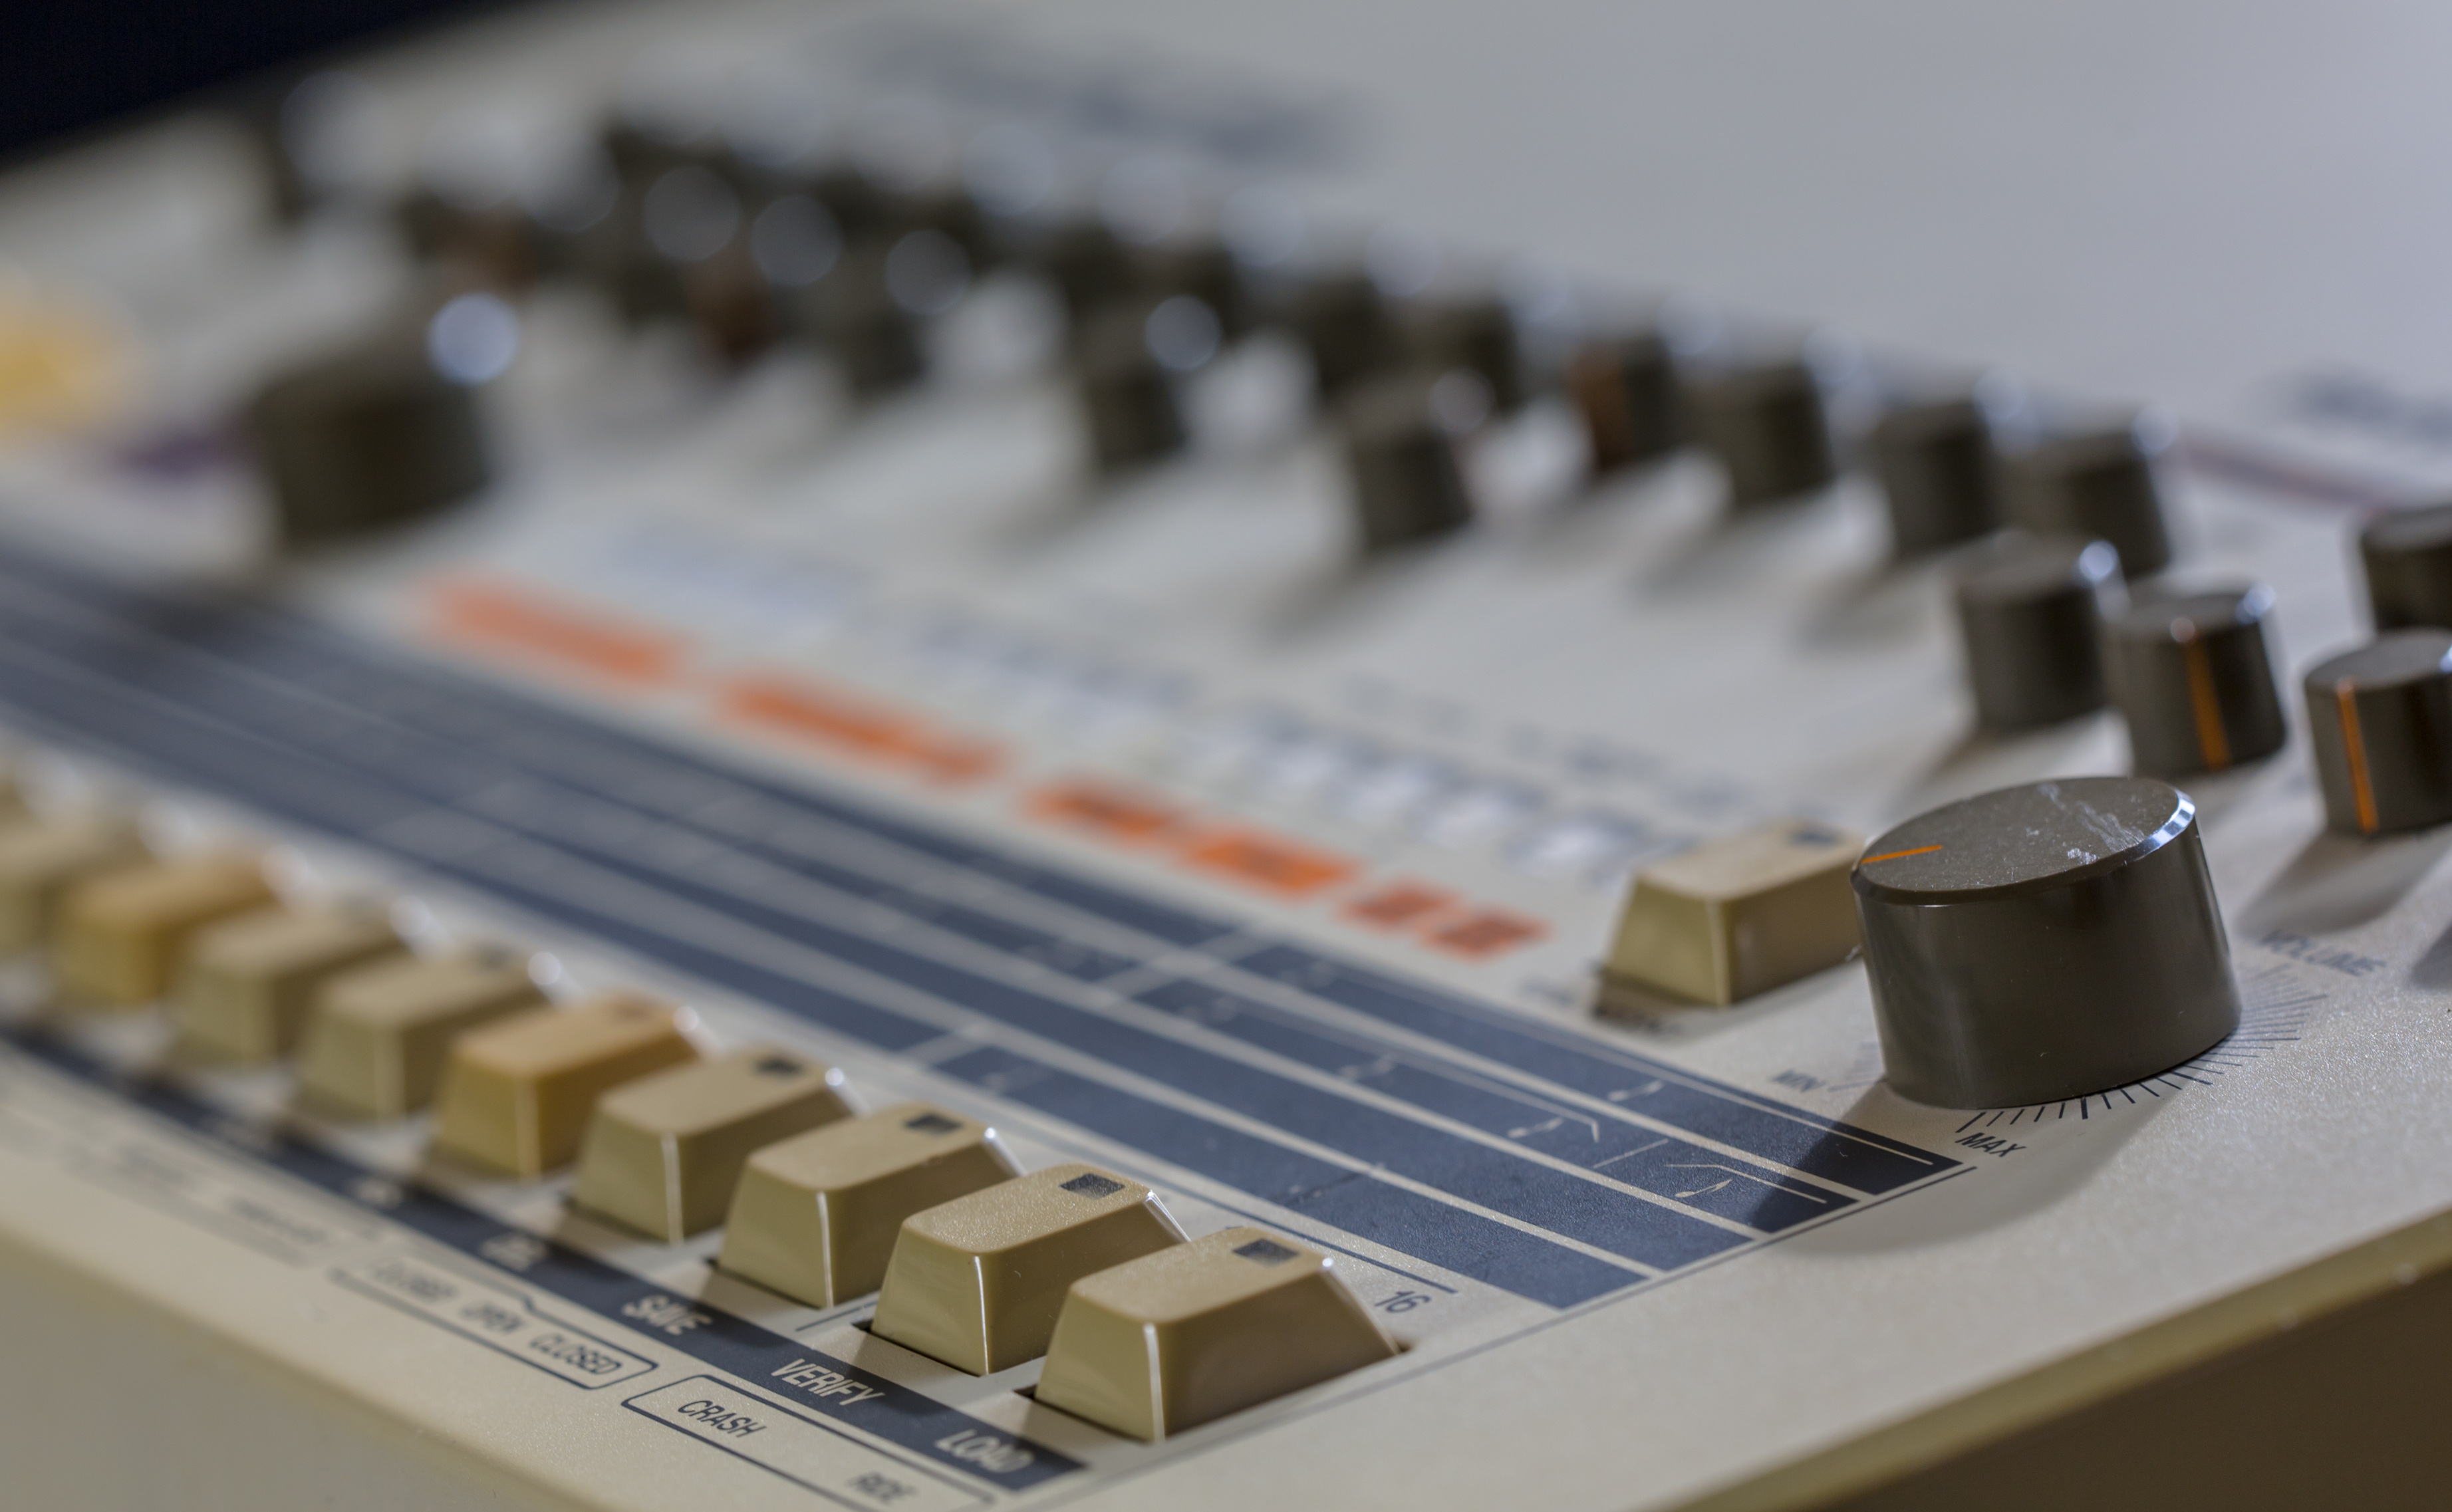
The Science Behind Tracky Music

I will always remember that day in 1989 when I went to the local record shop after school to see if they had received some rare techno records that had just been released. There were about 5 of us in town who were eager to get our hands on them, and it was a race to who would grab them first. This might sound surreal to you if you’re younger, but those were the days when each record you bought was precious. You’d often even buy the ones you were unsure of in case you liked it later… or because you didn’t want other DJs to have it. Funny, eh? We were at the opposite edge from our current times with music accessibility.

vinyl records, store, shoppingSo that day, I was listening to records in the “Techno – Fresh Arrivals” section of the shop. There were these 3 odd-looking ones (I still have them) with no information on them but colours. The green one had the same loop playing all the way through, from beginning to end. There were basically no variations, from what I could tell. “This is really weird!” I thought. I didn’t get the purpose of it. Then I listened to the second record — same concept, different colour. Last record, same thing. Puzzled, something inside of me pushed me to buy them. There was something about those records I just couldn’t pass up.

That was the first time I bought tracky records. 1989

I got to a friend’s place and we started to mix them, and suddenly it all started to make sense. The music was always changing, but very subtly. The records were mind-boggling, and I fell in love with them. We discovered we didn’t need songs — we had the tools to build our own stories. It was exhilarating.

dj, tattoos, tweak, tracky, techno, musicTracky music was a revelation. It taught us that no music is boring if correctly used, and that techno is not necessarily made to be listened to as is, but used as raw material.

See, the thing about tracky records is that they’re used with others in order to create something completely new. Have you ever heard of 1 + 1 = 3?  One record, mixed with another, makes 3 different layers (the 3rd layer is created by combining the other 2).

Making tracky music poses some challenges and the number one is, how to not be boring with simplistic elements.

There are some basic rules for making tracky music, but the great news is that breaking them is where the fun really starts.

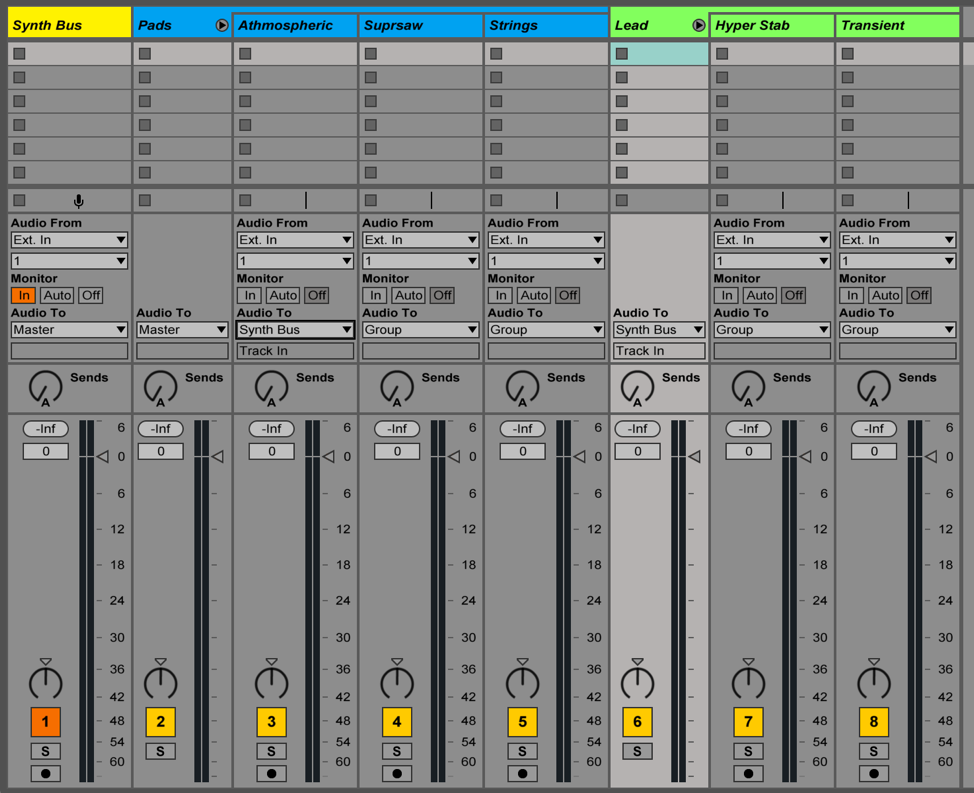
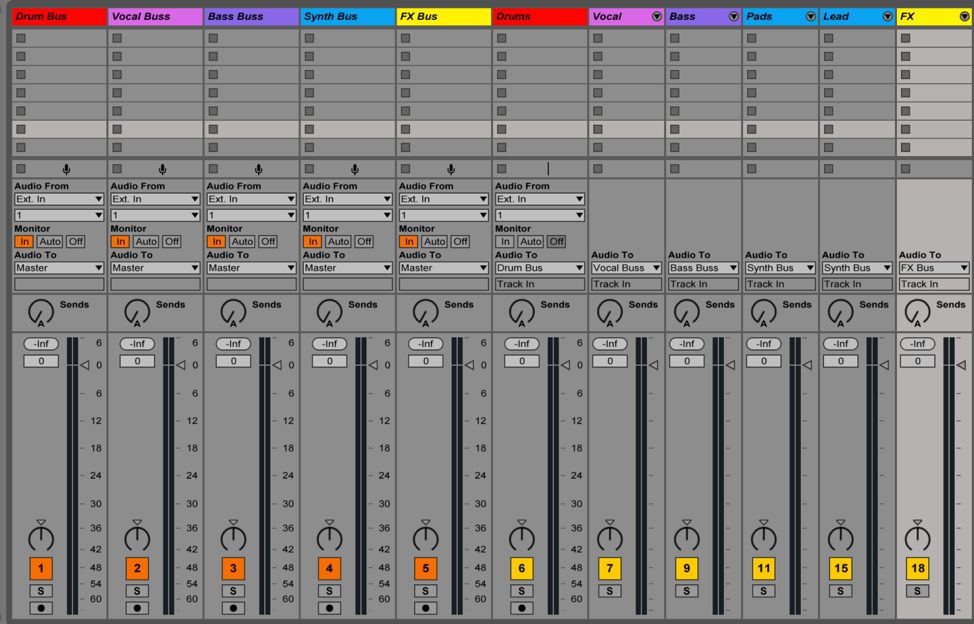
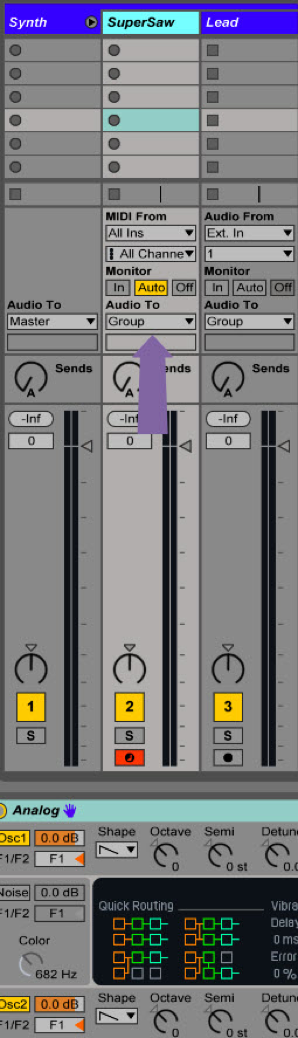
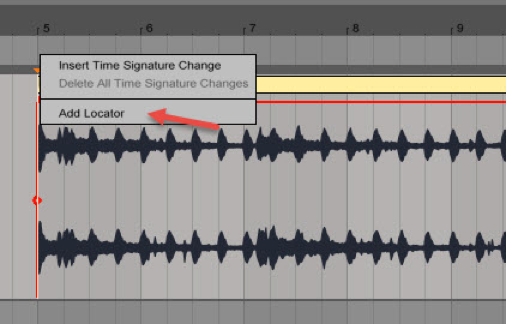
  1. Organized for DJs. The more organized your track is, the easier it will be to mix. This is why it’s important to place redundant elements in multiples of 4. Very useful.
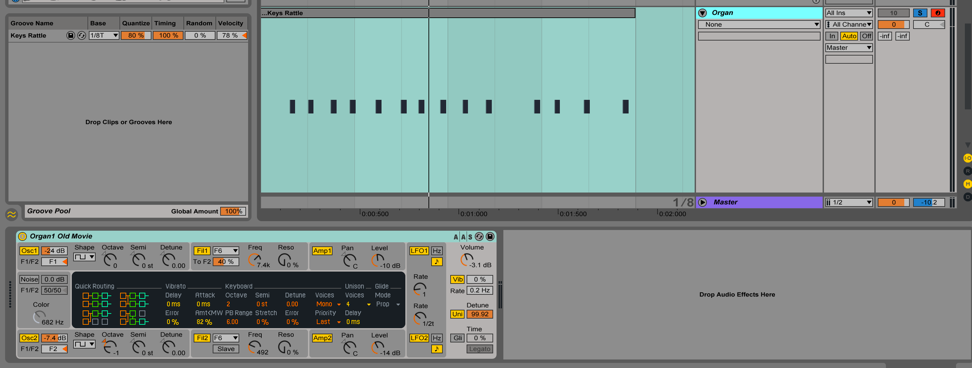
  2. Micro vs macro repetition. Start by the smallest loop possible, and then expand it. You can start by the smallest, simplest kick-hats-snare combo, for example, and then start adding a sound looped on a longer scale to make the small loop feel scaleable. The careful addition, spread over time, will allow the listener to process it and make the repetition feel more palatable. But it’s not about making music for listening, it’s about making music as raw material for someone else.
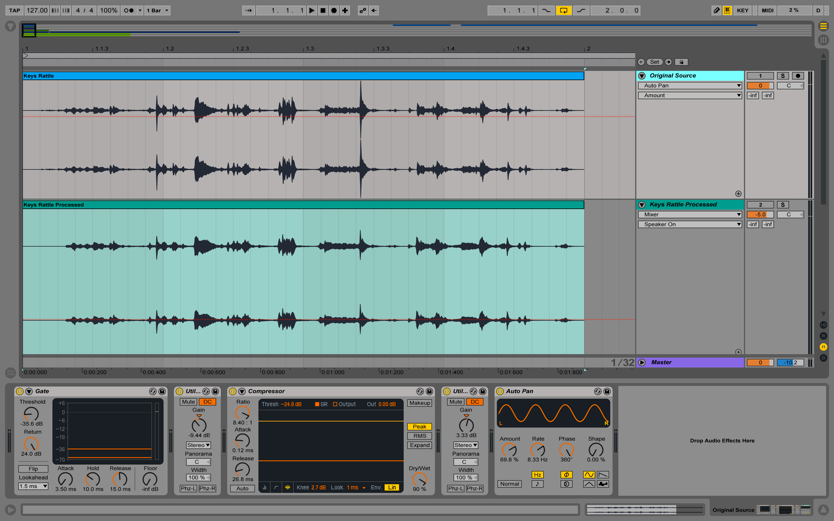
  3. Subtle variations. Try making automations that last over 1 minute or longer. This will create the subtle impression that something is going on, but since the changes are happening so slowly, it will be super hard to pinpoint exactly what. Some things you can automate: EQ gain, filtering, panning, volume gain, effect wet/dry.
  4. Arrangement surprises. Mix a number of predictable arrangements with more destabilizing ones. For instance, you can throw a clap in every 3 bars so the listener will come to expect it, and then later remove one clap to throw them off, before finally bringing it back in.
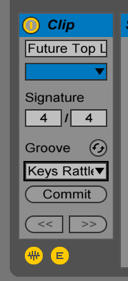
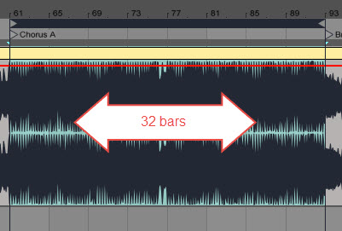
  5. Develop your vocabulary. This is a huge topic in itself. For now though, you need to know that 1 bar of tracky music may have its own vocabulary, and that it’s important to be consistent about it. So every 32 bars, for example, you could insert a little silence to accentuate the transition. If you mute something, you are muting a part of a sentence. This will be explored in greater detail in a future post…


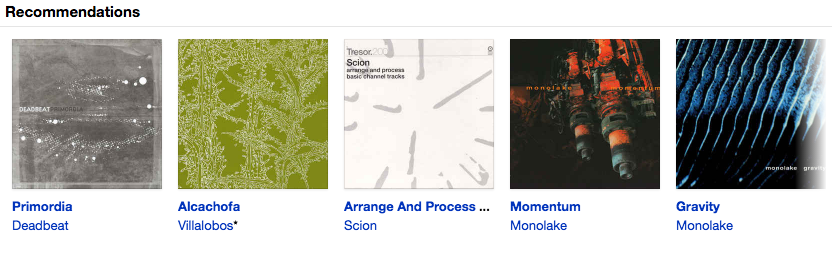
Here are some great artists whose tracks you can use as references: Mountain People, Gez Varley, Barac, Mike Ink.

https://www.youtube.com/watch?v=ZQjrOHMygZ0

Enjoy!

SEE ALSO : Self-Imposed Rules For Arrangements

Spending Long Hours in the Studio

Every now and then I’ll see people boasting in some online producers’ forum about how they spent 5 to 8 hours in the studio working on a song. The same thing sometimes goes for when I’m with fellow Ableton users, who will claim they have spent 3 days on a song. It’s a common perception that the longer you work on a song, the better it must be. Yet from my own experience and reflections, I believe it’s actually the opposite.

crazy in studioIf you’re unconvinced, consider this: how does the producer’s experience level impact on studio time? Might it differ depending on the music genre? Does it change if gear is involved? You see, the amount of time you spend in studio can depend on many factors, and these are just a few of them.

Just think of the long list of artists who wrote their hits in very little time, from “Hotel California” to tunes from Jamie Jones, Seth Troxler or Samim. The minimal movement in contemporary music is another important example of this. By “minimal” music, I’m not referring to minimal techno but to music by the likes of Philip Glass or Steve Reich. The common denominator among these many artists and genres is the understanding that songs are built around one core idea, which is then fully supported throughout. That central concept or component is what people will hum or sing to their friends. It’s what people remember.

So that’s the ideal. But here are where the problems start:

  • You’re not focused on the idea itself. It should speak for itself, you don’t need 4 different layers to do it.
  • You’re distracted by non-essential supportive elements. Because unless you’re a producer, no one really cares if your kick is analog or not.
  • Your ears are tired. Ears get tired after a while and it will become impossible to mix properly. Give them a rest.
  • Your brain is tired. If you’ve played your tune over and over again, you’ve almost certainly lost the plot. To regain a firm grip on your initial idea, you need to take a break and refresh your perspective.
  • You’re forgetting the track’s lifespan. If your track is short, the idea is played for only a moment, and that will be enough. It’s not worth weeks of your time.

spending too long working on a track can ruin even the best ideasThe crucial thing to remember is that the longer you expose yourself to the track you’re working on, the more you’ll lose your sense of what you’re making. You see, humans have evolved with an amazing skill called adaptability, which has helped our species to survive over hundreds of thousands of years, often in the face of impossible odds. This innate trait has an impact on us in the studio. For example, if you listen to something that you mildly like for a long time, you will eventually learn to either love or hate it — and then either want to alter it (to expand its longevity) or delete it completely (because you get fed up). Either way, even if your initial idea is awesome, being overexposed to it might completely ruin it.

So how to solve this?

There are many things you can do, but the main thing I recommend is to simply limit your time in studio. (Though of course, if you’re in the studio jamming away and having fun, it can still be cool to go for long hours.) Here are some other things I suggest:

  • Try my Non Linear Production Technique. To sum it up, don’t work on one project for a long time. Try to work on multiple at once — say 10 at a time — and then rotate between them, spending up to an hour max on each.
  • Swap computer for gear and vice versa. Move from one to another to get a flow.
  • Give yourself some moments of silence to relax your ears.
  • Learn to spot the distractions vs. the essential parts. Do you need to buy a new synth to finish a track? Probably not. Learn to ask yourself these questions: is there something I have already that would do the trick? Is this new idea that popped into my head worthwhile, or is it a distraction? Is there a utility to it, is am I getting carried away?

One of the most important things is to reserve a moment in your calendar for music production. Prioritize it, and learn to respect that moment and not move it. Some professional musicians dedicate one day a week to production and use a routine that is super important to the creative process.

SEE ALSO : When Do You Know A Track Is Finished?

Riding the Grooves in Ableton

Have you ever felt that your music’s rhythmic structure lacked a certain human touch? This seems to be the general consensus among producers, yet there is a simple solution to this hitch in the road. It’s caused by what I believe is the biggest drawback to producing music within a DAW: the musician tends to pigeonhole himself or herself by needing everything to sound perfectly aligned to the grid.

From experience, however, I think I can affirm – with a reasonable degree of certainty – that this method does not reflect how humans operate. We are not precise, monotonous machines, and we are most definitely prone to error when jamming live with acoustic instruments. There is even a certain beauty in this rawness, as music perfused with slight imperfections tends to appeal to the ear as more natural and groovy.

In order to achieve this particular “effect,” Ableton Live allows the producer to import a collection of rhythms, called grooves, into any MIDI or audio track, so as to either alter the current rhythm already written or to add an element of surprise or randomness to the audio.

The Ableton Core Library has a myriad of classic grooves that you can choose from, from MPCs to Latin percussion to hip-hop. However, in this tutorial, we’ll get really advanced and show you how to get creative by making your very own grooves.

Step 1: Record any percussive sound

I’ve recorded myself rattling my keys using nothing but a Macbook (you don’t need to get fancy).


Your recording will most likely sound like crap, so feel free to cut out excess noise with gates or tame peak transients with compressors.

Step 2: Modulation (Optional)

Add a creative effect that will automate the gain (volume) of your signal. You can draw automation curves or pump (sidechain) it with Ableton’s Autopan. The point is to create as many dynamics as possible by playing with the volume so that it translates into the clip’s velocity once we extract the groove. You shouldn’t have to do this if your signal is already very dynamic.

Step 3: Bounce

Consolidate the clip and its effects by either resampling it onto another track or simply freezing and flattening the track (by right-clicking the track).

Consolidate the clip and its effects by either resampling it onto another track or simply freezing and flattening the track (by right-clicking the track)

Step 4: Extract groove

Right click on your consolidated audio sample and select Extract groove.

Step 5: Groove pool

Open Ableton’s groove pool by selecting the wave in the lower left side. Your groove should appear in this box.

Step 6: Add groove

soundpicture2You can consult the Live manual or other tutorials to better understand what things like “base” and “quantize” mean, but make sure the timing is set really high (i.e., how much the groove pattern will affect the clip). Drag the groove name onto any audio/MIDI sample or loop track, preferably something percussive like a drum loop. Notice how the rhythm of your track has changed, and how certain transients sound louder or quieter, or appear later or earlier. If you increase the velocity of your groove, your signal will respond heavily to the volume changes in your original signal (which is why I used the Autopan to create dynamics).

Press “Commit” in the clip view, to destructively write the current groove settings to your sample. This means the sample’s pseudo-markers will move in accordance with the quantization setting, and your transients will translate the rest of the settings you selected in the groove pool.


Original:

Processed:

Step 7: Layering

Hopefully, you’ve saved your original percussion loop so that you can play it with your newly made rhythm. Notice how there’s percussion a bit everywhere now, and that it’s a little bit off. Yet I’ve still opened doors to new possibilities that I couldn’t have predicted by simply drawing in MIDI notes. I even got a wonderful slap-back delay on the snare, which I can edit to my liking.

I’ll go so far as layering the two sounds with a reversed sample of my new groove, which gives me this:


I’ve then added back the original keys rattle sample, and simply applied sidechain compression to get this beat:


Although it sounds a little all over the place, I can always go back and edit it how I want, or even apply some effects! Note how it sounds more human now and not perfectly cut to grid.

soundpicture3

Bonus: Step 8

Go back to Step 6, and drag your groove to an empty MIDI channel instead of an audio or instrument track. An empty MIDI clip will appear with notes matching the groove you created. Drag an instrument onto it to hear how it sounds. Although it will probably sound awful, you can always edit the MIDI notes to your liking!

soundpicture4

Bonus: Step 9

You can even get away with layering organic textures such as strings, or pad with grooves. Make sure to apply different groove settings to each layer by duplicating the groove (CTRL+D/CMD+D) and dragging it onto the track that you want. You can control all the different grooves together with the Global Amount value at the bottom right of your groove pool.

Examples:

SEE ALSO : Background vs forefront to create dimension   

Getting Lost in the Sea of Tracks

Searching for music these days has become a real skill. I was in a few music stores recently browsing for new tracks for an upcoming DJ gig, and I realized just how counter-intuitive the experience had become — not only because music stores are, in general, a huge mess, but also because the noise factor was so high that I just couldn’t find what I was looking for. By “noise factor,” I’m referring to the ratio of songs I found that were irrelevant to my search.

sea of tracks, music production, crowd, vacationsWe can attribute part of this to the accessibility of music softwares today, which helped democratize electronic music by bringing production within reach for so many people. Part of it can also be blamed on the fact that launching a label has become so simple that basically anyone with the resources can start one. It might seem ironic for a music production blog to point this out, but this is the reality. I’m pretty sure that if you’re reading this, you’re someone who is dedicated to your art and is looking to really make something happen.

But how do you find your way through this wall of noise?

Consumers have more difficulty than ever finding the music they like. Scroll back in time and you’ll understand that the invention of records was to answer a simple need: to be able to play something again. Once that need was met, a lot of the innovations were centred on making the music sound better. robot, missing hubRadio appeared later as a way of broadcasting over distances. Then, at the same time as music was becoming easier to make, the internet came along to dramatically expand its accessibility and reach, leading to an overall decrease in the quality of what’s available. The sea of music out there today is the result of this over-proliferation caused by these technological advances all converging at the same time. For the consumer faced with thousands of new songs daily, it can be very disorienting. One’s community of peers therefore become an important reference.

Artists have difficulty finding appropriate labels to release their music. If you’ve overcome the technical challenges and are now hunting for a label, you might feel overwhelmed. Like I explained in a previous post, you’ll have to spend a considerable amount of time in music shops and online just trying to pinpoint which labels are a good fit for your sound. But with so little time and so many choices, finding what you’re looking for can be a huge challenge.

What seems to be missing is a hub between both parties.

So what’s the solution?

headphones, music, selectiveStop searching elsewhere, rely on your network. I have a few people who I follow attentively on Spotify or Soundcloud. These guys seem to either have a great radar or amazing connections, because they’re always finding gems. I’ve been told that a great way to keep up to date is to follow as many artists as you can, and then cut out those who are idle too long or change styles abruptly. I also ask my friends who are DJs or label owners to share their recent discoveries with me every now and then, and I do the same. Very efficient.

Find influencers. Influencers are individuals who seem to be at the intersection of multiple networks, who are followed by many people and will make waves with their track picks in charts or podcasts. Each genre has its own influencers, of course. Perhaps check a site like Resident Advisor to get an idea of who they think is trending currently.

SEE ALSO : The New Face Of Albums 

Buses vs Groups in Ableton Live

The word “bus” may sound foreign to many beginner- and intermediate-level music producers who were not raised during the good old days of analog mixing on consoles. But rest assured, readers: the term “bus,” in this case, does not refer to a 33,000-pound vehicle, but to an audio channel that allows a multitude of audio signals to pass through it.

Buses are used to apply general processing to the mixed signal, so as to achieve a more cohesive effect over a particular range of instruments. This may sound daunting, but allow me to provide an example to clarify. If you have several drum channels (kick, snare, hats, toms, etc.) playing in the DAW that you are using, it would be wise to send and route them to a drum bus, onto which you could then apply some warmth or glue with mix bus compression.

There are several DAWs, including Bitwig and Ableton Live, that allow you to “group” tracks together. Other DAWs prefer to emulate traditional mixing consoles by routing the desired channels through a bus. Note that neither method is better than the other: they are exactly the same. Nevertheless, Ableton aficionados may want to begin using buses more often, given that their use simply opens up more possibilities in terms of mixing the music created.

How so? There are certain techniques that just aren’t available to you when you’re “grouping tracks,” such as sending a parallel compression return track to a group, or applying effects to two groups at once by grouping them together (groupception). But by using buses, you’ll be able to route any audio signal to any channel you wish.

So with all this being said, here are some pointers for creating your first buses.


Basic I/O Routing


  1. Open the Audio Routing section by clicking on the I/O button right below the master fader in the lower right corner (CTRL+I).
  2. Create an audio track (CTRL+T) for your bus. In my case (see screenshot below), I called it “Drum Bus,” because I am sending all of my drum tracks through it.
  3. Depending on how you organize your drums (I’m using a MIDI drum rack followed by several loop-based elements, like percussion, rides, etc.). Route them to the drum bus by:
    1. Selecting/highlighting all of your tracks.
    2. In the Audio To section, select “Drum Bus.”
  4. Set your initial channel as Drum Bus and set Monitor to
  5. You should now hear all of your tracks going through the drum bus.
    1. Try muting some of them to hear the difference.
    2. Apply a compressor to the drum bus to glue things together.
  6. Note that you can also route return tracks through your drum bus. I’m applying New York Style Parallel Compression by sending my drum channels through a channel with heavy compression, then sending its output through my drum bus to give it more power.


Buses vs groups in Ableton: my drum bus, which I send all of my drum tracks/channels through
If you have groups of elements that share similar sonic features and would like to EQ or compress them all together, then you can create a bus and send them through it:

Create a bus in Ableton to EQ or compress a group of elements all together

When I’m mixing, I’ll even go as far as creating individual buses for every group of tracks towards the end. This helps me get the levels right and apply broader strokes for every category of sound (bass, drums, etc.)

When I'm mixing, I'll even create individual buses for every group of tracks


To conclude, I’d just like to emphasize that there isUse groups in Ableton to organize your channels when you're writing music, composing, or doing sound design absolutely nothing wrong with using groups when mixing. It’s simply that they should be used more often to organize your channels while you’re writing music, composing, doing sound design, etc. to work faster and more efficiently.

Remember, you can always group channels together by pressing CTRL+G or CMD+G on Mac! The audio channel will be automatically routed through the group fader and will function exactly the same way as a bus does.


 SEE ALSO :  Reverb Tips to Boost Your Creativity


Getting signed to a label

One of the things I notice most from the artists I hang out with is how obsessed they can be about getting signed to a label.

But one of the main reasons people fail is that they’re doing it wrong.

You probably already know how to send in a demo, but do you know how to pick a label? Just like when picking a reference track, you need to find all possible references of the label you want to work with. You need to do your homework.

Don’t get me wrong. Even when I make a new track, there’s always that little voice at the back of my head saying, “Oh, this might fit this or that label.” And if I’ve been contacted recently, then I might if you're having trouble getting signed to a label, you could be targeting the wrong peoplealready have a lead, which makes it easier. Admittedly, at my stage I have a lot of contacts and receive a lot requests, plus I run my own record label, so the question of where to publish my music isn’t as much of an issue. But still, sometimes it is.

If your approach isn’t succeeding in getting you signed, it could be that you’re poorly targeting the labels you’re submitting to. In other words, labels don’t always sign artists for their music only.

They make decisions based on a number of considerations.

Does your approach match how they think? Getting to an A&R (the “artists and repertoire” division of labels) is not easy. You need to find who picks the label’s music so you can submit your music to them. Forget writing to random email addresses or messaging Soundcloud profiles. Trust me, it doesn’t work this way. Instead, try reaching out to an artist who’s already on board to find the right contact. If you can meet them in person, it’s always the best thing to do.

Do you share the same networks? Are you friends with artists on the label? Are you following the same artists on Soundcloud? Is the A&R friends with some of your friends on Facebook? Being socially close to them can really help.

Does your profile answer a need? This one is crucial. Each label has its own ways of doing things and is carefully building up its catalogue just like a DJ prepares their set for a gig. If you’re a DJ, you know that you want certain tracks in your set. You’re avidly searching for a specific sound or rhythm, or a particular song structure, mood, or tone. A label owner has musical needs too. They usually follow trends partly, but they also flow from past influences. It helps to refer to the label’s past releases, but it’s even better if you’re up on what they’re into now. This can be a game-changer.

FINDING YOUR LABEL MATCH

One of the biggest challenges is to find the perfect match between an artist and a record label The biggest challenge nowadays is to find the perfect match between a label and an artist. Exactly like love, there’s a perfect match for you out there, but how to find it is something that technology has yet to achieve. So, how do you find your label?

Well, first let’s examine a little scenario to give us some context. Let’s say you finished a track based on a reference track by X artist. That reference track is your biggest lead for whom to send it to. But if you’re not yet well known or have very few releases to your name, then sending it to the best or biggest label out there — even if your reference track is released with them — is a very bad idea. Not only are huge labels swamped with demo submissions, but they’re also super picky. The fact is that your reference track likely had to follow a winding road to get that label. So let’s investigate.

FOLLOWING THE TRAIL OF REFERENCES

Finding your label match takes time, patience, and lots of research. Here are a few cues of where to start.

Soundcloud. The holy grail of every possible kind of music, from unreleased to released, and featuring every possible label out there. Have a close look at your potential labels, and check out who they follow and who follows them. Dig, dig, and keep on digging. Give attention to who leaves comments. Those guys can be really useful because they might like various labels/artists you’re investigating.

DJ sets. Listen to DJ sets to find who plays music like yours. Get the track lists to find out what they play, find what other tracks DJs like to mix those with, and then investigate the artists similar to you and see what labels they’re on. Mixcloud also provides tracklists for DJ sets.

Beatport is a great tool for researching music and labels


Charts. Once you have a track list, go on Beatport to find charts and recommendations. You can find a bunch of labels there, so check out their back catalogues and investigate some more.


Discogs. Browse the discographies and look at past releases. When you select one, Discogs will offer you album suggestions, which in turn can point you to more labels. You can really dig deep that way.

Discogs is another way to discover new music and record labels

Spotify also offers new music recommendations, which will help you find new labels to submit toSpotify. This is another way to find new music. When you select an artist, it will give you suggestions. Note how whenever you swap from one to another, the algorithms will formulate new recommendations.

Conclusion

Think away, do your homework, and plan carefully before submitting your demos. Our label gets so many demos that we can allow ourselves to be very picky, and it’s the same for many of them out there. It’s about much more than presentation at this point — it’s about being spot on with who you target, and then selling yourself with a push from someone they know and respect. You’ll have a much harder time if you try to go it alone.

SEE ALSO : Besides music, labels are searching for these traits 

Dealing with Past Mistakes

I was chatting with a producer friend of mine recently, and he mentioned that he was currently contacting some record labels he had released with in the past to ask them to remove his music from digital stores. I didn’t get why he would ask for such a thing, but he explained that he felt embarrassed by his past tracks and that he didn’t want them to represent him anymore.

“What was I thinking? I have no idea, but it’s embarrassing!” he explained.

He said he feels that most of the music he made back then was directionless and tailored for specific labels, and that it has nothing to do with the artist he is now. So the big question is: do I live with the past, or do I try to erase the music that I don’t want to be associated with anymore?

Well, let’s try to unpack what happened in order to avoid falling into the same trap. What were the main factors that caused my friend to react towards his past in this way?

You're never reallyalone in thisTechnical challenges. This one is pretty obvious. Let’s say you start making music, and one of your main focuses is to release on label X. All of your efforts will logically be channelled towards making music that’s an aesthetic fit for the label. But then again, you’re only just starting to produce. So you’ll find samples and presets that sound alike, try to make everything fit together, and then when you think it’s ready, send it off. You have no idea though how many demos we (as record labels) receive from people who didn’t do their homework, and who haven’t listened to our last 3-4 releases to see if their productions are up to par. For example, most problems my friend had were related to the mixdown and arrangements, which are due to simple lack of experience. As you produce, you gain experience and whatever you release will always reflect where you were technically, at that point of your life. You can remove it from stores, but not from people’s computers.

Lack of music testers. Have you played your music for people who you know are reliable sources of criticism? This might sound obvious, but a lot of producers will just finish a track and send it off to a label right away. This is a very bad habit to develop, because a second pair of ears might be the best tool out there for gaining a fresh perspective on potential issues with your tracks.

You might think you can disown the problem by relying on the label owner to take care of the technical aspects, but the truth is that a lot of label owners aren’t always technically savvy. This is how my friend and I were wondering, “How did the label owner let that get past them without sending it back to have those issues fixed?” Mainly because it’s up to the artist to ensure their track is solid enough for them to be proud of — and for it to pass muster with reliable critics too.

music direction, compassLack of direction. This one is tricky. How do you know if the music you’re making now will still hold up in 4-5 years from now? Well, you’ll never really know. But making timeless music should be more of your goal than making music that would sell, at the precise moment. Many DJs change styles and genres every year, whether because they jump from one bandwagon to the next to chase the trends, because they’re lacking gigs and choose to adjust their sets, or simply because they get bored. This can become a real issue, because if a release takes a few months to a year to get published, then by the time your music is out, you’ll have already moved on. For producers, this presents one big existential question: “What is my voice?”

If you’re spending most of your time trying to sound like others, you’ll be trailing behind all the time, trying to adjust yourself to their sound even after they’ve moved on. This is not an issue if you’re sounding like yourself.

But how do you know what your voice is?

This is a difficult question to answer. If listeners can recognize your sound from one song to another, there’s a good chance that you’ve found it. And if you tend to return instinctively to a particular musical direction when you’re having fun in the studio, this can also be a strong indication of your voice.

Try these tips to find your own voice:

  • Don’t buy samples anymore. Try to make your own.
  • Don’t use presets. Again, make your own.
  • Pick a few effects you love and use them in all your productions.
  • Spend time learning sound design.
  • Build a reference folder with tracks that inspire you no matter what.

In conclusion, I’d really encourage you not to remove music you made in the past. It is you, and old productions can be very useful for keeping track of how much you have evolved. Besides, some people might have loved what you made, and keeping the music out there is a good way to reach appropriate people.

Should I Remix for Free?

If you’ve been hanging out on SoundCloud, uploading some of your music productions, commenting on other artists’ tracks, and exchanging a few words here and there, you may have been invited to collaborate at some point. If you haven’t invested much time in networking on SoundCloud, you’re really missing out on one of the most important hubs for music producers.

There’s been a huge emphasis in recent years placed on the number of followers producers can rack up. I even get people hitting me up every now and again to offer me 10,000 new followers, if I pay them 100$ or so.

Yet this craze over followers is nothing but a mirage.

Record labels won’t bite if they see an empty profile with two songs, but 1000 followers. And it’s not only labels who’ll see right through this. Anyone who’s even slightly curious or discerning will be struck by the awkwardness of such a hollow presentation.

Genuine connections, however, can go a long way. The more you interact with people directly (through SoundCloud’s horrible messaging system…), the more you run the chance of being invited to do a podcast or a remix. It’s even a pretty frequent occurence for active users.

Remixing for free can gain you valuable exposure and connections.Yet with this being said, if you’re at the beginning of your musical journey as a producer, you honestly shouldn’t expect to get money for this, not even if they propose royalties on sales. The truth is that the current state of sales in the industry is pretty discouraging for all but the larger record labels. Exposure and connections are thus the name of the game, and networking is the way to get you there.

It comes down to these key points:

  • Gain exposure, get heard. Considering that there’s not much money to be made, and that you want to expand your visibility on SoundCloud, one thing you can hope for is that the remix or podcast you make will help you reach a new audience. The music scene is composed of countless separate micro-worlds, and you’ll never manage to reach them all. Be strategic: try to reach the ones that are looking for music like yours. It’s a common mistake to assume that casting a wide net will succeed in garnering you enough people who will love what you do. But that’s actually counter-productive. You’re better off reaching one true fan than 100 people who care more or less. That one impassioned fan will spread the word and carry your music around. But you need to be exposed.


  • Target the right people, make your network work. Following the previous point, if you connect with people who love the same music as you, your music will find its way to the appropriate people. Again, you have to think strategically. Too often I see someone agree to do a remix without first having done research into who they are about to work with. On the other end, you could end up saying no to someone who is close friends with one of your favourite artists, or who attends a club regularly and passes music he discovers off to local DJs who love the kind of music you craft. The point is that good networking involves enlisting others to spread the wheel of music for you. And the same goes for you if you ask other DJs to remix your music productions: if someone believes in the music, they’ll pass it to people who will play it.


  • The rocky road. The state of DJing is pretty interesting these days. If you think about it, a lot of DJs play digital music they get for free, and will only pay for vinyls. Digital sales, at least for underground music, are somewhat stable, but haven’t evolved much at all in the last 5 years. For some reason, people have a hard time paying for underground music. They prefer to get it for free through their DJ friends. So with this in mind, accepting to remix for a label or a fellow producer is more about hoping that you’ll connect with someone who will get you closer to your goals: to release with a specific label; to be associated with a producer that inspires you; to get more gigs; or whatever they may be. This comes with a price though, and remixing for free might be one of those little discomforts that are necessary to get you closer to your destination.

Group of Friends with Digital Tablet

So as a producer, if you’re facing the option of being invited to work for free, consider these 3 things:

  • Are you inspired by the original song?
  • Is the invitation coming from someone with an interesting reach (fans, artists, community, promo)?
  • Who else is involved? Is there anyone in their circle that inspires you?


Ask yourself these questions, and feel free to ask the people who are inviting you to collaborate. If you’re going to do it for free or for a few bucks, it’d better be a fun gig!

Now just one final tip: you too may at one point invite someone to remix your music, and they might be considering these same points. So if you really want to work with an artist you love, it could be worthwhile to invest some money into having that special artist remix your track. Paid artists are often a good source of promotion to get your music where you want it to be.

Deconstructing A Reference Track

Note: This article is partly related to the Non-Linear Music Production technique explained in my previous post. It offers a complementary method for finding inspiration in your workflow.

Now that you’ve been exposed to my non-linear approach to music production, you know that the early stages of production are focused on building ideas and content. Once that has been attacked, you can start looking into creating a temporary structure for a loop. If you’ve also checked out my One Loop Per Day challenge on YouTube, then you’ll see that the following step is to build a storyline around the idea.

One of the best and fastest ways is to devote your time to carefully analyzing the work of artists you admire. This entails actively analyzing and interpreting others’ work within your DAW so as to carve out a path that you can easily implement in your own production.

But before you dive into your sources of influence and follow the process outlined below, I’d like you to consider this famous quote:

“Art is theft” – Pablo Picasso


Step 1: Finding Your Track

  • Pick a track that you really like and whose arrangements you would like to more or less imitate.
  • Make sure that the track is un-warped so that it doesn’t sync with your DAW’s BPM, and so that it’s unaffected by any transient markers you might have set.
  • If your track is in Ableton’s Session View, drag it into the Arrangement View by hovering over the 3 vertical lines at the top-right corner of your screen, or by simply pressing the tab key.


Deconstructing a reference track Step 1: Find your track


Step 2: Correcting Grid Settings

  • In order to properly match the grid with your track’s tempo so that you can use the waveform to spot what happens at what time, you need to find the BPM. You can do this in many ways, by:
    • Finding your track on Beatport. The track information should include its key and BPM.ableton, arrangements
    • Accessing the track’s metadata by right-clicking on it in Windows and then clicking on “Properties>Details” (if it’s available).
    • Finding the BPM on your own using Ableton’s Tempo Tap.
      • Make sure to tap “tempo” in the Session View or else it will fall out of sync in the Arrangement View.
    • Type in the appropriate BPM.
      • Manually adjust the track with Ableton’s grid so that the sections of your track begin on beat.


Deconstructing a reference track in Ableton, Step 2: Correcting Beat Grid


  • Picture4You will notice this will help you to analyze your track’s arrangements by determining at which bar a section will start.e.g.: The breakdown starts at 80 bars.
    • Feel free to cut out any elements such as silence,noise, or “pre-intros” before the actual intro, as in my example above.


Step 3: Placing Markers and Locators

  • If your sections are starting on beat and are properly aligned with Ableton’s grid, this is where you will be able to start learning how tracks are arranged.
  • Listen to the track a couple of times, and marPicture5k its waveform with appropriate section locators. To do this:
    • Right-click in the Scrub Area.
    • Click on “Add Locator.”
  • Mark all relevant sections with locators throughout the whole song. It should look like this:
    • Note that you can label your sections however you wish, depending on the style of music you’re writing. You don’t need to call a section a chorus, for example, if you just want to call it A or B.


Deconstructing a reference track, Step 3: Placing Locators


Step 4: Analyzing

Now for the important part…

  • Pull out Ableton’s Loop Brace in the Scrub Area above the track’s waveform, and stretch it from the beginning of a musical section to its end (from verse to chorus).
  • Count the amount of bars there are within that section by subtracting the last bar of the section from its first.
    • Example: If your section starts at 61 and ends at 93, do 93-61. That’s 32 bars.
  • Count the amount of bars for each section and you’ll start to notice when new elements emerge: sections and themes begin and end every 8 to 32 bars. That’s just how dance music works.
  • For example:In dance music, sections begin and end every 8 to 32 bars.
    • Everything works in multiples of 4.
    • You won’t hear a new section begin on bar 5 unless you’re not writing in 4/4.
  • Once you analyze how many bars are within a section,it becomes easy to understand how long your instrumental arrangements should be and where to place them in your own track.
    • Example: “My reference track has a chorus that lasts 16 bars. It also has a pad for that entire section. I can apply this to my own productions by placing a pad in my chorus for 16 bars only and making sure that it doesn’t overlap with the bridge.”


Step 5: Taking Notes

Once you map the structure of the track with locators, it’s important to take note of all the musical elements that come into play for each section. This is how you’ll get to understand what to place and when within the sections of your own track.

  • You can take notes down on a piece of paper, or even simpler, directly into Ableton’s clips. Here’s how:
    • Split the waveform into multiple clips by clicking on it and pressing [CTRL+E/CMD+E], or right-clicking on it and then selecting “Split.”
    • Once you’ve split the waveform into multiple clips, write down the most important elements for each section.
    • Then right-click on the Ableton clip and select “Edit info text.”
  • For the build-up section, you can write things like “white noise sweeps, risers, automated filter cut-off, percussion repeating faster and faster,” etc.

In Ableton, you can save notes directly in the clips


Bonus Tip: Creating Ghost MIDI Clips

The last trick I want to show you for deconstructing your Bonus Tip: Creating Ghost MIDI Clipsreference tracks element by element is to create ghost MIDI clips for every instrument. This is the best way to learn from other people’s tracks, because it will allow you to break them down layer by layer.

  • Create MIDI channels for every instrument you hear in a section, and label them.
  • Make sure there’s nothing in them.

Using this method, you can even go as far as deleting your chosen reference track and just filling in the MIDI skeleton with your own synths, pads, drums, effects and more! You’ll have the same arrangements as the artist you chose to mimic, but it will be your sound!

SEE ALSO :  Where to Get Fresh New Ideas for Tracks

Non-Linear Music Production

patienceOne of my goals is to help people be more productive and finish more tracks. I’ve learned that for many people out there, getting a project done can seem overwhelming. Many will never complete them, because the sole thought of finishing it to perfection stalls the whole process. We could even call this a form of writer’s block, even though the blockage occurs mid-project instead of at the start.

But starting new projects is and should be fun. That’s why I’ve even been encouraging people I coach to try to start one project a day.

Having multiple projects on the go is not only a great investment in your own potential, but it also forces you to practice, learn new techniques, and get outside of your comfort zone.

I swear, it will even become addictive.

So you might be wondering: how does this help you finish tracks if you just keep starting new ones?

Have a look at my Discogs page and you’ll see that I’ve released many EPs and albums. This is the technique that I’ve been using, which I call Non-linear Music Production (NLMP). And I can honestly say that I couldn’t have done it any other way.

The main mistake many producers make is to tackle a project from start to finish in a single sequence. This is how they operate:

  1. Find a hook, idea, main loop.
  2. Develop the idea into a structure.
  3. Do the arrangements.
  4. Do the mixdown.
  5. Finalize the track.

How to work faster with music production. creative process. electronic musicThe problem here is that producers also tend to move back and forth between the steps as adjustments are required. This often results in artists hearing their own track so many times that they can’t even tell what’s working or not anymore – and they start to go a little crazy! This way of organizing your production workflow might be motivated by your love for the idea you found, and by your desire to finish up the project so you can share it with your friends. But it forces it too much.

By comparison, Non-linear music production, or NLMP, works very differently. But after introducing it to people, I started seeing them improve.


The first thing that’s different is the introduction of what I call rounds. A round is an iteration of the same work process. But to define your round, first you need to decide how many tracks you need in your project. Usually, an EP will be 4 tracks and an album, 8 to 10. The number of tracks will decide the number of rounds.

Let me explain.

Once you have decided on the number of tracks, here’s how to work rounds:

  1. Find a hook, idea, main loop. Try to spend less than an hour on this at once.
  2. Save the project and close it.
  3. Create a new project, then repeat step 1.

Now, you will repeat this for each track on your EP or album, and each of them will evolve in parallel instead of one after the next. It will give you the impression that you’re not going fast enough, but you are actually farming your tracks all at once. Once you have your X number of tracks, all with an idea/hook, then you can move to the next stage of rounds.

  1. Develop the idea into a structure.
  2. Add more elements as needed.
  3. Save the project and close it.
  4. Open the next project, then repeat step 1.

Again, try to not spend too much time at once on each project. Plus you should try to space out each of your sessions by at least 24 hours. Rested ears know better. Then the final stage will follow:

  1. Arrangements.
  2. Add more elements as needed.
  3. Save the project and close it.
  4. Open the next project, repeat step 1.

As you can see, whenever you start a new round, you then repeat it for all of the other tracks. This goes as well for the mixing and such. You can develop your own workflow too, but in the end, what matters is that each track evolves in parallel.

What’s really exciting about this technique is when you get to the last week and finish all the tracks. You’ll see the end results all together, then you’ll just have some final touches to make, and boom, your project is done.

I’m currently working on a document that describes the whole process in detail. If you subscribe to my free coaching service, you’ll get the training and more news as it comes.


SEE ALSO:  Making and breaking genres in your music

When Do You Know A Track Is Finished?

Are you one of those perfectionists that has a hard time finishing a project because they feel there’s always one more detail that needs fixing? I’ve published a few posts with tips on how to finish tracks, but maybe you’re still spending countless hours on minor tweaks. You’re not alone. I’ve long been like that too, but with time I’ve learned to find a happy balance between embracing my perfectionist side and staying spontaneous.

bridge-593148_1280I remember seeing a very inspiring video about Fellini, who felt that the only art possible was that which emerged from spontaneity, not from trying to control the uncontrollable. In other words, if you try to control your initial impulses, you might ruin what your instincts had naturally proposed. Overworking your production, after all, often comes from being excessively concerned with others’ feedback, but that’s completely out of your hands.

For all you know, people might love the exact things you were trying to suppress.

Here’s where it can become a problem:

You’ve been adjusting (and readjusting) the same project for months. Each time you listen to your track, you hear some new detail that you’d forgotten about or hadn’t noticed before.

This might be because:

You’re spending too much time on your track in one sitting. If you spend 4 hours in a row on a track, you’ll lose the perspective you need to hear things properly. I’ve stressed this before, but I always recommend taking tons of breaks, and to space out your sessions too. Letting your project sit for a few days before opening it again can really help. A week is even better. Months can do magic.

Your listening environment might not be perfect. This is why listening outside can help you figure out what needs tweaking. Try to always refer back to tracks that you know sound right, and insert your track into the same playlist. You can then put your player on shuffle to discover if your track sounds like it fits in.

But remember: achieving perfection is an illusion. What you hear on the 1000th listen is only what someone who has been listening to a track on non-stop repeat will hear. The chances are very low that anyone on earth will listen to your track as much as you do. And even if they did, by that point there’s actually a mental mechanism that kicks in, where people’s brains will adapt their perceptions to the track so as to accept it as it is. This might be a bit hard to swallow at first, but it is factual.

poteryTo cite a good example, every time I play live, I’ll spend innumerable hours preparing my sounds in advance. But then as I’m juggling with them live, they’re only being played for a few minutes each. The ones I think don’t sound so great are often perceived as really cool by the crowds. People will think that the sound, as they heard it, was made that way for a reason. They’re not totally wrong. You’ve created your music in a specific environment, and that is how your music sounds — there. Even if you get a mastering engineer to look over it all and make sure it sounds right, it’s honestly very rare that they’ll adjust more than 3 or 4 things at most.

Which is all to say that spending countless hours on that snare just might be a bit overkill.

In conclusion, you never really know if your track will be done. It is just a matter of accepting to move on and leave that track living it’s own, watching where it will end and accomplish. Go focus on the next work. You can always leave a track sleeping for a few months and get back to it later. That is always a way to see what’s left to be done.

SEE MORE:  What Is A Mature Sounding Track?

Where to Get Fresh New Ideas for Tracks

Jazz drummer in a nightclubOne of the questions I used to get the most from my students was how to come up with new ideas when making music. Unlike with jazz or rock, the options for creating electronic sounds are limitless, and so the range of electronic music genres and sub-genres is vast. Because of this, it becomes particularly easy to get lost in the innumerable possibilities and directions your music could take.


For many, just the pressure of trying to come up with new ideas can generate a writer’s block. And asking someone like me for tips on where to start could also lead to more questions, since I’ve developed my own ways of approaching the process over the years. With that said, I’ve personally found it essential to bear these 3 things in mind:

  1. Music is a shared experience. The more you live your music, the clearer your ideas get.
  2. Your experience of the music may not be the same as the listener’s. Let go of your desire for people to “get it,” and accept that they might see or feel something you don’t.
  3. Creativity starts with embracing the endless recycling of sounds and ideas. Don’t think you’ll reinvent the wheel, if you know what I mean. Expectations kill creativity.

While you might have an intellectual understanding of the whole process of making music, there’s another dimension, that of intuition and feelings. So this involves two things:

  1. Jamming. Play with gear, softwares.
  2. Recycling. Inspiration from other songs, samples, presets, artists.

Everyone’s different, but if you think of bands for example, they jam together for a while until they uncover an idea they like. Then they will nail it down or record it to make it into a song. But before they can get there, they need to just let loose, go wild, and explore. In jazz, it’s well known that the masters would play for hours on end in little clubs, pushing themselves beyond the point of exhaustion until they reached a level of pure creativity, discovering new paths that they never would have found in a short session.

Basically, your brain needs a little push. You can’t just sit there and think you’ll have something fresh and innovative by opening your DAW and tweaking for 30 minutes. It demands patience, and giving yourself the permission to get a bit wild and break your own rules.

??????????????????????????????????????????????????????

Many people find that jamming isn’t really their thing, and they’ll get great ideas if they already have material to work from. This is why sampling has become so popular in the last 30 years. Musicians take something they love, and then change the context to give it a whole new life. Using other people’s music can a bit of a legal nightmare though, so thankfully, as you know, there are tons of options out there — but maybe the best way is to learn to make your own sounds.


Fact: Doing arrangements in your DAW isn’t really “playing your music.”  Have you developed the skill of playing it?

This is why learning to jam can be really useful. But how do you do it?

Try this simple exercise:

  1. Open any soft synth in your DAW, and pick a preset or make yourself one.
  2. Write a few few notes, but keep it simple. Play it in a loop.
  3. Play with the parameters and record everything. Also, record the midi in case you’ll be changing that.
  4. Listen to what you recorded, isolate the best parts, and then jam over it some more.
  5. Repeat.

That’s it. You’re jamming. You have no idea how many people don’t realize how easy it is until they try it. And how fun. Just do it and PLAY your music.

On a final note, remember that inspiration also comes from listening to music, and lots of it — whether it’s music in the genre you want to make or something completely different, since you can translate ideas into your own world. One thing people sometimes forget is how listening to music with friends or in another context (walking, driving, commuting) can be especially useful, since it provides perspective on how the sound feels when doing daily activities. Ideas will then sprout.

SEE MORE:  Recycling Your Tracks Into Fresh New Ideas

The Rule Of 10: Production in Rotation for Big Results

I was speaking with a friend about my approach to making music, and I explained my rule of 10. Most people, especially new producers, will work a song until it’s done. But this is actually a huge mistake. The reason is simple:

after working hours on the same track, these guys have a hard time knowing if it’s still good or making any sense at all.

Plus they fall into the trap of tweaking things endlessly for that one track.

You might already see how this can be quite limiting from a learning perspective. Or maybe you don’t agree. So let me throw a few ideas out there that could help you jumpstart your inspiration.

tomato-676532_1920Let’s compare making music to planting vegetables. You’re not going to plant one tomato plant and then wait for it to produce a tomato before planting something else, are you? To get big crops, you’ll need to plant a whole bunch at once, and nurture them all at the same time. Then you harvest.

The same goes for your songs. Start multiple at a time, and while one is progressing, don’t hesitate to stop yourself and let it sleep for a week or two, especially when you’re entering a very productive phase. This is to make sure you’re always fresh when you open a project and know exactly what needs to be done next. You’ll observe that your perspective on your work will be more accurate. If you open your project and it’s a mess, leave it to rest some more, or maybe recycle it into another, ongoing project.

There are two approaches to the rule of 10:

10 different projects.

Create 10 folders, and drop an Ableton project that you want to develop into each. Also, take the time to insert reference tracks that you love. This is music that you’d like your project to sound like but not necessarily mimic. Don’t hesitate to drop anything in there — get some classical or jazz, record some field recordings, anything. No rules should limit you.

You should also do some careful sample hunting on a site like Splice, for instance. Drop various sounds in there you like, along with presets you want to use. Save some in there in a specific folder.

1 project, 10 songs.

This one might surprise you, but I love this trick.

Open one project and build your 10 songs inside it, one after the next. They will all share the same number of channels, effects, and so on.

This is also an excellent way to keep a particular mood from one song to another.

You will run into interesting results by having some sounds go through the effect chain from the previous song. You can also be creative and not use all the same hi-hats in the same channel. For example, one song could use channel 3 for claps, then the same channel for toms. Don’t alter the EQ and compression on the other tracks. Try instead to take advantage of the settings from the previous track to see how to tweak the following one.

party-629240_1280It’s rare that you’ll think you can create multiple songs in one project, but the idea came to me while I was turning parts of a live set into various songs. I thought it was really interesting to try a different way of working.

For me, two things have always enabled new ideas: limitations, and being forced to work or think in a new way. Both go hand in hand. I know that most people feel like the more gear and gizmos they have, the more productive they’ll be. Yet getting more usually leads to procrastination, since you feel confident that you can do it in the end. I call that the runner’s syndrome: you bought your running shoes and shorts, so you feel you can run. But are you, really?

SEE MORE:  Spending Long Hours in the Studio

Find a track tester for your productions

This might be one important post, so consider taking 5 minutes to go through it carefully. You probably already know how important it is to test the music you’re creating, but the big question is, how do you test your music effectively?

you need DJs who will test your music properly

First, there are a few traps people fall into. I’ve said it many times, but succumbing to the myth that your music isn’t important if it isn’t signed to a label is a very common mistake — even for experienced producers. No joke. The truth is that your music is important simply because it’s yours. It deserves real love and attention, and that means proper treatment.

So how do you make sure to test your music properly?

In a word: you need beta-testers.

Track testers are experienced DJs who regularly play in all kinds of events, both big and small. The fact that someone plays often will ensure that your music gets inserted into their sets alongside other tracks, and that it will be heard by live crowds. The great news is that thanks to the internet, you can work with DJs across the globe and test its reception in different countries.

Here are a few tips on how to proceed:

Find a track tester to test your music properly Follow artists/DJs on Soundcloud. I’ve said it in past posts, but the importance of connecting with people on Soundcloud can’t be overstated. If you follow artists and DJs and engage with them, you can make some great contacts that will be beneficial to you both. Find people who enjoy, support, and comment on the music you really love. This is a good way to make sure the people you invest your time and energy into genuinely share the same tastes, which is a crucial factor in finding your beta-tester.

Share music in private. If you’ve gotten into the game of sending music to labels only to have your experiences end in frustration, then working in a one-on-one setting can be much more interesting. Don’t just send a random link to a DJ though. Take the time to connect with the person first, and then share a track after you’ve made contact. It feels special to receive music privately after a nice introduction — and even more so if the music fits.

Get feedback and tweak. This part is a bit trickier. If you want the DJ to play your song in a club, you’ll need to let them download it first. Be sure your mixdown is right, and it’s even better if the track is mastered too. Once the track is played, try to follow up to get some feedback. Be clear that you’re not fishing for compliments, but that you’re genuinely seeking constructive criticism. This is the only way to improve your track.

And very importantly, make sure the person will not share the track with their DJ friends! 

difficult producerYou have no control over this of course, and that’s why you need to be extra careful about whom you share your music with. I’ve seen some really awkward situations where unreleased material accidentally got into the hands of a vast network of people. There are even online groups where members create pools of music to be shared abroad. If your music finds it way into one of these groups, the good news is that you’ll be known by a lot of music collectors (who for the most part aren’t DJs). The bad news, though, is that your track will have been burned, and there’s basically no way to release it after that.

So sometimes, a smart strategy could be to sacrifice a great track you feel could get you attention, even if it means giving it away. If it works, then the benefit in the end could be much higher than the loss. I myself have done this multiple times with netlabels, and it often paid off.


SEE MORE:  Guide to shameless self-promotion

Learn Mixing At MUTEK’s Panel Workshop

Learn more about the workshop here!

I’ve been asked by MUTEK to present a workshop on how to prepare tracks for mastering. This means, in technical terms, how to get the most out of your mixdown session. For many people, the whole music production process seems like a crazy, disorganized back-and-forth of constant tweaking, with the help of a lot of coffee. But if you look at the most common modus operandi, the stages actually go like this:

  1. Sound design/recording. This is where you either create new sounds or select the existing ones that you’ll be using in your next song.
  2. Production. Once you have all the sounds, you try to decide your hook. This stage involves deciding the structure and working on the arrangements.
  3. Mixing. Once your song is canned, you mix the component parts so you get the best sound possible.
  4. Pre-mastering. Shining and polishing. Adjusting so it sounds best, everywhere.
  5. Mastering. Preparing the master copy for duplication.

Get tips for making a great mixdown at Pheek's MUTEK workshopApplying a methodology to your music production can provide many benefits. Many artists embrace the chaos of going back and forth between the stages, or working without a plan. This is fine if you think it’s the best way for you to remain creative. But if you want the best out of your sound quality, it might be a good idea to adopt a more ordered approach.

Why?

One of the most important reasons is that if you juggle between these stages, you will lose focus. The mixdown will be done best if you have everything set up first. If you have to keep changing elements around as you go, you’ll be forced to reconsider EQ and volume levels also to make sure that everything fits. Think of it as building with Lego blocks: if you move one brick in the middle of a wall that’s already built, you’ll need to readjust a lot of things around it to compensate.

So while there’s no hard rule on the order of the stages, and one can hop between them to fix certain problems, there is another major issue to consider. If you spent countless hours on arrangements, your ears might be bored to death when it’s time to mix it, and you’ll lose what really matters. This is why mixing is increasingly seen as a stage you might want to leave to someone else — not because you can’t do it, but because you want a fresh perspective.

If you decide to do it yourself though, you want your song’s idea to be sewn up so that only the sound needs tweaking. And ideally, once you have everything set, you might want to take a few days off and then attack the mixing.

For the MUTEK panel, I’ll be sharing some great tips on:

  • How to approach production generally.
  • How to work with a reference.
  • How to do great mixdowns.

I will be using some of the participants’ projects as an example.

You can register here.


Music Production And Studio Tips

When I talk to music producers, both newcomers and more experienced ones, I realize that many of them could use some tips on improving their production workflow. I’m talking about the little things in life that aren’t necessarily computer related, but that can make a big difference in how effective you are with your studio time.

Most of these tips are based on the trials and many errors of my own experience, and on what I’ve learned by applying them every day.

Studio tip 1: Naps can provide your brain with a needed reset to feel productive againWhen it doesn’t feel right, stop. Do you ever get to that moment when you finally have the time and space to make music (sometimes life is a hustle!), but after a few minutes, you realize that it sounds terrible? The weird thing is how in your last session, that same loop or track felt amazing, right? Well, there are a few things you can do here, but before you delete anything, try this:

  • Stop working on the project and start something new. If it doesn’t feel right anymore, it could need to sleep for a bit to be heard again later in a whole new moment of your life.
  • Take a 10 minute pause and listen to something else.
  • Consider: can you say what’s wrong with it? If it’s just a physical sensation more than something logical, then the problem is you. Yeah, you read that right. It’s important to do something else instead of trying to force it out. Smoke a ciggie, make yourself comfortable in any way you want, or just move on to another project. If the blockage persists, then try working on simple sound design with a new synth you haven’t explored yet.

Calibrate your ears. People really underestimate the importance of this one. It usually implies a fair degree of time spent setting your monitor’s volume at roughly 80 dB (there are smartphone apps that can measure this for you), then listening to music that you love and that you know sounds right. If you can listen for a minimum of 15 minutes, your ears will develop reference points of optimal sound levels.

Studio tips: Take pauses often, and space out your studio sessions by 2-3 days.Take pauses, often. I’ll never say it enough, but working a long, extended session is one of the least productive ways to work. You’ll lose your references, as well as your ability to evaluate your own work. Taking a pause is not only important to give your ears a break. When you start up again, you’ll have a fresher perspective on what’s working and what’s not.

Space out your sessions. I usually avoid making music (i.e., working on my own material) two days in a row. I space out my sessions by a few days and I try not to work on the same song more than once a week. This is why I’m always working on multiple projects in parallel. I’ll jump from one to the other, so that I’ll forget what I was doing with the first. Then when I open it up again, I might have a whole new perspective on where it needs to go.

Shorten your sessions. I often hear people say, “I worked on this track for 5 hours last night, and I don’t know why, but I feel like it’s just not working at all.”  Indeed it’s not. Try not to spend more than one hour a day on a song. When you know your time is limited, every minute will feel extremely important, and your mind will pump more quality into the effort. By speeding up and working in short bursts, you’ll eventually get faster at what you do and your flow will be more effective.

Grasp the big picture before digging into the details. I highly recommend that you don’t start working on a song from the beginning. Find the main idea first, which is more or less the middle of your song, and then from there, unfold it to the beginning and extend it to the end. Making sure you have a broader view of your work before delving into the details is a good way to scope out the storytelling and back bone. This will help you identify the critical moments of your track, so that you can then work in the transitions, changes and so.

Listening at different volumes will help you notice what needs fixing in your mix.Listen at different volume levels. I encourage you to listen to your song at a very low volume, then high, and then vary it to a sweet spot somewhere in the middle. People don’t always listen to music at high volumes, so it’s good to know what the experience is at lower volumes too. This will also help you notice some things that need fixing in your mix.

Listen from different points in the studio. Get up and listen from far back, or move around the studio while listening. If you can, try listening from another room. I also use a wireless headset and will pace around the room while listening to a loop. I’m so used to just sitting there glued to my computer that this has a very strange effect on me. You’d be surprised how simply walking can open up a different perspective on a song.

Drink water. This one seems off, but trust me, keeping your hydration level optimal really helps with your focus.

SEE ALSO: Spending Long Hours in the Studio

Create Your Own Concept Album

I was recently discussing a concept album I did in 2015 entitled Tones Of Voidand I was asked about my views on what makes an album unified. It’s an important question if you want to create a concept album: how does one come up with a theme, or create their own style?

Let’s start with a basic understanding of a genre and its origins, say techno for example (since it’s the one I know the most). If you watch documentaries about some of techno’s pioneers, like Juan Atkins, Richie Hawtin or others, they’ll often talk about how when they began as music producers, they just made music with whatever they had or could get their hands on. In our current era, with its overwhelming abundance of plugins, sound banks, presets, hardware and the like, many people follow sites like Synthtopia to keep up with all of the latest toys. But in 1987, they weren’t as common or affordable.

Some notable mentions:

The famous TR-909

The famous TR-909

  • The acid sound was defined by the notorious tb-303, which wasn’t even invented for that purpose.
  • House and techno relied heavily on tr-909 and tr-808.
  • Early electro at the start of the 80s used tr-606 and tr-707.

These weren’t really deliberate choices or statements. They simply came from what was available.


Step 1: Build your sound bank

First, select a bank of sounds for your concept albumKnowing that sounds define a direction, a good way to start is to select a bank of sounds that will be used for your concept album. Try to be hard on yourself here, and remember that less is more. It will sound cruel as hell, but the fact is that a more restrained selection will prevent you from getting stressed searching for new sounds, and it will help you focus on production.

A good example of sounds that fit within a concept or genre would be dub techno. You will hear the first 5 seconds and immediately know the exact genre, sounds, and pretty much what the rest of the track might be like. Labels like Basic Channel or Chain Reaction (personal favourites) have built an entire catalogue from their sounds, and left a precious legacy that strongly influenced hundreds of later artists and labels who followed their ideology.

TRY THIS: Pick about 10 sounds, and create yourself a drum rack in Ableton that will be used over and over.


Step 2: Pick your effects

On my Tones Of Void album, what made each track similar was the use of a macro template on several sounds. This stimulated so much creativity and productivity for me that the whole album was recorded in a 3-day span while on vacation in Florida. It was such bliss that I even had to stop myself from making twice as many tracks! You have no idea how exciting it is to open a new project, drag and drop your favourite macro, and then just play sounds through it to see what will happen.

Romanian techno is a great example of a specific sound style

Image courtesy from Nightclubber.ro

For another great example of a specific music style, we can point to the emergence of the popular Romanian techno, lead by the dudes of Arpiar. One of the characteristics of this genre is the intense use of reverb effects. It sounds very puzzling at first, because some tracks feel completely hollow, like you’re standing inside a huge reverberation room. But it creates a very pleasurable feeling.

TRY THIS: Get a collection of random effects and group them into a macro. This will allow you to unify your sound design with an overall aesthetic. If you own Max for Live, I’d say to drop some LFOs in there or get new ones, and assign them to some parameters. This will be your swiss army knife for sound design.

TRY THIS TOO: Matthew Herbert had a really interesting approach regarding the use of effects. He would start a new session using a board, but wouldn’t initialize the board for the next song. That would sort of pre-determine the sound levels and effect assignments for certain sounds, which would automatically create new ideas. You can do this by using the most recently used session to start a new one, while leaving the effects on certain channels to see what it does. Happy accidents will happen!


Step 3: Design your song structure

Having a similar structure from song to song is another thing that can help unify your concept album. Think of how important song structure is in pop music, or in EDM today, with its famous drop that you just know has to happen at one point or another. In most dance music tracks, the breakdown and relief sections play an important role for crowd response on the dancefloor. If you want to create your own concept, explore the use of a similar song structure throughout the album.

TRY THIS: Just like in the previous step, opening the last project and just swapping samples in the arranger section can be a good way to explore this. You can even leave automations on and see what happens.


With these 3 steps, you can easily create a series of new tracks that could be the beginning of a concept album. But the first thing is always to finish the tracks you’re already working on, and if you are lacking inspiration, you can apply these steps to help give your current projects a new direction.

SEE ALSO Creating Beauty Out of Ugly Sounds